


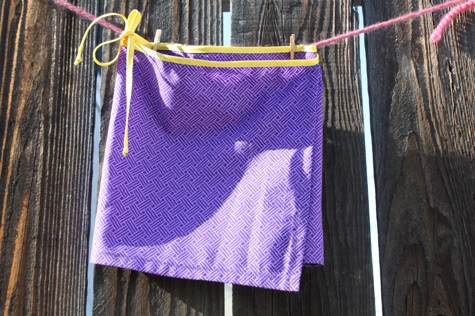
OK, maybe the Ten-Minute Onesie Dress took more than ten minutes, or so I’ve heard. We hear you when you tell us that sometimes we say things are super easy, but you’re new to sewing so you disagree. So to that end, I set out to create a DIY that would be about as simple as it could possibly get and still be a sewing project that you would totally use and be kinda cute. Here it is, a super simple wrap skirt. This is a great project for trying out bias tape for the first time, so seriously, buy some double fold bias tape and make this, and then you will understand bias tape so you can make a Reversible Baby Bib or an Oilcloth Art Smock or a Swingy Summer Tank Top or what have you.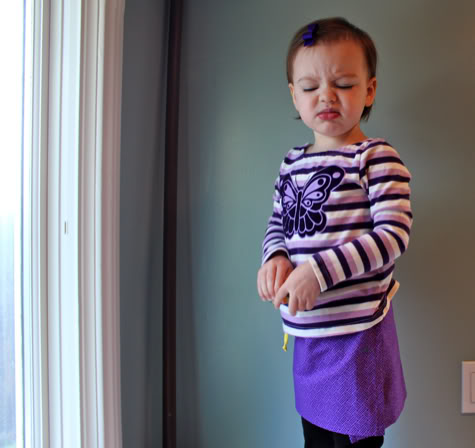
I couldn’t resist posting this face. And hey, while you’re at it, make a bigger one for yourself. Get the full Super Simple Wrap Skirt tutorial after the jump…
Super Simple Wrap Skirt Tutorial
1. Cut a long strip of fabric. You don’t have to get all scientific and measurey with this one, it wraps so it’ll fit no matter what (see, easy). But if you feel better measuring, then measure around the waist of your wearer (or use a piece of clothing that fits the wearer to determine their waist measurement) and make the length 1.5 times that plus 1 inch. Make the width the length you want the skirt plus 1/2″. You’ll also need a package of double fold bias tape. i used a super skinny one, but any width will be fine.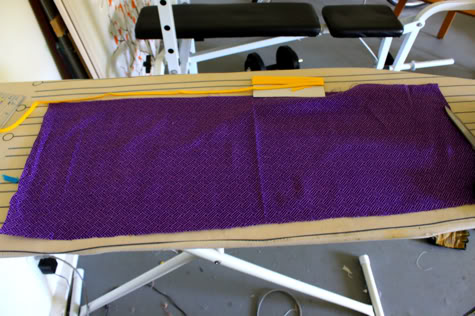
2. Hem one long edge of your fabric by folding 1/4″ and ironing, then folding another 1/4″ and ironing, then sewing in place with a straight stitch.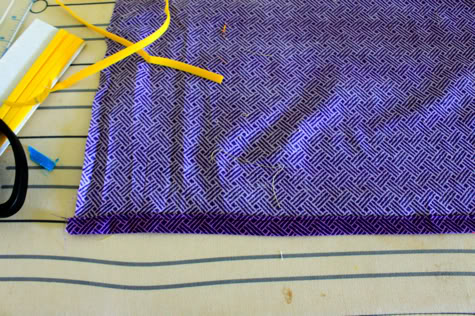
3. Now let’s finish the short sides. So fold in 1/4″ and iron, then snip a corner off like so: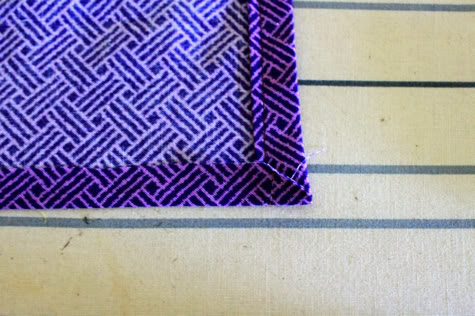
Then fold in another 1/4″ and iron, then sew in place with a straight stitch. Repeat on both sides: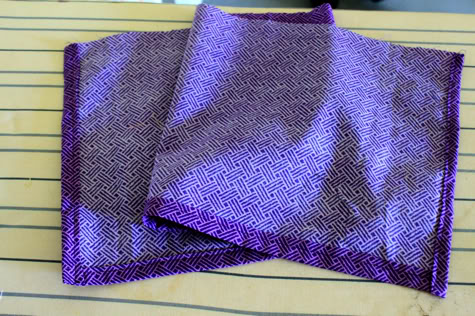
4. Now unwrap your package of double fold bias tape. One side is slightly wider then other. Open it up and pin the wider side to the wrong side of the skirt, with the edges aligned: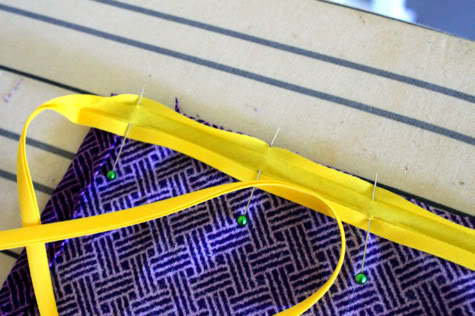
Do that all the way across. Leave a long tail on one end and a reallllly long tail on the other (about the length of the skirt or a little shorter).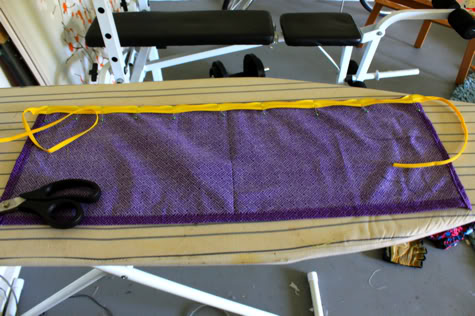
Sew the bias tape to the fabric in the fold. You probably want to use thread that coordinates with your bias tape, but I wanted you to see it: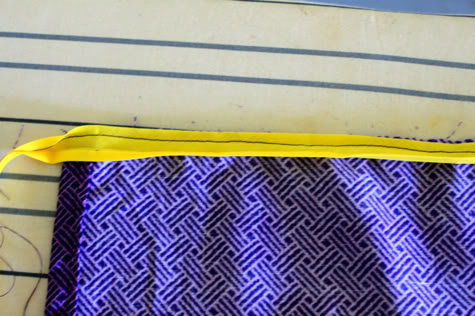
Now fold the bias tape back up and over the unfinished skirt edge and iron it like so: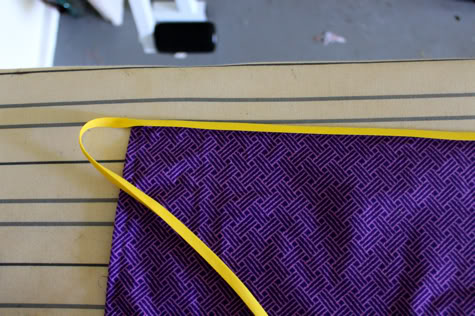
You can pin that if you want but I didnt. Now sew at the edge of the bias tape all the way from one end of the tape, across the front of the skirt, to the other end: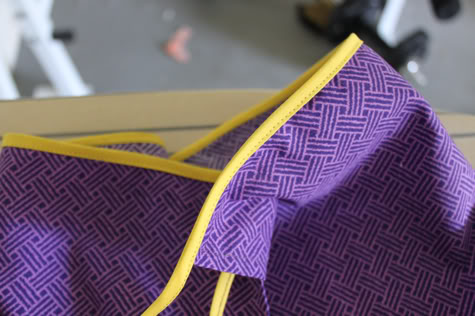
Tie the ends of the bias tape in tight knots and trim any excess: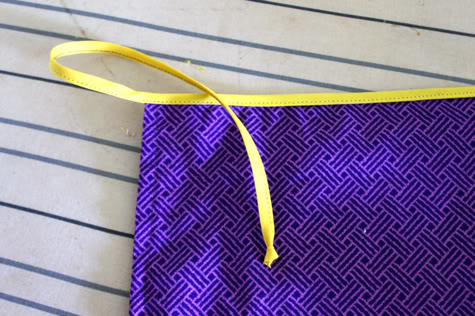
Rejoice for you are done!
Thanks for the how to… I made one for my daughter from a baby crib skirt.. check it out
http://colbyrileydesigns.blogspot.com/
If you're making it for an older child, go with twice their waist measurement – I tried the 1.5 for my 6-year-old and it was too small. Other than that, it came out great and was way easy. So now I have a new apron. 😉
How CUTE is that skirt?! -Marci @ Stone Cottage Adventures
How verycute thank you so much for sharing definitely going tto make one for myself super cute thankyyoulooks easy enough