


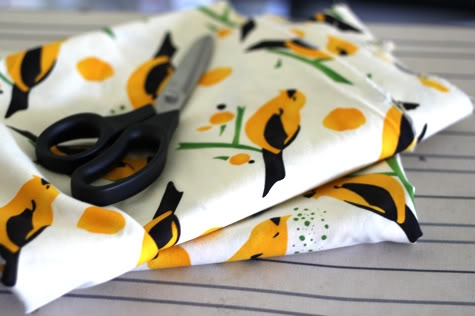
If you bought a crib set you probably have an unused comforter lolling about in a closet somewhere. Now that Scarlet is in her toddler bed I deem the comforter safe for her, so I sewed a sweet duvet cover using this beloved fabric: Alexander Henry Bird Seed in Yellow that I picked up at favorite fabric resource Fabricworm.

Making a duvet cover is a simple beginner sewing project with an added bonus: when your child moves into a big-girl bed you can re-use the fabric for some other cuteness. If you want to sew a duvet for a twin, full, queen, or king size bed, this same method applies and I’ll share the measurements with you and the full DIY Duvet Cover Tutorial after the jump…
How to Sew a Duvet Cover
1. First determine your measurements. I’ve detailed them for each size below, but if you want to understand how I came to them, I’ll describe: You’ll need a top and bottom for your duvet each with 1″ added to the width for a 1/2″ seam allowance on both sides. Then you’ll need to add 1.5″ to the length for seam allowance, plus 6″ for our closure area. For sizes larger than a toddler bed duvet you will need to sew yardage together along the length to get a piece of fabric wide enough to meet these measurements (or use a sheet). These are standard measurements, but bedding tends to vary so just measure yours first to be sure it will fit!
Toddler Bed – Final Dimensions 33″ X 42″ (two pieces 34″X49.5″)
Twin – Final Dimensions 72″ by 90″ (two pieces 73″X97.5″)
Full – Final Dimensions 84″ by 96″ (two pieces 85″X103.5″)
Queen – Final Dimensions 90″ by 102″ (two pieces 91″X109.5″)
King – Final Dimensions 102″ by 108″ (two pieces 103″X115.5″)
2. Pre-wash, iron, and cut your fabric to size.
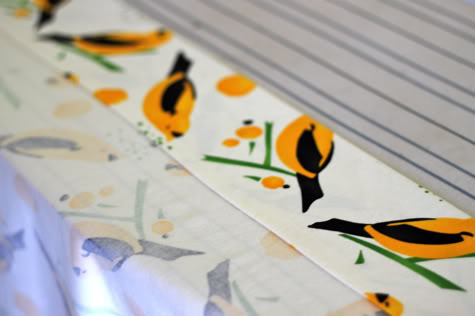
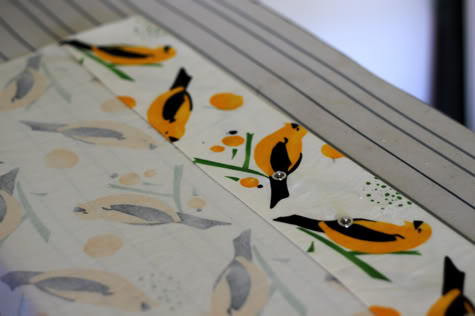
3. Let’s start by creating our snap closure. You can sew on snaps, but why, when it’s so easy just to hammer them in place with an inexpensive snap kit. Fold one of the width sides in 1/2″ (to the wrong side) and iron, then sew in place. Then fold again 3.5″ to the wrong side and iron in place.
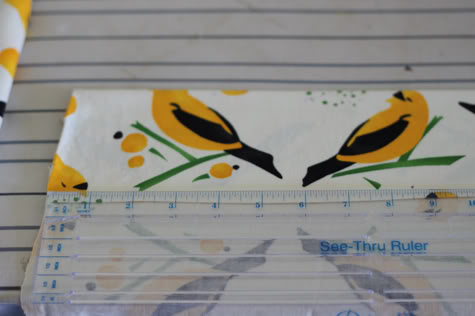
Measure 1/4 of the way in on each side and mark (on my toddler duvet cover, that’s 8.5″):
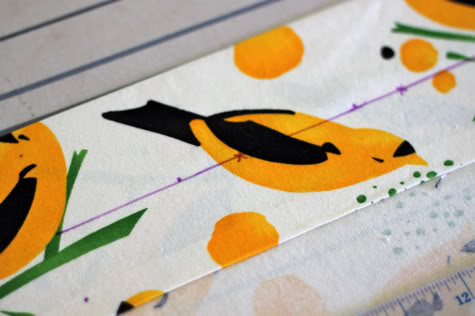
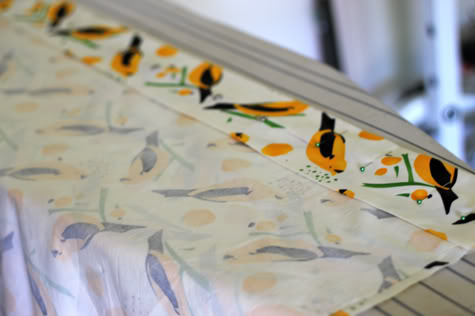
Measure 2″ down from the fold and draw a line between your two marks. Measure in 3″ and 6″ from each side on the line and mark an X (for bigger duvet covers you’ll obviously need to add more marks and more snaps):
Using your snap kit, attach snap backings to the right side of the fabric at those marks. Don’t attach them through both layers! Just the folded bit!

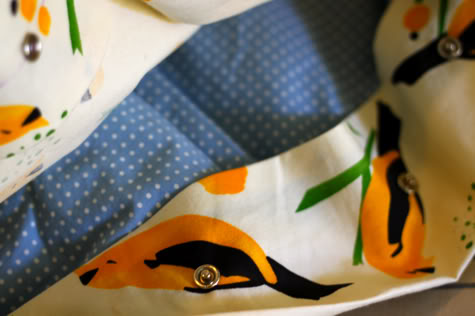
Repeat the entire process on the other side of your duvet (Make sure your patterns are pointing the direction you want before you start!), this time attaching snap fronts:
4. Take your two duvet pieces and pin them together right sides facing, with the folded edges on the same side, so the fabric snaps face up:
Starting at your mark (1/4 of the way in on the snap side), sew the two sides together with 1/2″ seam allowance, sewing all the way around and back to your other mark. Clip the corners and finish your unfinished edges by serging, sewing with a zig zag stitch, or cutting with pinking shears. Turn your duvet cover right side out and iron. Stuff with comforter. The snap side goes on the bottom, FYI, not up by your face:
You’re done:
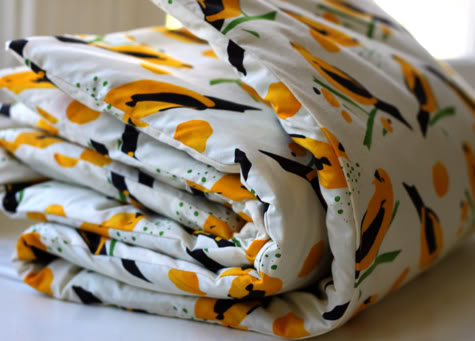
Time for snuggling!

Ok seriously you could not have read my mind more! I've been wanting to make a new duvet for my king size bed and KNEW it was gonna be easy but just hadn't gotten around to it. You rock!! Now I will be making one of these ASAP! Thanks so much!
Love love love this project – thankyou so much – Ruby could really do with a toddler cover – she's only got plain covers at the moment – I hated the selections so I went for plain white – this blog is so inspiring –
Adorable pics of your little one! Clearly, happy to be in her big girl bed!
What can I say… this is beautiful. One of my all-time favorite fabrics. I have a stash of the teal.
This looks SO easy! Thanks!
Ha! I just made one of these for my 18month olds toddler bed but I made it from a thrifted single bed cover and I made a matching pillow case with the left over fabric, I will post a photo on the flickr group.
Oh my god, I was already in love with this fabric, and now I'm absolutely head over heels. You Prudent Mamas seem to post tutorials just as I need them!
SO ADORABLE!
this is a great tutorial thank you for sharing. what is the name of the fabric. it is really lovely.
Thanks, this is fantastic. I'm inspired and I LOVE the fabric you chose. I usually don't like yellow much, but that is simply delicious.
I like the snaps! I usually do button holes and fabric ties. Oh, and BIG TIP: Use two flat sheets in the size you want. Way easier than trying to find and/or piece fabric yardage.
Hey! You read my mind – I have a little project to repurpose a Queen size to two toddler size covers this weekend. Your tips couldn't be more appropriate! Beautiful photos by the way! (I hope you don't mind, I've linked to this post on my blog). (via ohdeedoh)
Great tutorial! Thanks.
I used snap tape… cheating I know, but so quick and so easy!
I also backed mine with flannelette for extra warmth because miss 4 seems to always lose her sheets down the end of the bed at some point, and because their duvets almost always end up in the lounge room each morning for early morning cuddles/tv.
Wonderful tutorial! The husband and I are getting ready to move and I would love to "refresh" our bedding for the new place. Thank you for sharing.
Great project! You used one of my most favorite fabrics ever for it, too! I linked to your tutorial on Craft Gossip Sewing:
http://sewing.craftgossip.com/tutorial-diy-duvet-cover/2010/05/05/
–Anne
Love this!!! Thanks so much for sharing!
– Elizabeth (missimagination.com)
Great project! I did one modification to my store bought cover that I love – and plan to incorporate into a cover I am working on right now – I added fabric ribbon ties in the inner corners and on the center of each side, and a ribbon loop to the corresponding spots on the cover. When I slip mine in, I tie those spots in place, and the cover does not shift and twist (my little guy tosses and turns a lot)
THANK YOU! I have been stressing out about not being able to find the right duvet for my toddler's new room! This is GREAT! Thanks again!
I really, really need to do this! Thanks so much for the great directions. I'll be linking as well.
Wow, gorgeous fabric and what a cute daughter you have!
I've been facing a dilemma as my 1 yo daughter and soon-to-be-here son will be sharing a room. I want something that matches, but don't want to purchase a whole new set (since I'm only using the comforter). Here I've been looking for a matching one at a gargage sale, I NEVER thought to make a duvet cover!
Thanks so much for the great tutorial, this made my night. Bookmarking this post and following you.
-Ann Marie
I am so definitely buying some designer fabric and trying this! Thanks so much for the tutorial!
This has been featured at my "Go Handmade for Mother's Day" post here:
http://kindredspiritmommy.com/go-handmade-this-mothers-day-you-still-have-time/
Whipped up a duvet cover last night for my DDs newly painted room (ok, if you stay up until 4am does it still count as a one day project???)
http://www.flickr.com/photos/34285691@N08/4853652950/
Going to use the fitted sheets for a window valance and table skirt and maybe a few pillows… can't resist your poofy pillow tutorial! 🙂
Thank You THANK YOU for this post. I just finished making one of these for my daughter. Since I live in Minnesota, you never know when it will start to snow. We are ready!
http://www.facebook.com/photo.php?pid=4962243&l;=c19a34fd0a&id;=653664326
The 2 year old has no clue, but her picky grandmother LOVES the result. She thinks it's gorgeous. I have to agree.
(Thanks to Alexander Henry for making such cute Apples and Pears fabric too!)
ooo mrs j its SOOO gorg!!
You just have the bestest tutorials and fabrics!
cant wait to get a sewing machine and try this, adorable pattern too! and the little girl is adorable!
I have been dying to do this for my son since we never did a nursery theme or anything. Now that he is older, I snagged a bunch of Alexander Henry's 2D Zoo in chocolate and I started looking for a comforter at consignment stores but never could find one. So I bought some flannel and pre-cut batting in "crib size" – however, it is almost twice as big as your measurements for the toddler size. I have no idea why this is but I didn't notice until I just measure my finished homemade (shoddily I should add) duvet so I could start on the cover. I'm hoping it will just mean more use before he outgrows it! It started out at 45×60 and in reality was a little bigger than it claimed on the package. Finished product is 44x 58. Wish I knew why…
exACTly what i was looking for – thank YOU!!!
question – can you do a lining fabric – will it affect the dimensions of the fabric? I want to do a lining with a little color and the outer part just a simple solid blue.
s84whitley@hotmail.com
Great idea, I can't wait to do this. But I do have a question. Most fabrics are 44" to 54" top to bottom. What do you suggest the best way to do a duvet cover for something larger than a toddler size cover? Will I just need to piece more than one cut of fabric together somehow? If so, what's the best way to do that? Thanks!
my question is the same as Marshall K's. How do I cut fabric to make a piece big enough?
s84whitley@hotmail.com
marshall & stephanie, stay tuned, i just made a twin duvet and will be posting all the details this week!
I am in love with this fabric, but cant find it anywhere! I want to make this for my little girl,(3yrs) with the same print, she loves birds! Where else can i find it? Thank you guys!
hi V! I love that fabric too, but it's sold out pretty much everywhere. you might try ebay or etsy, or email fabricworm, they will know if alexander henry will be making more, and if so, they will carry it.
Thanks soo much for the tutorial. I bought a feather comforter for my daughter and want to make a cover for it. The dimensions are 36×50. The fabric I have is 108 inches and according to your measurements I would need 115 inches of fabric. Can I still make it work for the closure flaps with what I have? I hope so. If you could help me I would be really grateful!!!!
my email is desipoopoo@hotmail.com
About to make one of these… But I think I'm going to posting a tton first..
Hi, Jamie, thank you so much for this tutorial! I have a question about the length measurements. You say you start with 34" by 49.5" and end with 33" x 42". I get the width cuz it has 1" total side seams. But the length is 49.5" -.5" for 1st fold – 3.5" for 2nd fold -1" seams when top and bottom are sewn together. That is 5" total seam allowance. Can you please help me understand why you have a 7.5" difference in length between start and finish? I have a brain cramp, please help 🙂
ashley you are not crazy, it's just space for the poufiness of the duvet insert! i could have left more space widthwise too but i like when they are fluffy at the edges. but if it was just 5" (instead of 7.5" your duvet would want to squueze out the bottom all the time.
great tutorial! i plan on sewing one for my son's big boy bed later this week! thanks!
Love this tutorial, just wish there was a place to buy good extra wide fabric so I didn't have to sew together two panels for a Queen size duvet.
[…] SetsStuff – Your Questions Almost Duvet Guards QueenTechnologysphereLifestyleBest product reviewsDIY Duvet Cover TutorialDIY Duvet Cover Tutorial HomeAboutPrivacy PolicyContact UsYour Questions […]
Thank you so much 🙂 I decided to do my little boy’s room in a space theme and found the most ideal curtains but could not find a cover to match. I’m going to buy an extra pair of curtains and try my hand at making one!
Just finished redecorating a very small guestroom and needed a serious update to a comforter set I was given since it did not match the room. I was so glad to find your very easy duvet cover pattern. Thanks so much! And also a big thanks for giving the measurements for the different size bedding. You made my day!
I love this!! We have two King XL duvets that I cannot find affordable covers for, and leaving the white duvet on our bed with two big dogs have proven to be not the best decision, I really need to go to the laundry mat! With some tweaking this is so perfect! Thank you!
[…] Give your bedroom a facelift with this duvet cover tutorial. […]
I’ve been thinking I might use cheater quilt fabric for a king or queen duvet. It comes in wider widths.
I’ve wanted to make bedding for a long time, but the issue is the width. Unless it’s crib or toddler sized, there’s not much by the yard wide enough for a bed. Did you have tips or suggestions for matching up pieces or seam placement? I’ve just learned about doing this on drapes where the folds can hide it, but the fact remains there’s an obvious seam sitting on top of bedding. It seems IMPOSSIBLE to find washable fabric that is wider than 54-58″.
[…] I just measured a doona cover we already had, and vaguely followed the instructions according to this tutorial. (Managed to make a bit of a mess of the snap opening, but I’ll be the only one to see that […]
[…] bed were a project I did last year for his third birthday. The fabric is from fabricworm. The tutorial I used was stupid easy and I basically just made the duvet cover to fit over his old crib […]
[…] very happy to introduce you to our lovely guest host, Ashley of Dancing with Ashley. ONE / TWO / THREE / FOUR / FIVE […]
What great pictures….she looks so happy with that beautiful bedding! Thanks so much for telling us how….I just sewed a bunch of crib sheets and changing pad covers and was surprised at how easy it was!
[…] source : Jaime Prudent Baby […]
I’m gone to say to my little brother, that he should also pay a visit this website on regular basis to take updated from hottest news update.
Hello would you mind letting me know which hosting company you’re working with? I’ve loaded
your blog in 3 different browsers and I must say this blog loads a lot faster then most.
Can you suggest a good hosting provider at a honest price?
Kudos, I appreciate it!
Oh my goodness! Incredible article dude! Thank you so much, However I
am having problems with your RSS. I don’t understand the reason why I can’t join it.
Is there anyone else getting similar RSS issues? Anyone who knows
the answer can you kindly respond? Thanks!!
I usually do not drop many comments, but I read a few of the
remarks here DIY Duvet Cover Tutorial | Pretty Prudent.
I actually do have a couple of questions for you if it’s allright. Is it only me or do a few of these comments look like they are coming from brain dead visitors? 😛 And, if you are writing on other sites, I’d like to follow
everything fresh you have to post. Could you post a list
of the complete urls of all your shared sites like your twitter feed, Facebook
page or linkedin profile?
Do you mind if I quote a few of your posts as long as
I provide credit and sources back to your website?
My website is in the very same area of interest as
yours and my users would genuinely benefit from some of the information
you provide here. Please let me know if this okay with you.
Regards!
So I made one of these this weekend and your tutorial was great – my one question is in regard to the bottom where the snaps are. When I look at my finished product the portion of the bottom that has the snaps hangs a bit lower than on either sides where I stiched in a 1/2 inch seam up to my markings. Did I do something wrong there?
Hey, LOVE this tutorial!
My question is what size duvet did you make this cover for? I have a toddler duvet the is 37″by43″ Do I need to adjust the starting measurement much? Your finished product is 4″ less width and 1″ less length than my duvet, so I assume I need to add those inches back into my measurement?
Thanks for the help!
[…] Vía: prudentbaby.com […]
[…] for new bedding. All those choices and none of them quite the right one. Maybe that’s way we love this DIY duvet cover tutorial from Prudent Baby so much. Not only does it give you the option of using […]
Good respond in return of this issue with real arguments and describing everything regarding
that.
Great project – but annoying pop-up advertising for cat litter in every image.
It is appropriate time to make a few plans for the future and it’s time to be happy. I’ve learn this
publish and if I may just I desire to counsel you few interesting things or
suggestions. Maybe you can write subsequent articles relating to
this article. I wish to read even more issues approximately it!
[…] Duvet Cover from Prudent Baby – This tutorial is from Jaime at Prudent Baby. She used the Alexander Henry, Bird Seed Yellow […]
[…] you’ll see in any tutorial, you only need scissors, pins, a sewing machine (or you can sew manually), perhaps some buttons or […]
[…] you dont find exactly what you want so the solution is to make your own and duvet cover and think this tutorial by Prudent Baby is […]
This is 44″ fabric?
[…] Sew a queen-sized duvet cover for my bed […]
[…] toss on a decorative blanket and the room looks that much better. A longterm project would be to make a duvet cover for our bed, but that’s on hold for the time being. I can’t justify getting started on […]
[…] 4. Update your comforter with a duvet cover. […]
I feel really stupid trying to figure this out lol! How do you keep the comforter from sliding around inside the cover? Is it really as simple as sewing the two pieces together and adding snaps? Does the comforter slide into that pocket behind the snaps? Brand new sewer here.. got my machine about two months ago and there are so many things I want to do but havent yet learned all the sewing lingo! Thanks!
Hi, did you use flannel fabric or cotton fabric?