


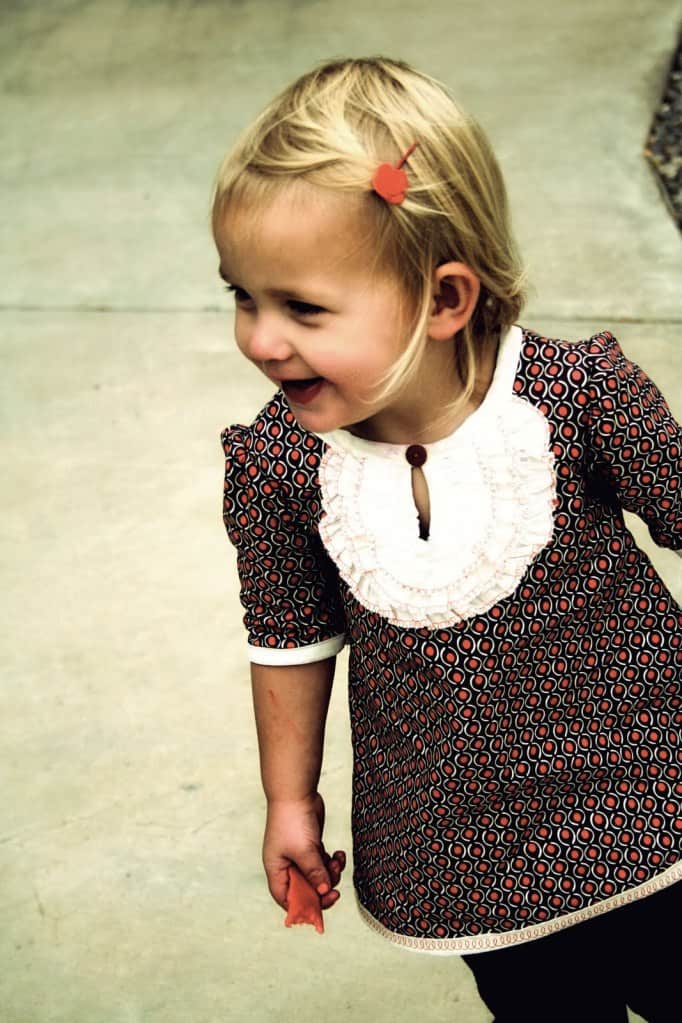
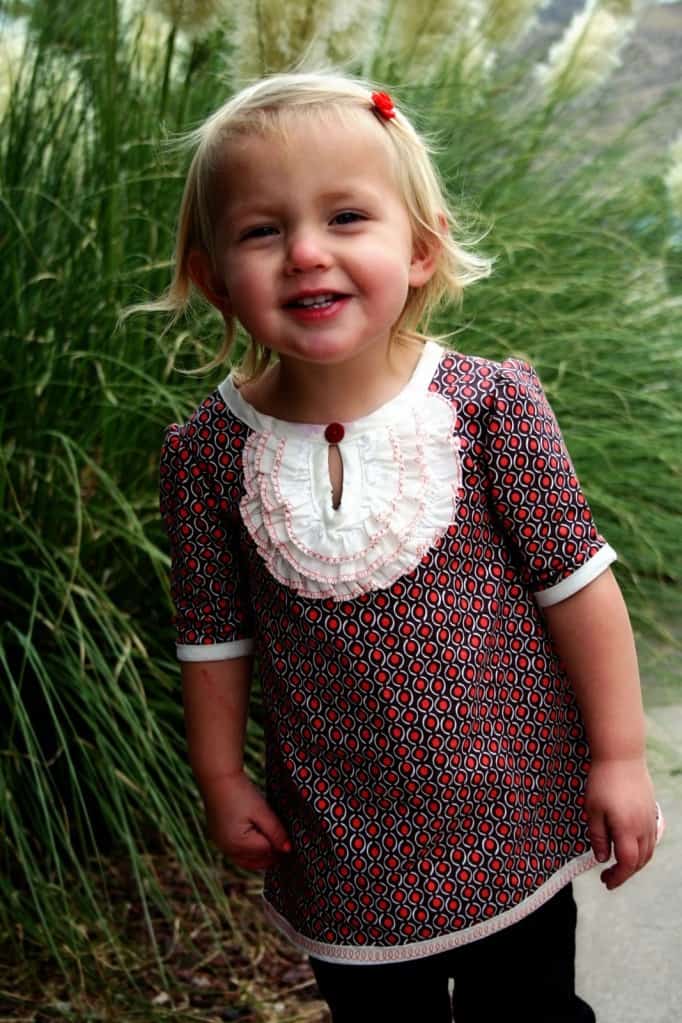
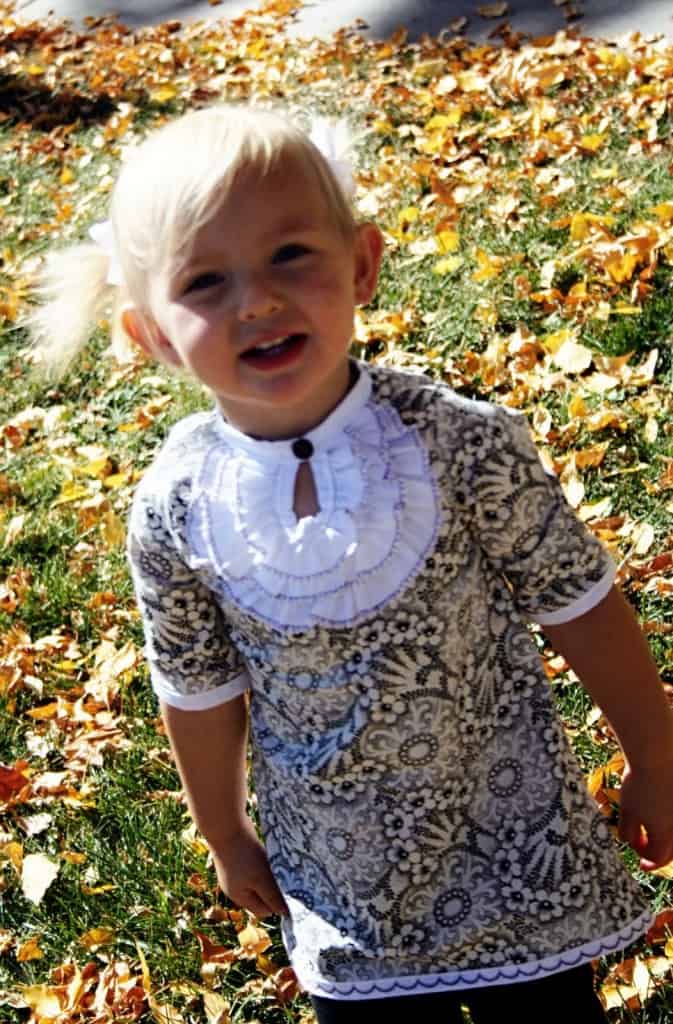
I never seem to get tired of finding new sewing tutorials for little girl clothing. How could I when there are so many creative ideas to choose from? One of my favorites is this Ruffled Keyhole Shirt that Jessica from A Couple of Craft Addicts made. Jessica and her partner Heather are always coming up with new projects like Picture Coasters, Holiday Card Display, and the Isabella Dress. Today Jessica will take you through each step of making this adorable shirt. Her inspiration came from this beautiful ModCloth dress.
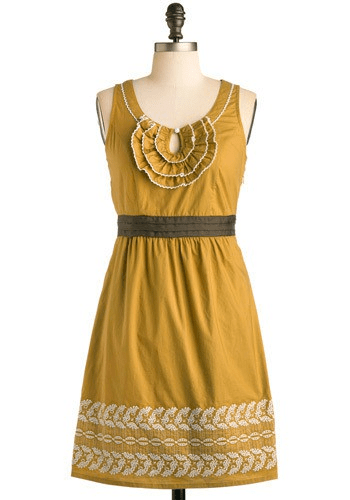
I just love it. I love the neckline, I love all the embellishment details around the neck and hemline. I love the color. I was so inspired by this dress that I decided to make a similar top for my daughter. I wanted to try something new. I wanted to push myself and my machine. I have not sewed much with embroidery stitches so this was the perfect project to experiment.
Keep reading to get the full Ruffled Keyhole Shirt tutorial after the jump…
Want to make one? Don’t be afraid of the details, we are all learning here.
Here is the full tutorial so you can make your own.
Supplies:
1/2 yard of fabric (I used basic quilting cotton, this is for a 2T)
1/4-1/2 yard of trim for ruffles, back panel, and bias tape if you want to make your own or you can buy a pack.
4-5 large buttons
1 small button
Your sewing machine and thread
1. Begin by cutting out your pattern. You can do this by tracing a shirt that fits your model. I always use a shirt that is a little loose. Fold the shirt in half and trace from the neckline, under the arm pit, and down the sides. Continue down until it is the length you want. You will be adding bias tape to the bottom so you don’t need to leave room for a hem. Then trace the sleeve, I extended mine to make a longer sleeve.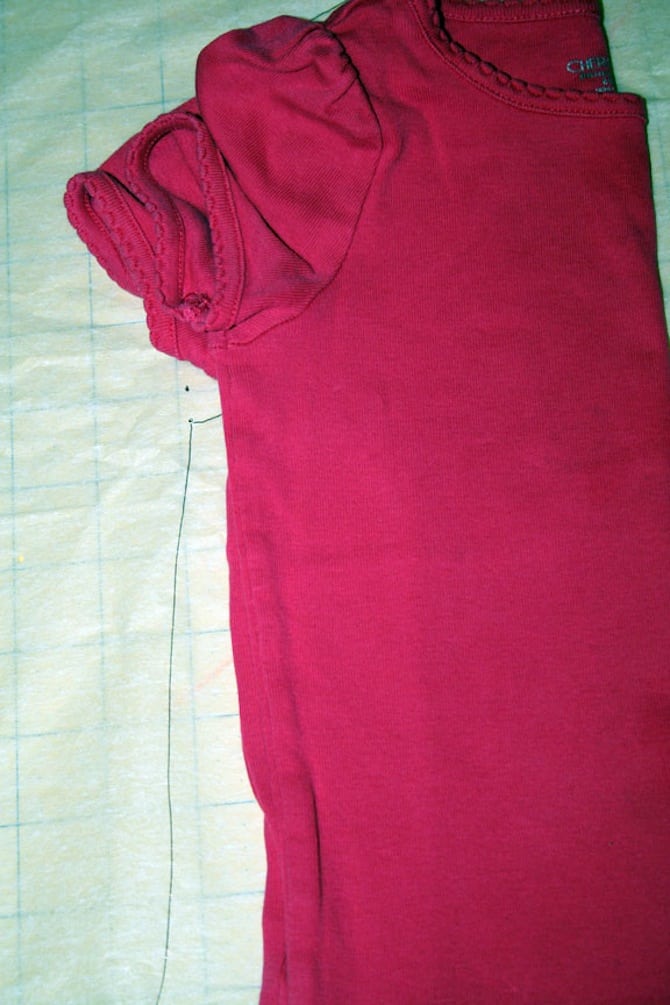
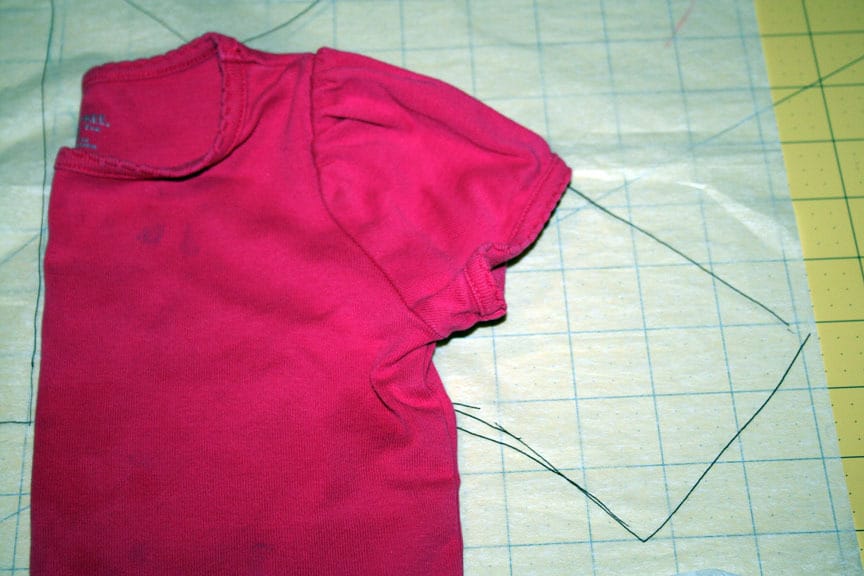
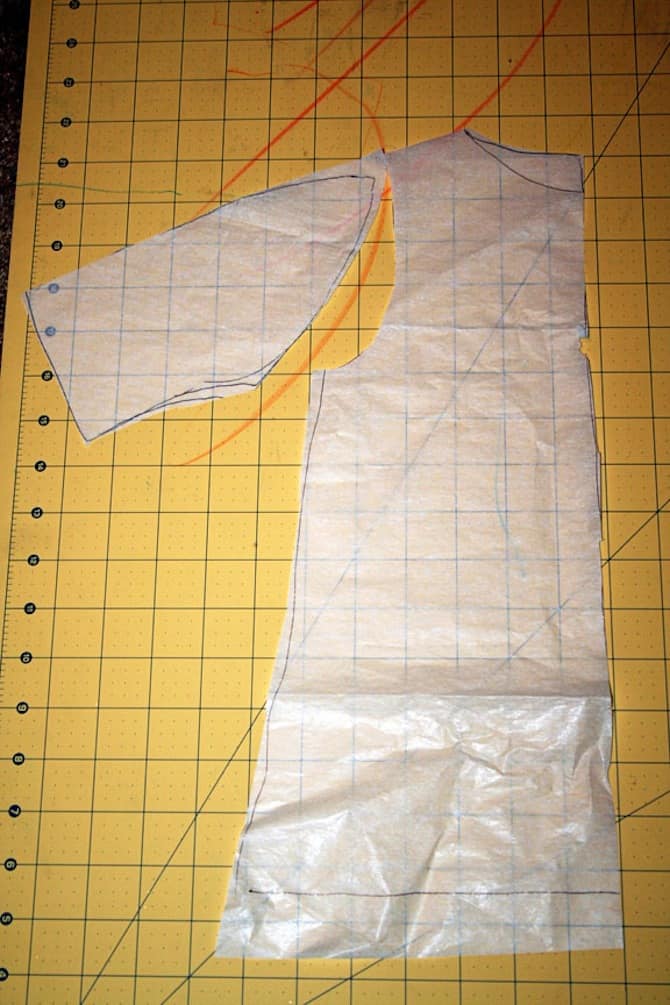
Then cut out of your pattern. Two sleeves on the fold and two bodices on the fold. I cut the neck of the front a little deeper than the back. You will also need to cut the following from your trim fabric.
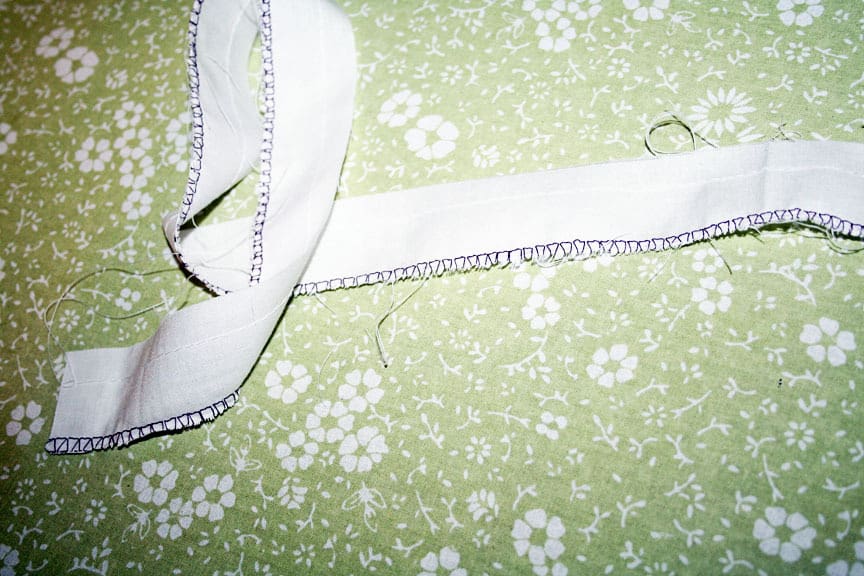
-2 strips 2 inches wide (I used about 62 inches total) for the ruffles
-2 4inch strips the length of the back of your top for the button tab
-bias tape for the neck, keyhole, arm bands, and bottom hem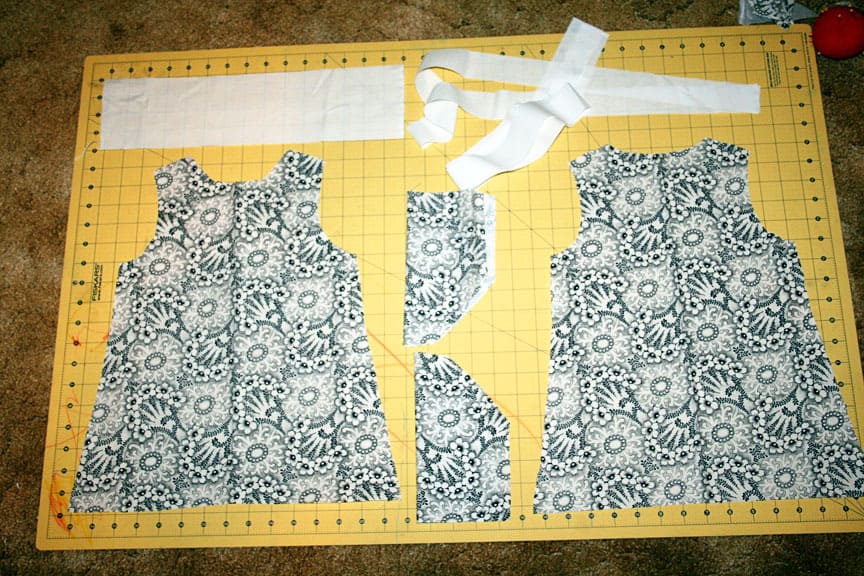
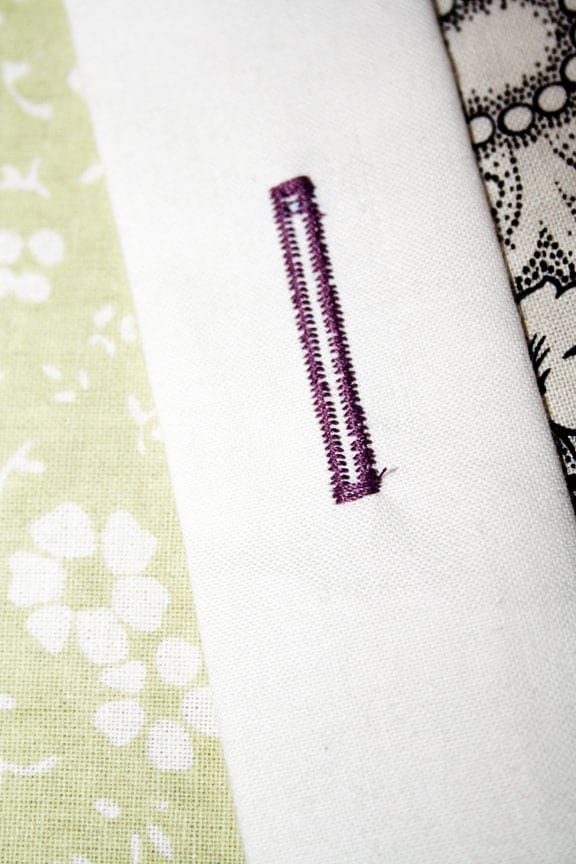
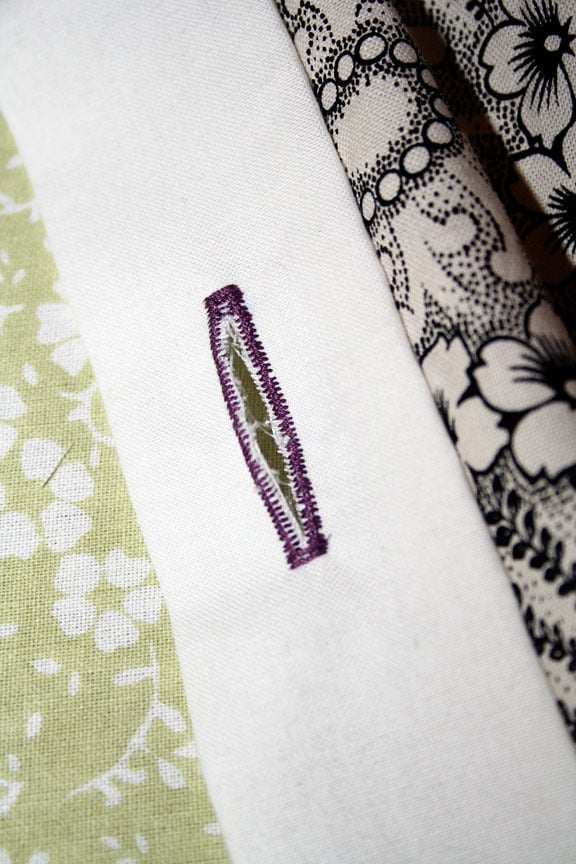
2. Lay the front of your shirt down and cut out your keyhole. I just drew mine with a fabric pencil. Then I folded the shirt in half and cut it to make sure the sides were equal.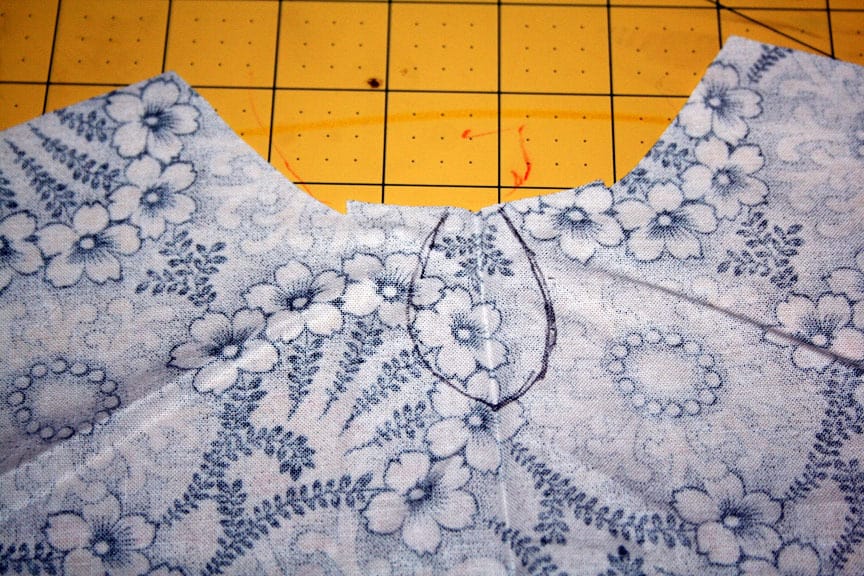
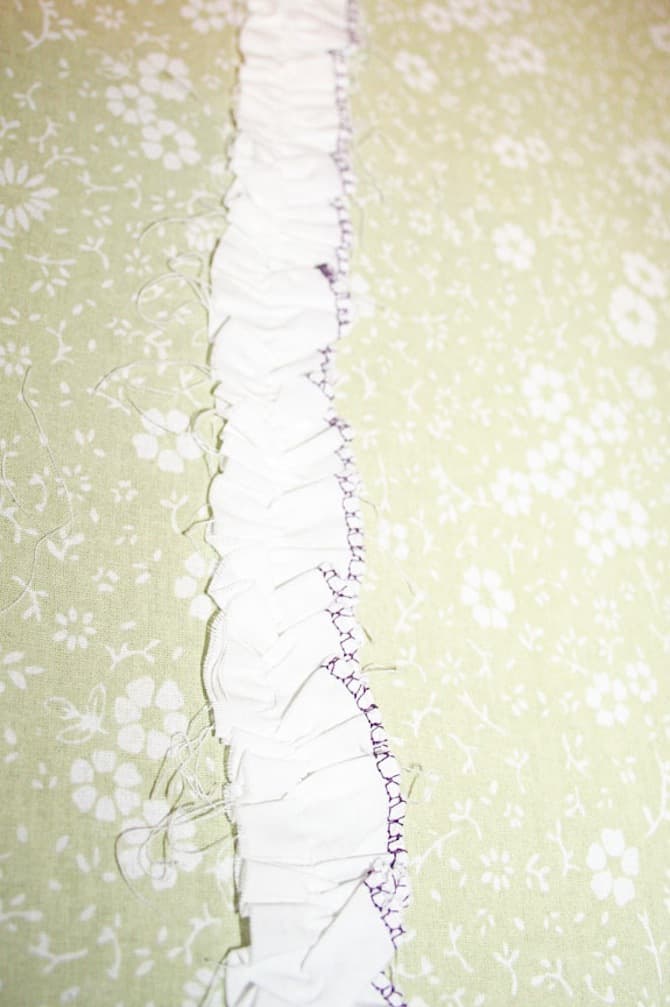
3. Now we are going to create the ruffles. Take one of your long 2inch wide strips and sew a loose stitch down the side about 1/4 inch from the edge, leaving the end long for gathering. But before you gather, stitch the wide side with a zig zag or other stitch of your choice. This will close the edge to prevent fraying and add some contrast to the ruffle. Then you can gather the piece creating a loose ruffle. Finally I pressed the ruffle flat with my iron. Repeat with the other strip.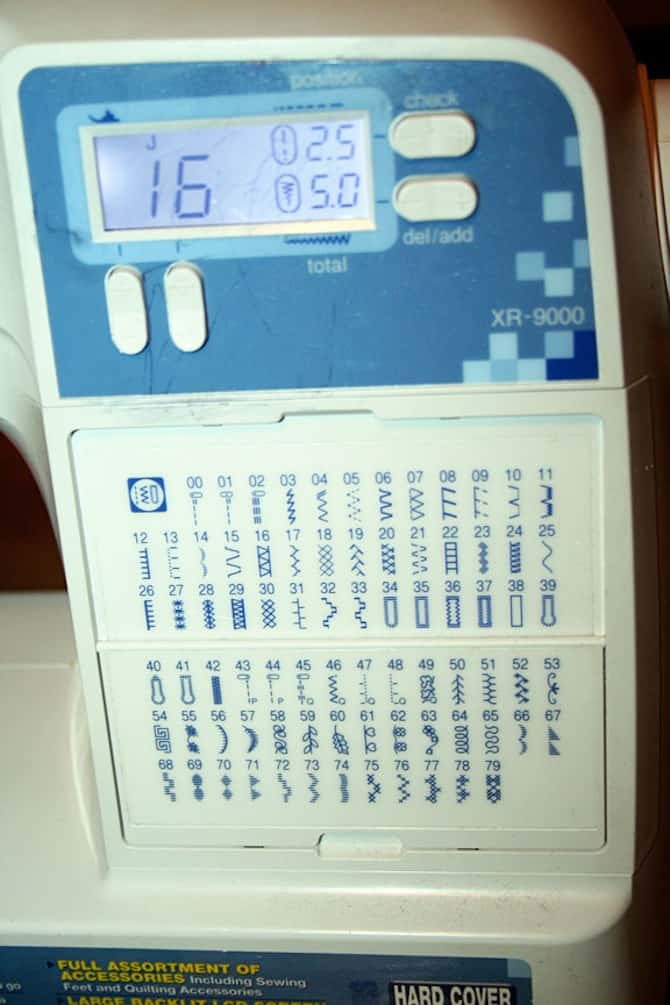

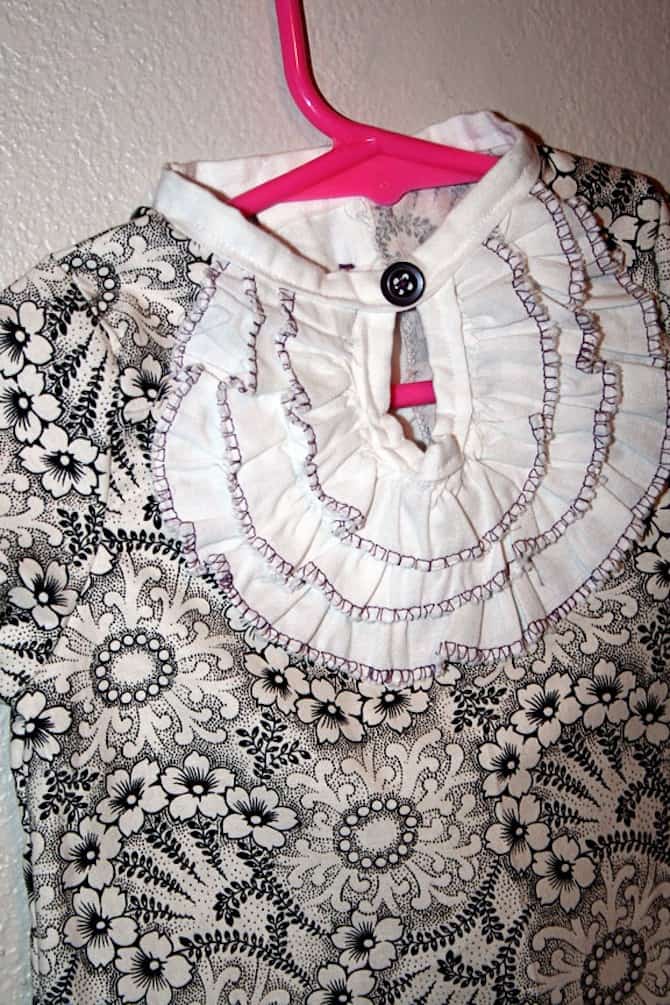
4. Now you are going to pin your ruffle in place. Start with the top ruffle which will be right around the keyhole. Pin it in place and stitch it down (I try to stitch on my gather stitches).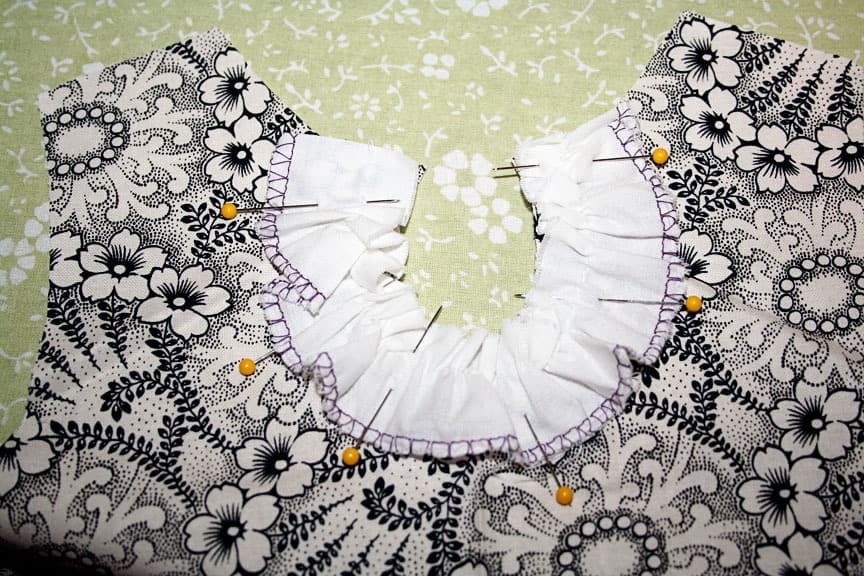
Next you will pin the second layer down. Place the end right next to the seam of the top ruffle but underneath. Then pin in place with the ruffle edge matching up with the first ruffle seam. (Aren’t pictures great lol) Sew that ruffle down.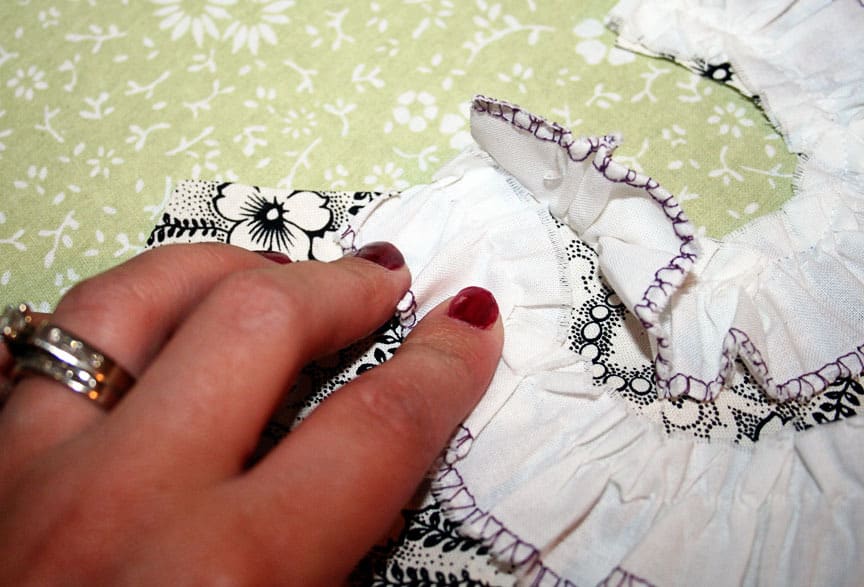
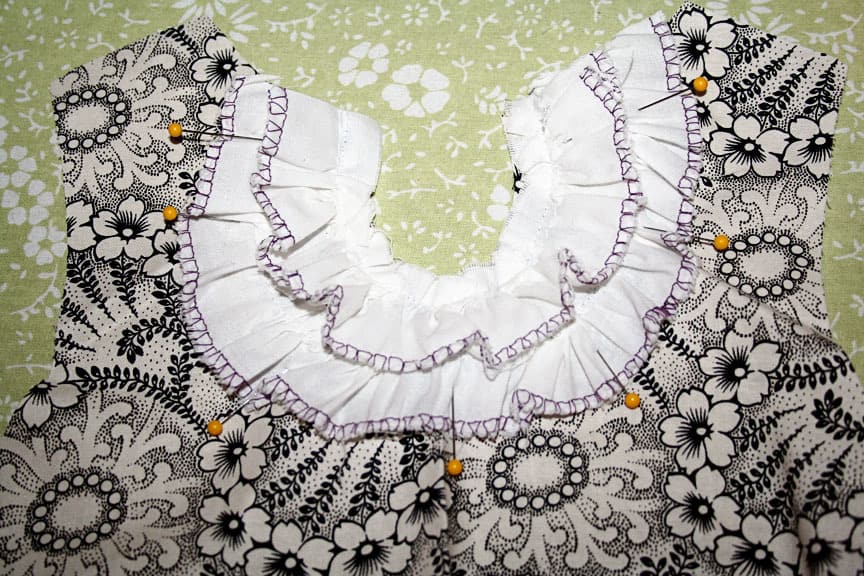
Finally pin the third ruffle under the second ruffle the same way. This time fold the end of the ruffle to make sure it lines up with the neck not the shoulder. Pin in place and stitch it down.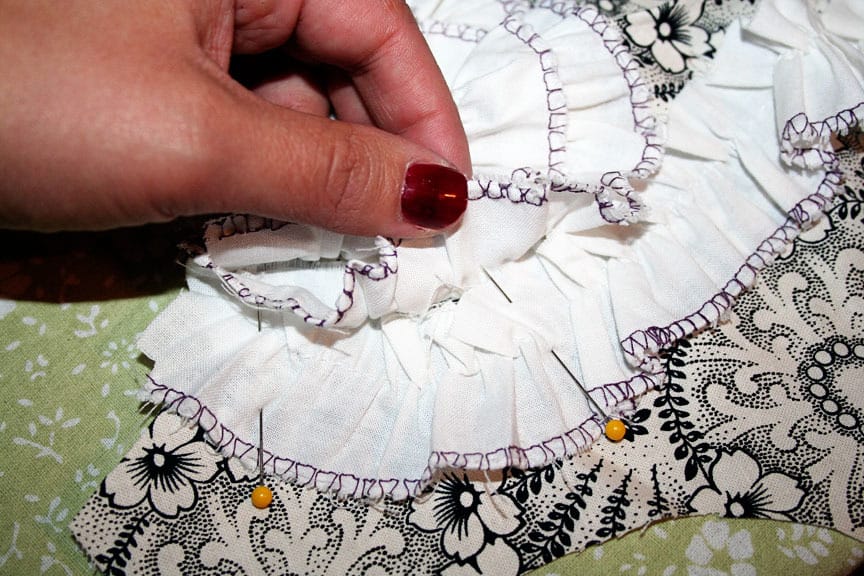
The final step to the ruffle is adding the bias tape around the keyhole cut out. Pin in place and sew it down.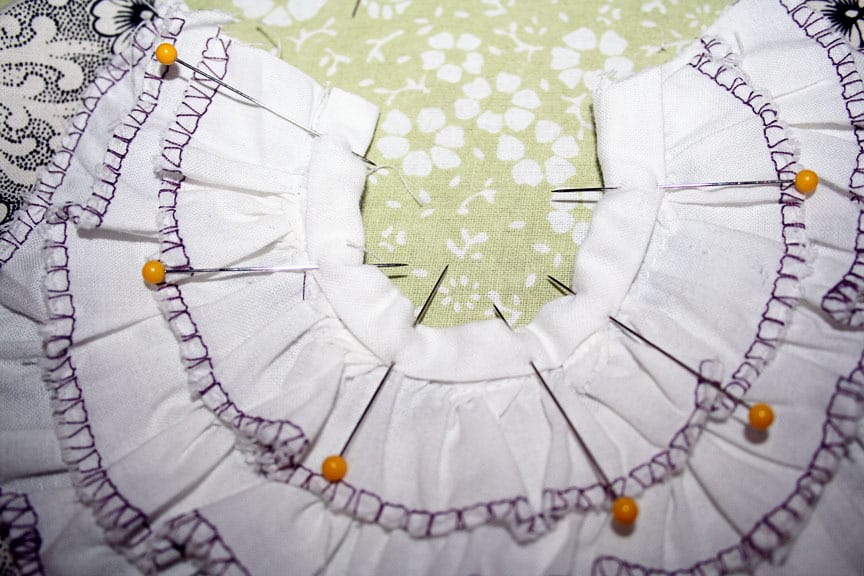
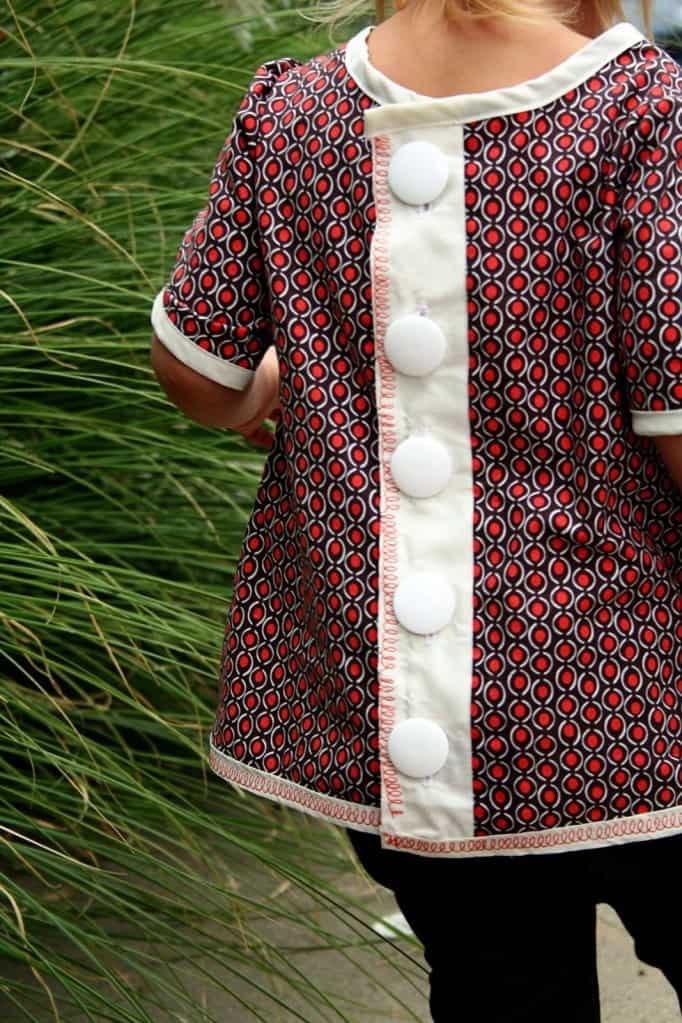
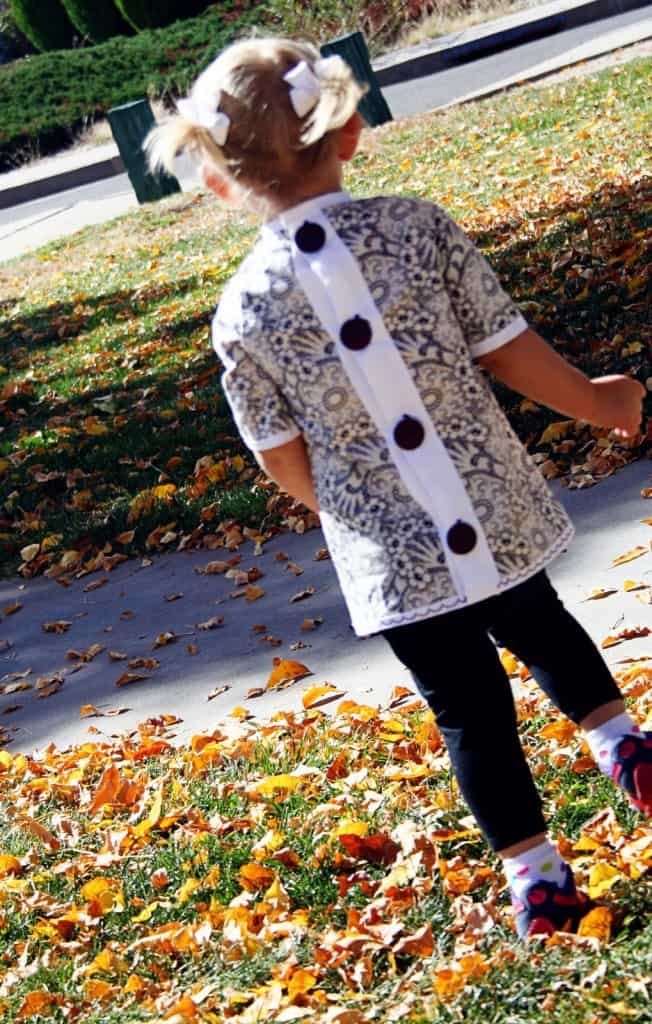
5. Now we are going to work on the back. Lay your back piece flat. Cut down the middle so you have two pieces. (You could also cut the back piece on the edge instead of the fold). Now cut 1/2 inch off the edge to make room for the panel.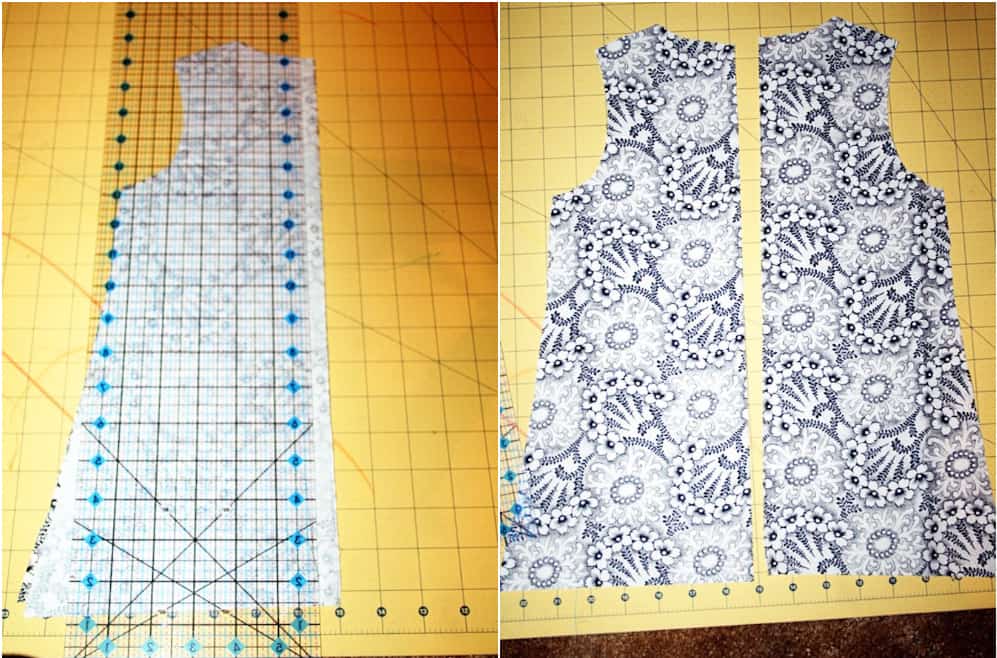
Next take your panel pieces and press them in half so you have 2 inch pieces. Match up the raw edges and right sides together. Pin in place and sew down. Repeat with the other side. Then press them open.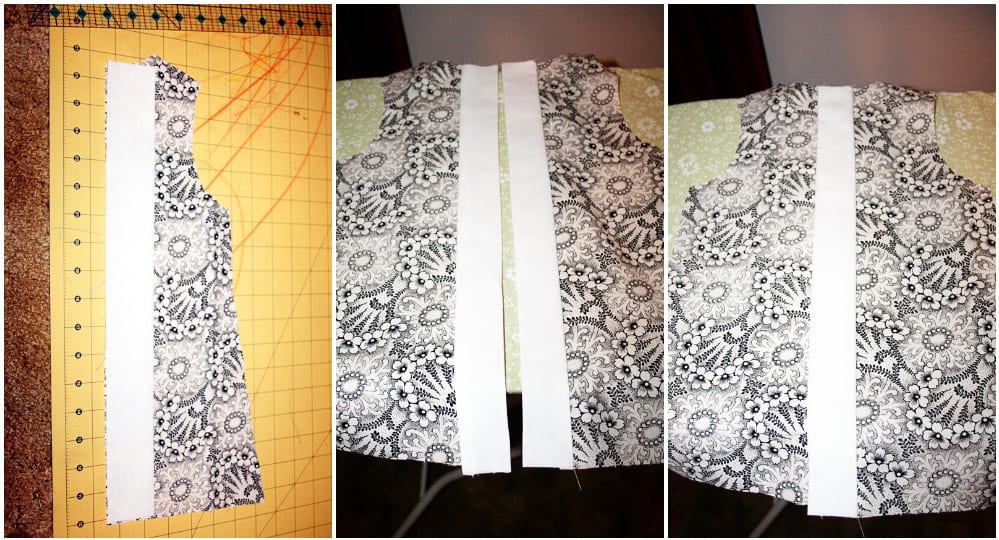
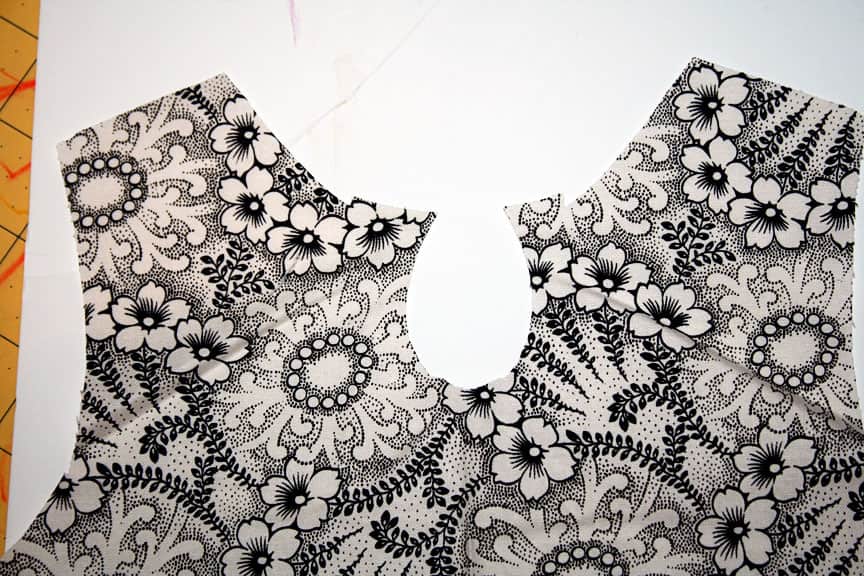
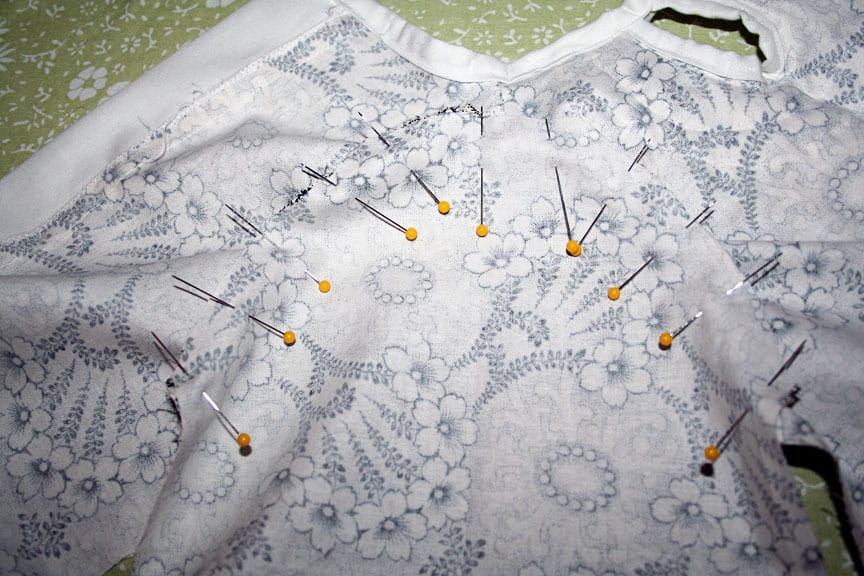
6. Now we are going to put our pieces together. (Still with me?) With the right sides facing match up the shoulders, pin together, and stitch (make sure to finish off your edges by serge or zig zag). 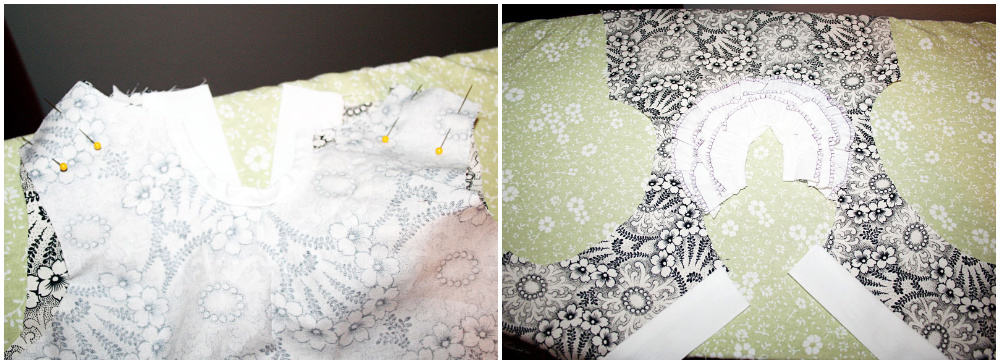
Then you are going to add your bias tape to the neckline. You will need to finish your edges by folding right sides together, stitch and back stitch, and flip. For more information on this check out this tutorial. Use a lot of pins to hold it in place and then stitch down. The tricky part is the keyhole. You will just go straight across, try to keep the tips of the keyhole close but not overlapping.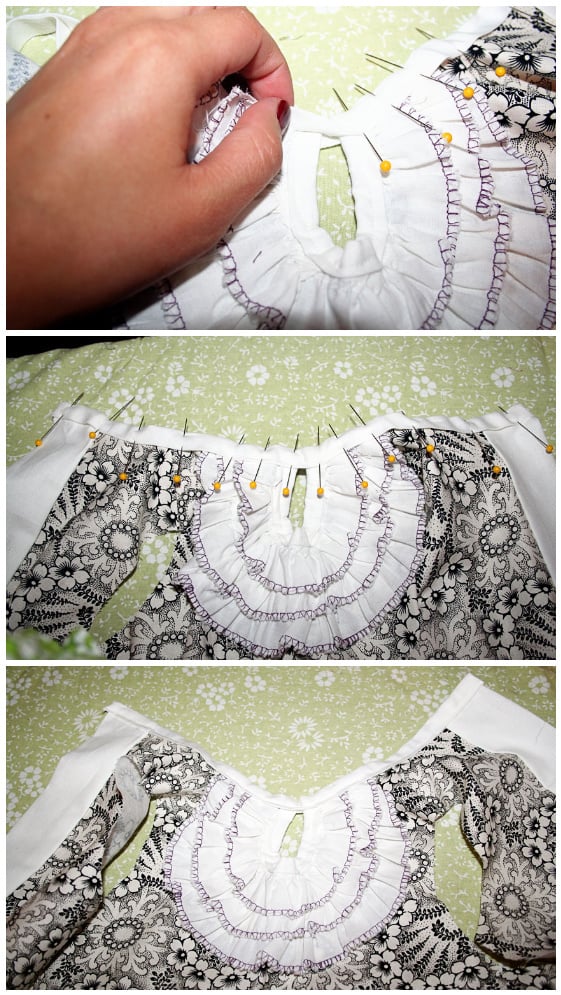
7. Now we are going to add the sleeves. On the end of the sleeve add bias tap to finish off the edge. Then with right sides facing place the sleeve in the arm holes pinning it in place. Sew it down, finished your edges, and repeat with the other side. 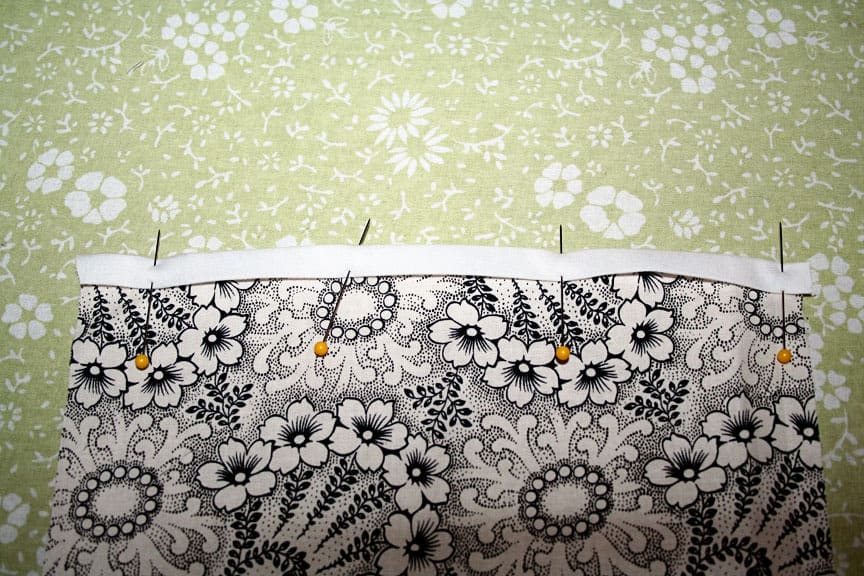
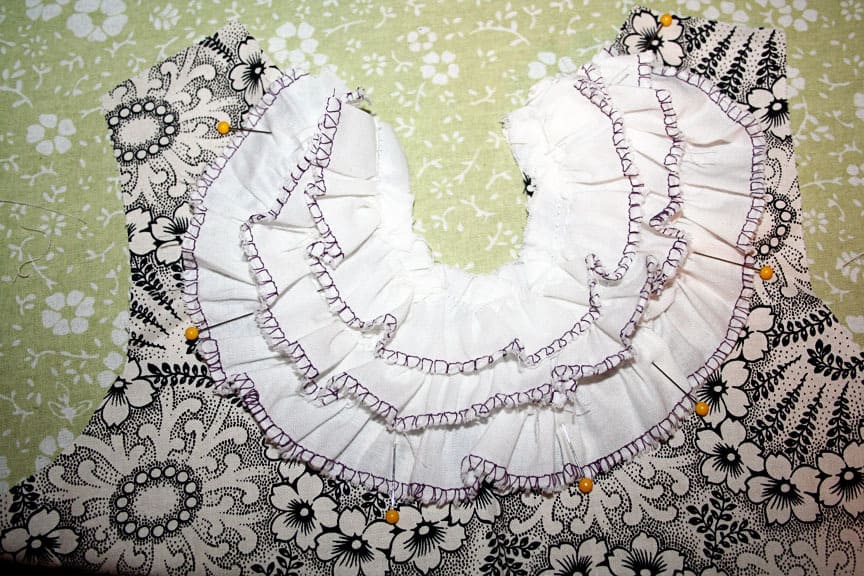
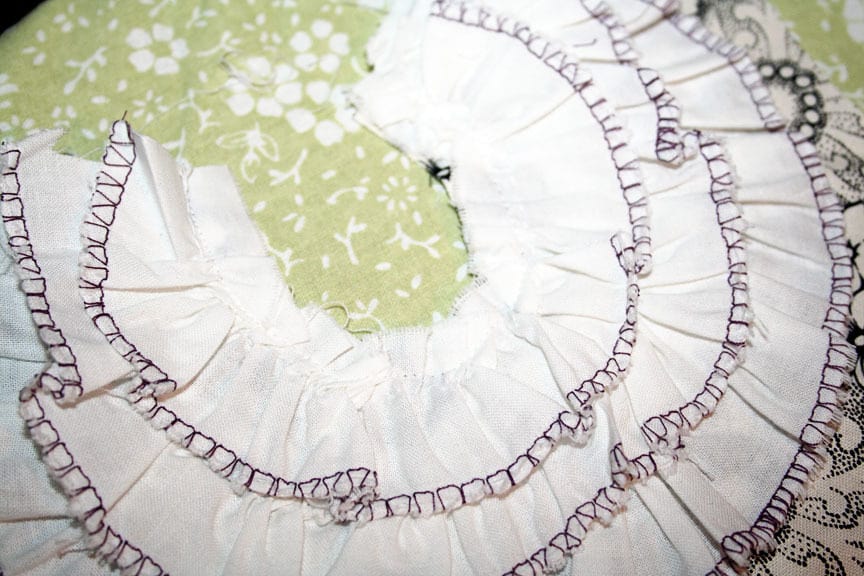
You end up with this.
YOU’RE ALMOST DONE!
8. Turn your shirt inside out and with right sides together pin and sew up the sides. 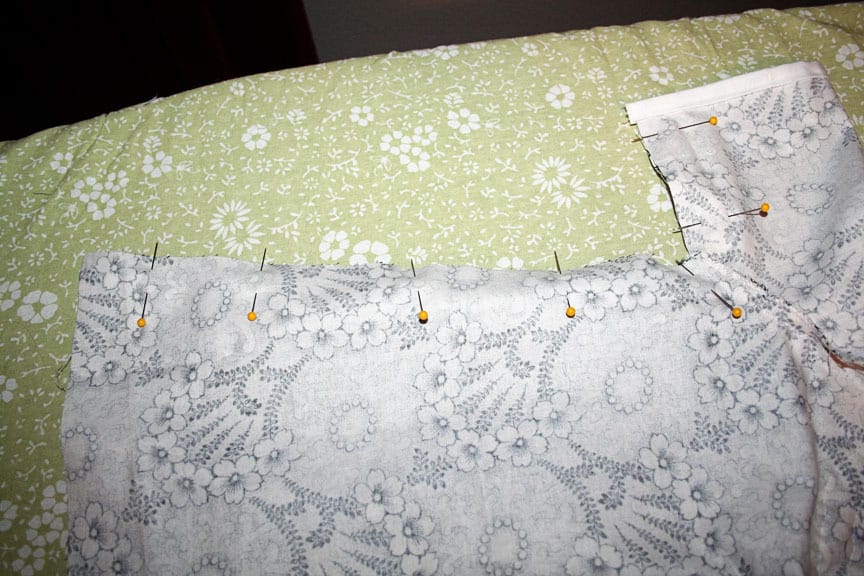
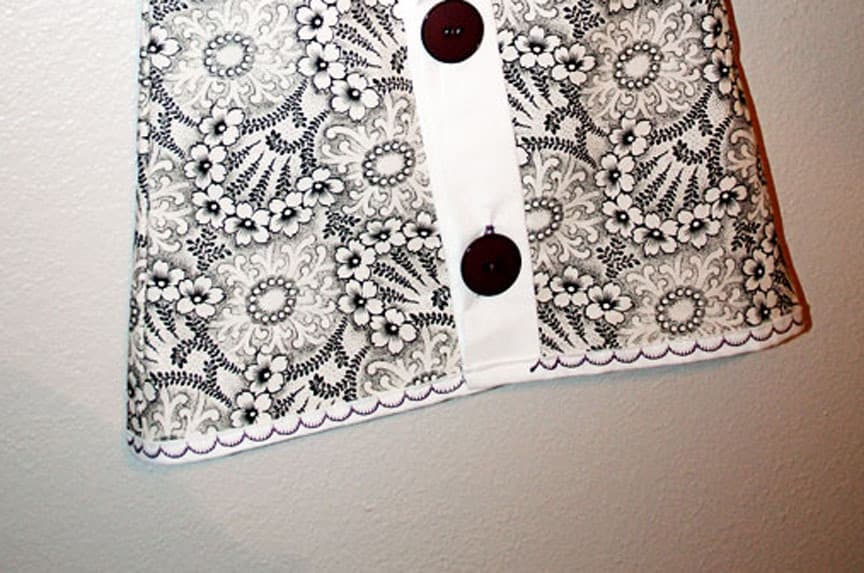
Turn right side out. Now you have a shirt; just need to add the buttons and finish the bottom. If you are using a button foot on your machine now is the time to apply what you know or get out the manual. Here is how I do mine. Place your buttons where you want them and use a fabric pencil to mark the bottom edge. 
Sew your button holes, use the seam ripper to cut the holes, and sew your buttons to the under side.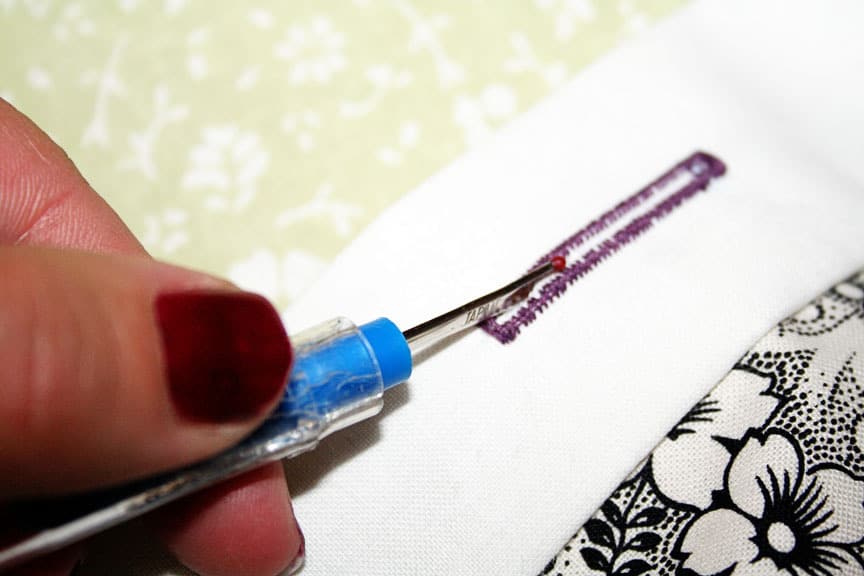
You also need to sew your small button to the front in between the tips of the keyhole. This covers the blank area.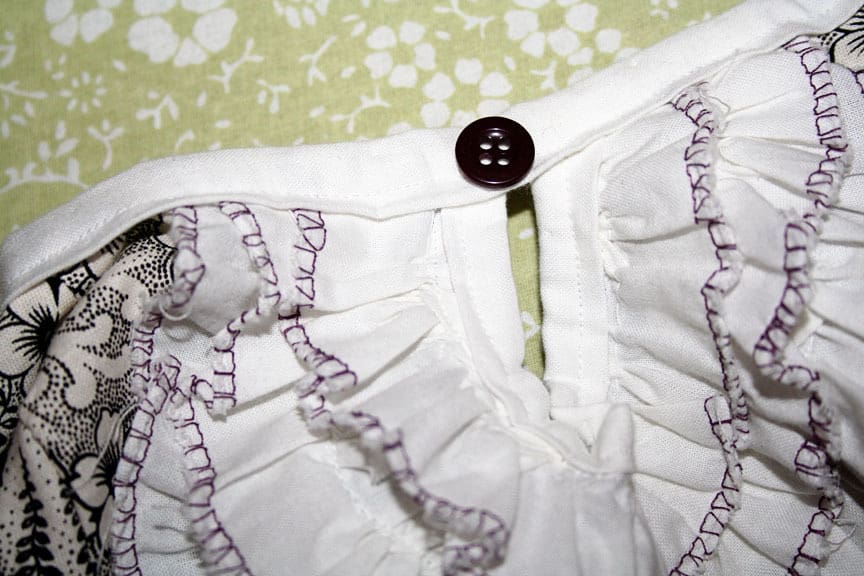
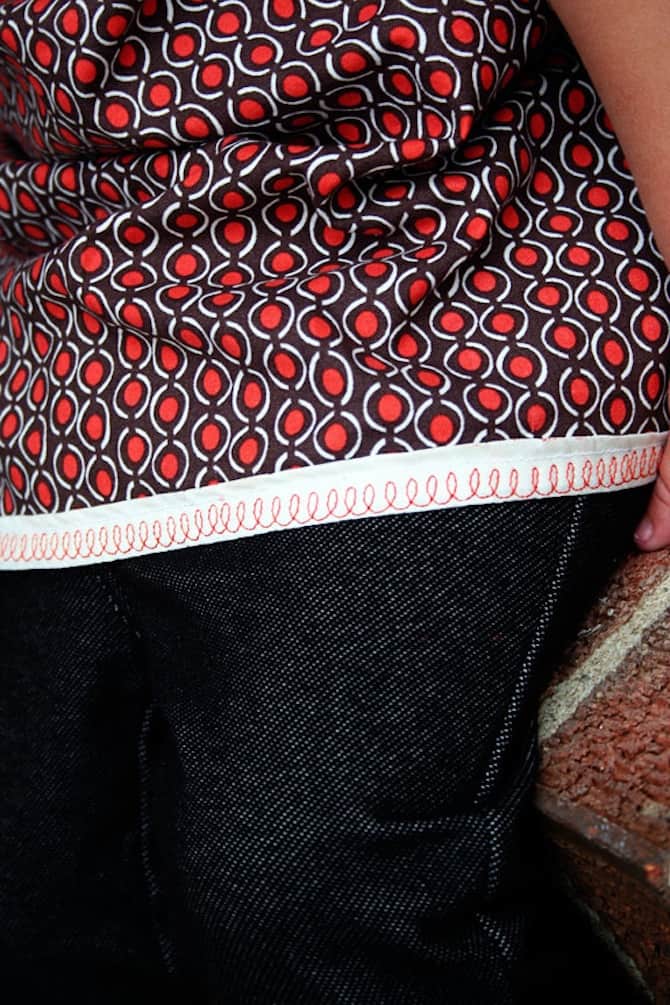
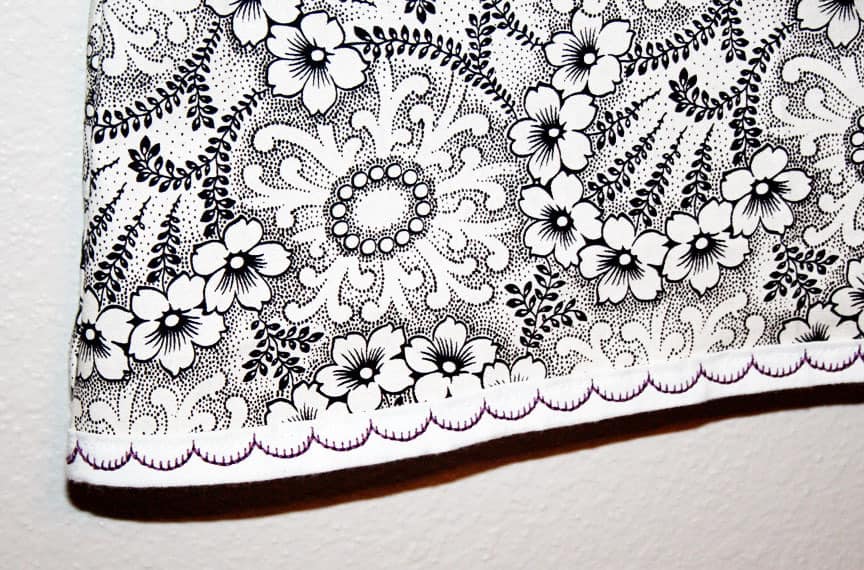
9. Now you are going to add the bias tape to the bottom. You will need to finish off the edges just as before and pin it in place. Stitch it down. Then if you want you can add the embroidery stitch to the hemline. I think it adds some interest and fun.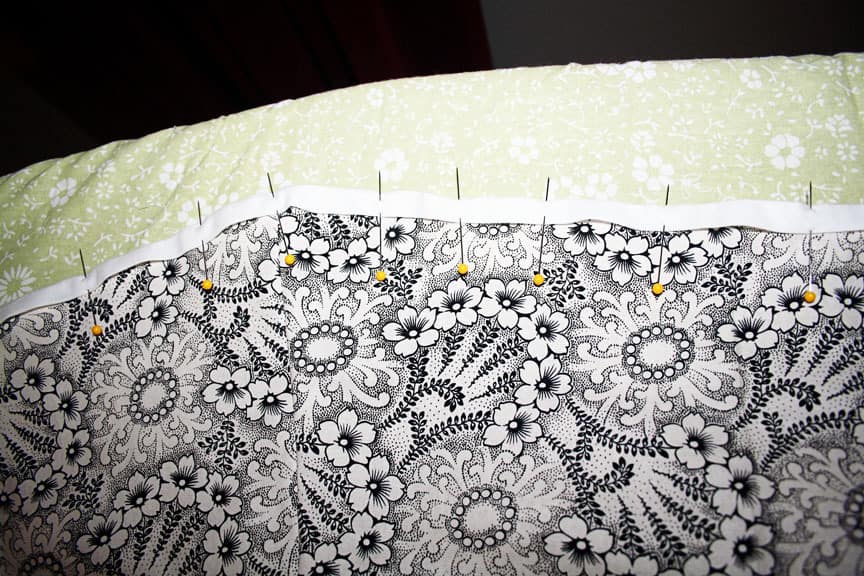
Now you are done. I know there were a lot of pictures but that’s how I operate. I hope you enjoyed it and make one of your own.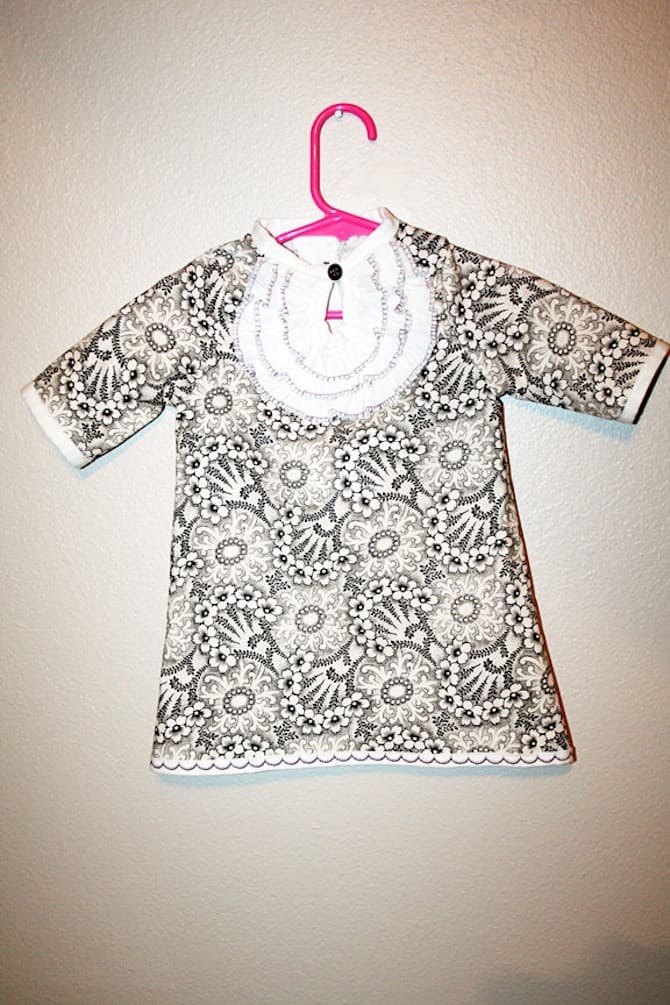
Thanks so much Jessica! Don’t forget to stop by A Couple of Craft Addicts to check out their many other fun tutorials.
Oh My Goodness!!!! That is soooo darn, stinkin' cute!!!! I have to try it. Off to check my fabric stash…..
SUUUUUUUUUUUUUPER CUTE! Came out amazing! Adding this to my (infinite) to do list!
This is incredibly cute and beautiful! I've pinned it immediately 🙂 Just a question on the sleeves in the first picture: they seem a bit 'puffed' – did you do something special for that?
Yes, for the puffed sleeves add about 1 inch to the length of the top of your sleeve. Then sew a loose stitch and gather it. Finally sew the sleeve as instructed.
I don't sew clothes often, but you made this seem so simple and clear that I'm going to give it a try! Thanks!
I LOVE it!!
Um…this top is way too cute to make for a kid. I want to wear it myself! I'm going to have to figure out how to make this like 20 times bigger. Adorable!
I don't have skills on sewing but upon seeing those clothes, well I am totally impressed with your project. It's very clear that you are really passionate on making this stuff and I wanted to write a little comment to support you and wish you a good continuation. All the best for all your blogging efforts.
Angelwynxx@http://www.lnlclothing.com/
I made this and it turned out so cute! I made it with short sleves and i did a little cutout like at the neck on the edge of the sleves. Thanks for the tutorial!
[…] my peplum top into a full-length top (erm…tunic?). I stumbled upon Pretty Prudent‘s Ruffled Keyhole Shirt tutorial, and it started the wheels turning. I am a sucker for a bib-front baby shirt (see: ), and I love […]
Hi there terrific website! Does running a blog such
as this take a lot of work? I’ve very little expertise in programming however I had been hoping to start my own blog soon.
Anyhow, should you have any recommendations or tips for new blog owners please
share. I understand this is off topic but I simply had to ask.
Kudos!
It’s appropriate time to make some plans for the future and it’s time to be happy.
I have read this post and if I could I wish to suggest you few interesting things or advice.
Maybe you could write next articles referring to this article.
I want to read even more things about it!