We are always keeping our eyes out for pretty accessories to make, so when Jen from Eat. Sleep. MAKE. told us all about her tutorial for making knotted suede and beaded bracelets we had to share it with you. Her Plywood Inspire Boards and Citrus and Herb Soap are also great projects to add to your “things to make” list. All those out there who love a good estate sale should check out the Estate Saling 101 Series.
If you have a project you’d like to share with us at Prudent Baby contact us here. We’d love to hear from you!
Keep reading for the full How to Make a Knotted Suede Bracelet Tutorial…
Knotted Suede Bracelet
Hi there! I’m Jen, and I’m 1/2 of the blogging duo who write for Eat. Sleep. MAKE.. My sister-in-law, Shannon, and I love sharing our passion for all things creative. Our goal is to create projects that are quick and easy for most people to do, and this tutorial for knotted suede bracelets is no exception (in fact, you might get a little hooked!)
I love the look of layering multiple bracelets but I have a confession: I don’t usually wear bracelets. I have skinny little wrists, so I can never seem to find one that fits just right. The bracelet usually ends up dangling loosely from my wrist as I write, and my handwriting already looks like a 3rd grade boy’s, so I don’t really need something that might make it even worse.
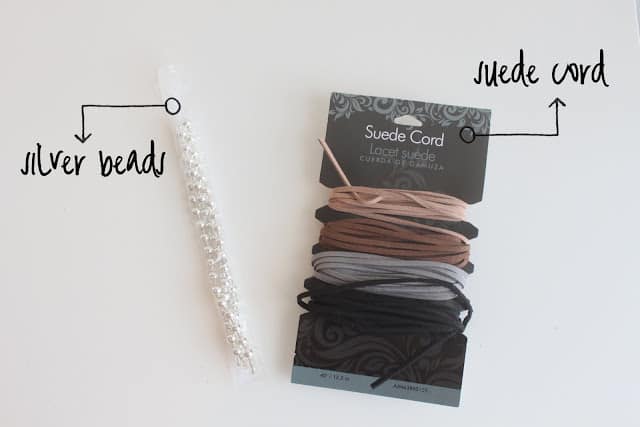
Despite my reservations, I was browsing the craft section recently on a trip to Walmart and I spotted some suede cording that was just screaming to be made into bracelets. I grabbed the cording and some beads and came up with these great knotted bracelets that have even ME wearing multiple bracelets all the time.
First to determine the length you need, wrap the cording loosely around your wrist. You need a length that is a little over 4 times your wrist size (it may seem big, but you’ll be folding the cord in half and making lots of knots so if you’re in doubt, make it too long so you have more to work with.) I have skinny little wrists, and my total length was 36 inches.
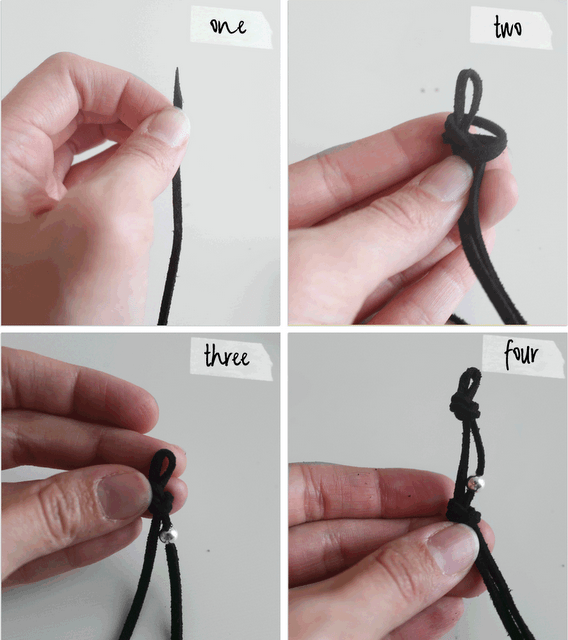
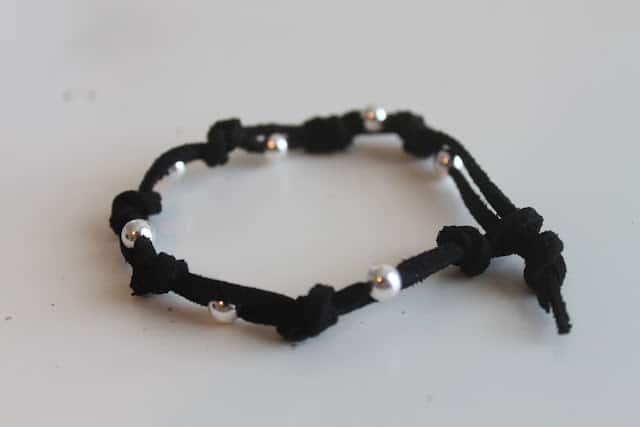
If you have small beads, you may want to snip the ends of your cording to make it easier to thread your beads on. Next, fold your cord in half and tie an overhand knot at the end to make a loop for the closure. Finally, thread your first bead on and tie a knot a little bit below the bead. Thread another bead on the side opposite where you strung the first bead and tie another knot. Repeat. Tie a knot at the end of the bracelet to finish.
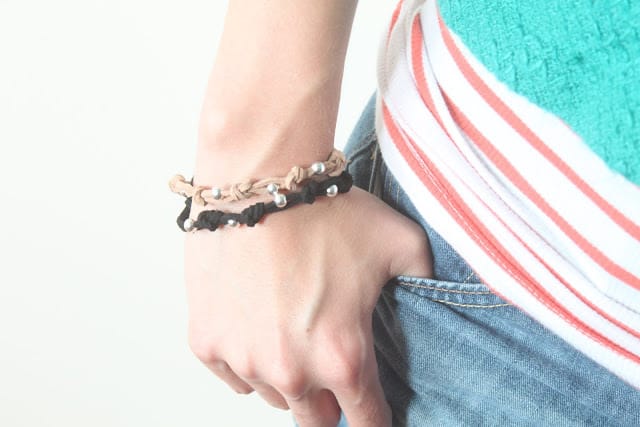
Now you have a pretty knotted bracelet! You can buy all sorts of different colored suede cording and beads. I made a black and tan one because they go with everything, but I have some turquoise cording that I can’t wait to make more with!
Layer them or wear one by itself, they’re cute either way!
Thanks to the wonderful ladies of Prudent Baby for having me today, and I hope you’ll come visit me on Eat. Sleep. MAKE.


Thanks for having me ladies!
-Jen
Thank you so much for this post. I want to let you know that I posted a link to your blog in Creative Busy Bee Craft Inspirations, under the Page 2 post on Aug. 27, 2012. Thanks again.
[…] was zu fertigen, so DIY-Style, denn ein bisschen basteln und einfädeln krieg ich noch hin. Mit diesem einfachen Tutorial gelang es mir tatsächlich innerhalb kurzer Zeit ein tragbares Armband aus Perlen und Lederschnur […]
I’m curious to find out what blog platform you are using?
I’m having some small security problems
with my latest site and I’d like to find something more risk-free.
Do you have any solutions?
[…] Get the tutorial at Pretty Prudent Fold-Over Clutch 4 of 7 Use any extra cotton, linen, or leather fabric you have on hand to make this simple fold-over clutch. It’d be great for a moms’ night out on the town! […]
Thanks to my father who told me about this web site, this blog is truly awesome.