


 We first shared with you our tutorial on How to Make a Bow Tie FIVE YEARS AGO. Oh my. And that post was so popular, little boys everywhere were rocking prudent bow ties in their family photos. How cute is this?
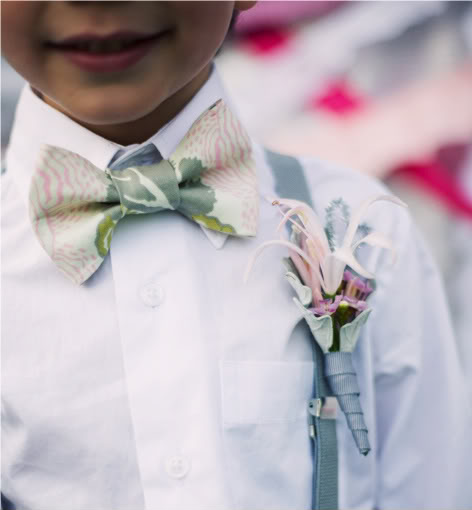
The post was so beloved that we thought maybe we would include a tutorial for making a bow tie in our book, Pretty Prudent Home. But then we thought, bow ties aren’t really a home decor item, are they? But lucky for you, it took as a minute to figure out that obvious fact, and by that time we has already had all the steps beautifully illustrated by the amazing Sonya Benham. Oh, and modeled by my sexy husband. 
So I’ve gone ahead and updated our DIY instructions to be extra clear and illustrated here in this post. Of course, if you prefer the photographic tutorial, you can still get it here: How to Make a Bow Tie.
Read on for our updated 5-years-on How to Sew A Bow Tie Tutorial…
How to Sew A Bow Tie
Materials
Fabric, cotton
Lightweight Interfacing
Bow tie hardware (one 7/8″ slider and one clip set)
Instructions
Cut two pieces of fabric 12.5″ long by 3.5″ wide. Cut one piece of fabric 2”x3”. Cut one piece of fabric 14”x 2”. Cut one piece of lightweight fusible interfacing 3”X6”. 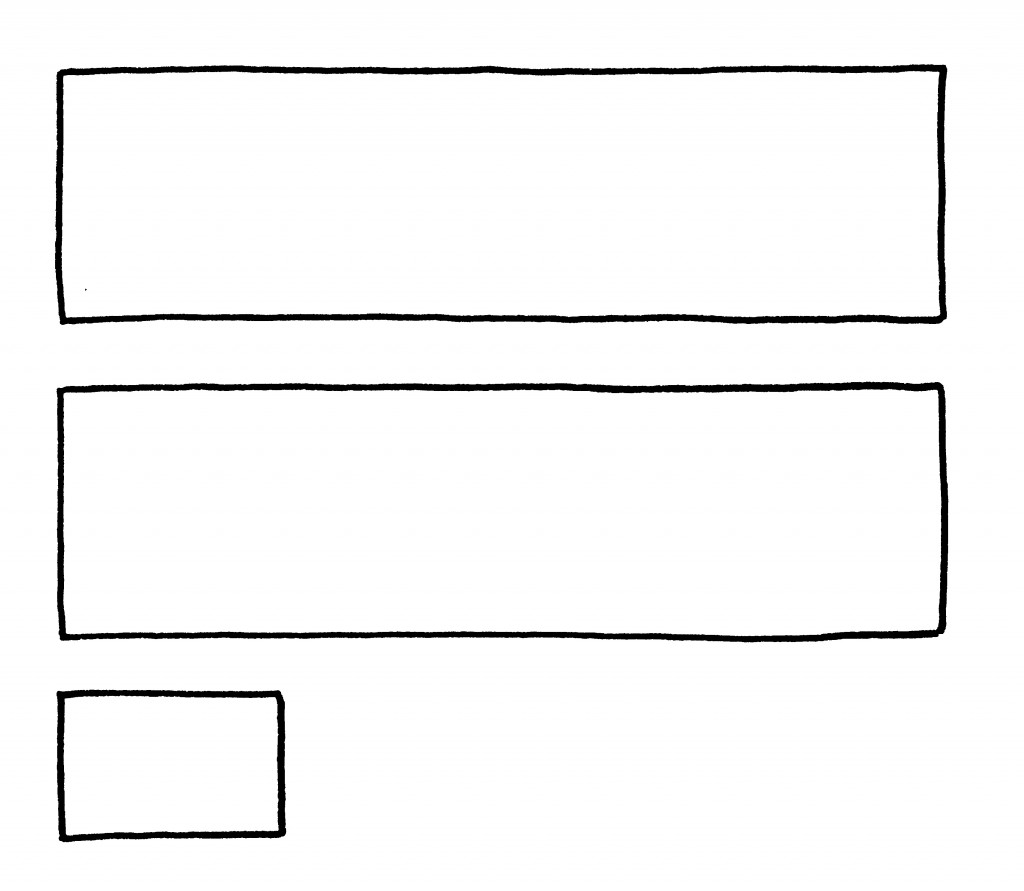
Iron interfacing in the center of the wrong side of one piece12.5” x 3” piece of fabric. 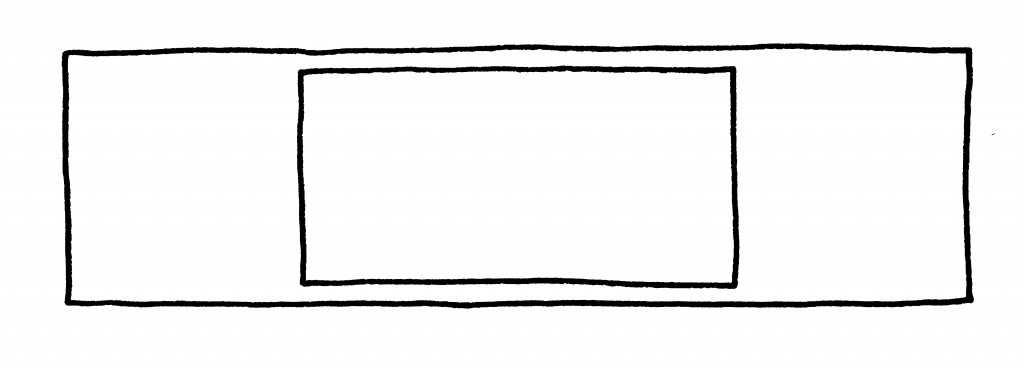
Lay your two pieces of fabric right sides facing and sew around the two long sides and one short side with a straight stitch and ¼” seam allowance.

Trim the corners, remove the paper from the interfacing, turn it inside out, poke out the corners, and fold the edges of the unfinished side under. Iron it flat to fuse the interfacing to both sides. 
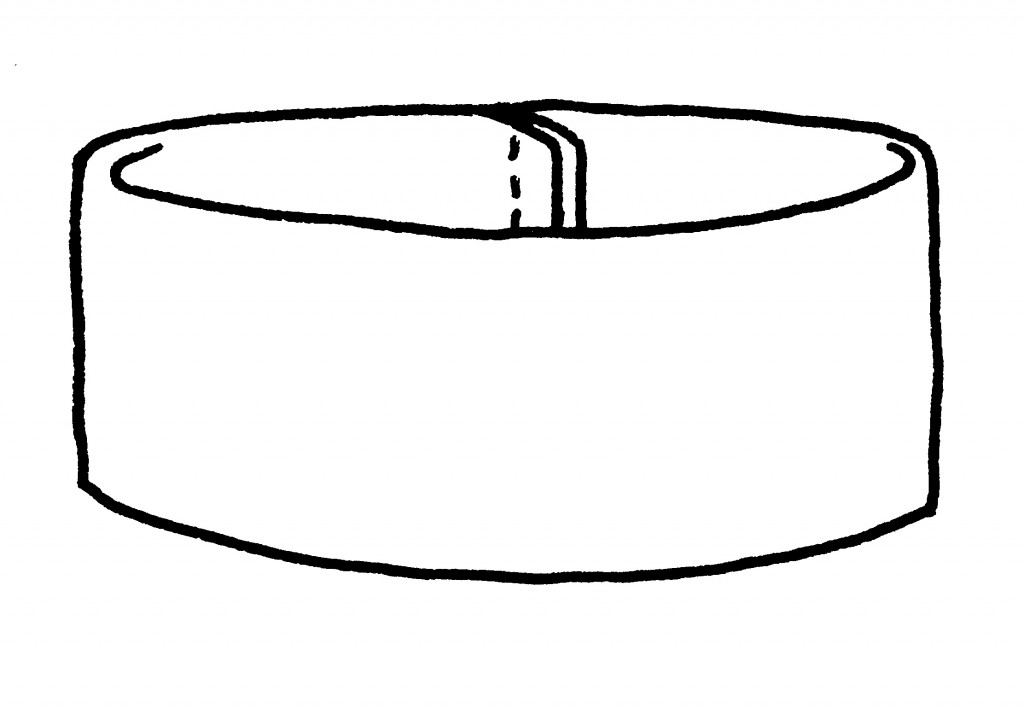
Decide which side is the front of your bow tie and fold it in half with the front to the inside. Sew up the short side to create a tube. 
Turn the tube right side out and align the seam to the middle of the back.
Take your 2”x3” piece of fabric and fold it in half the long way with right sides facing and sew a tube. 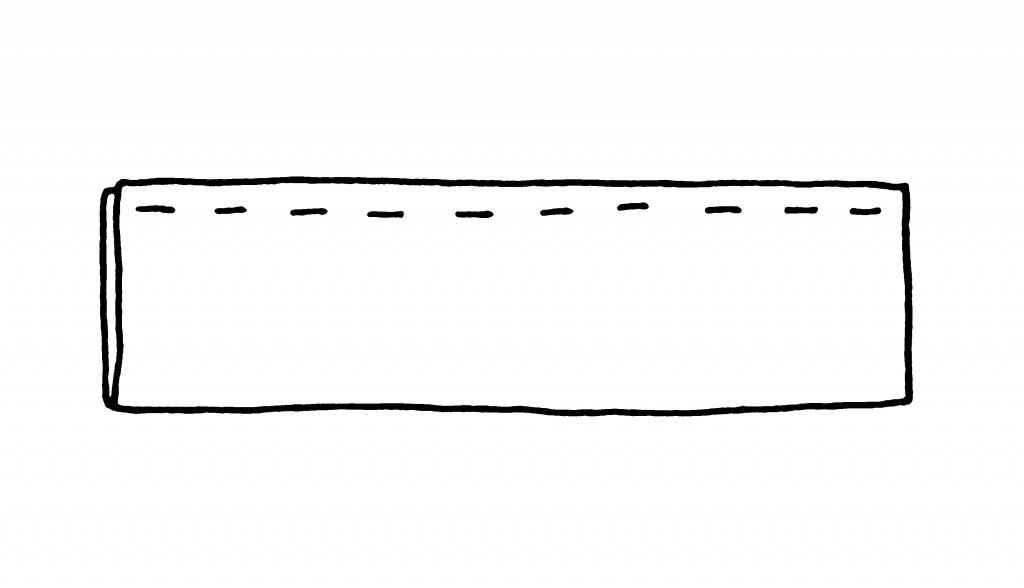
Turn it right side out and iron it flat with the seam in the middle. 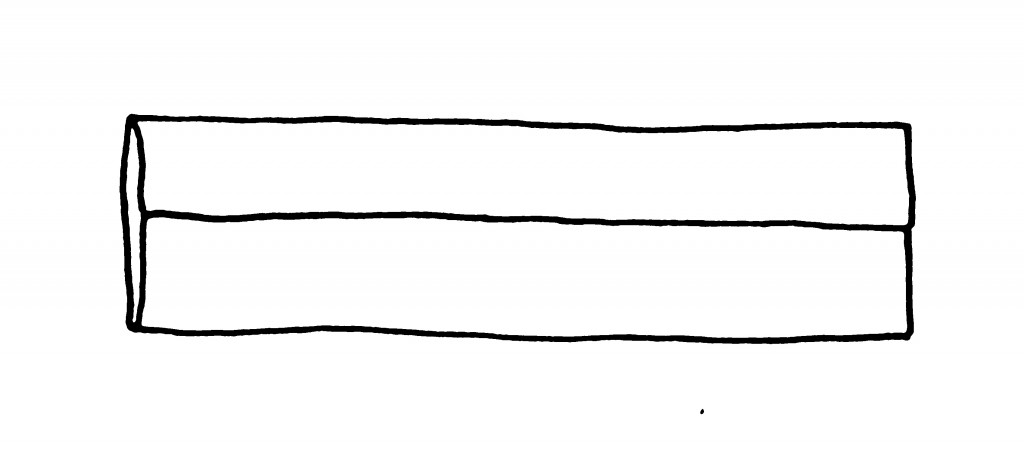
Fold it in half right sides facing and sew together along the short side. 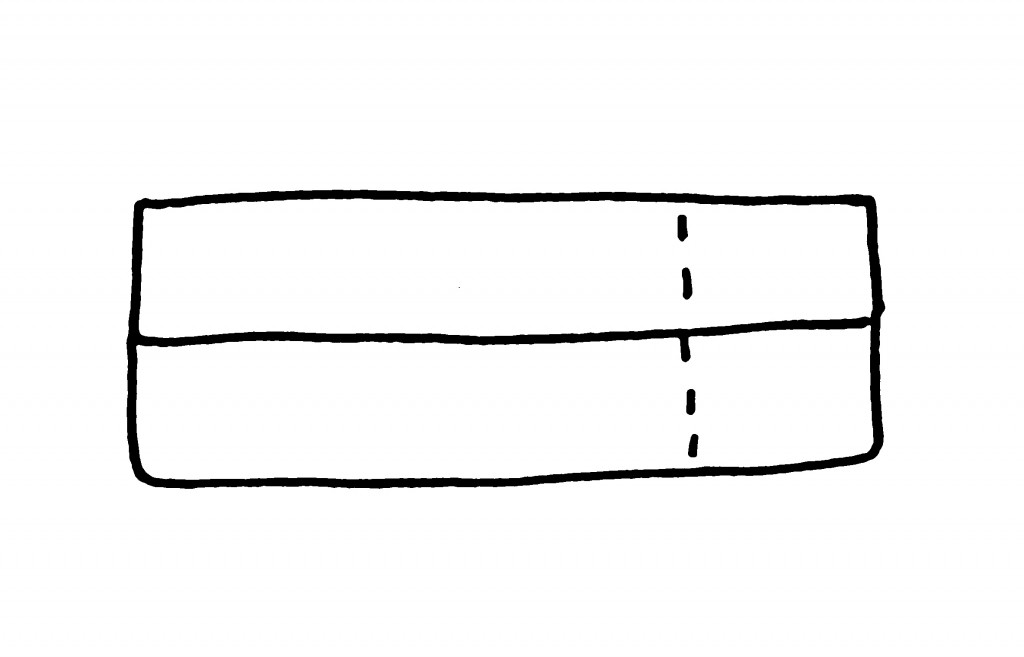
Iron the seam flat then turn it right side out. 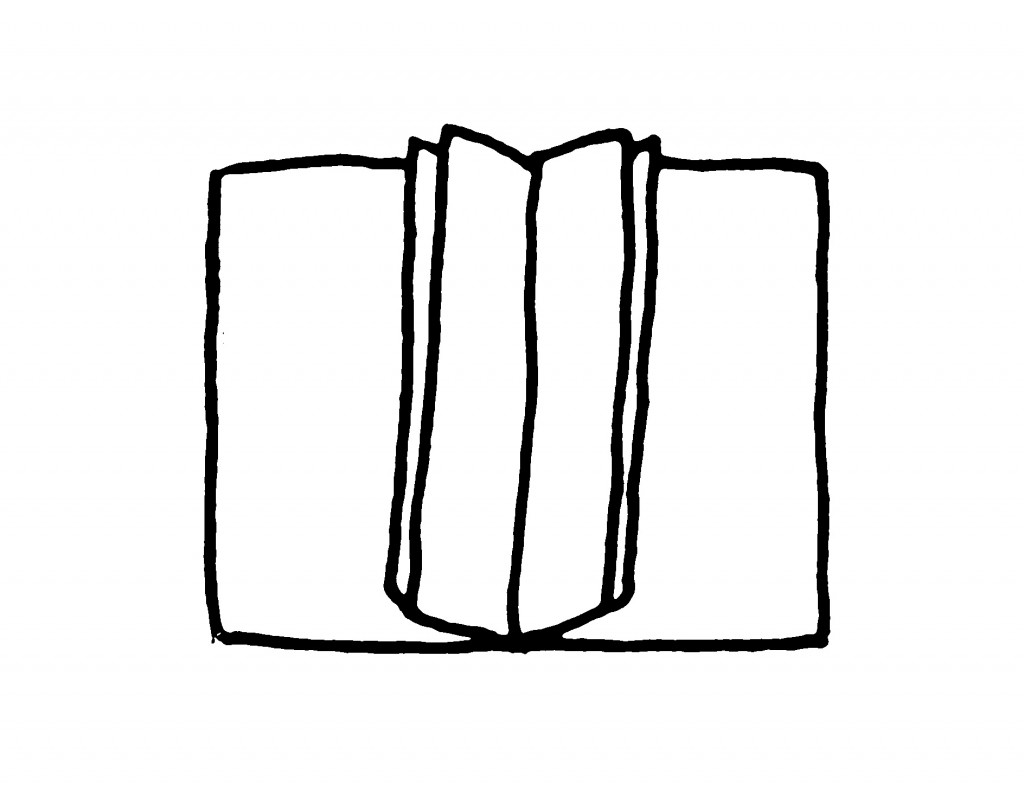
Slide this tube onto your bow tie, aligning it in the center with the seam to the back, being careful to pinch the bow tie evenly. Your bow tie is complete. 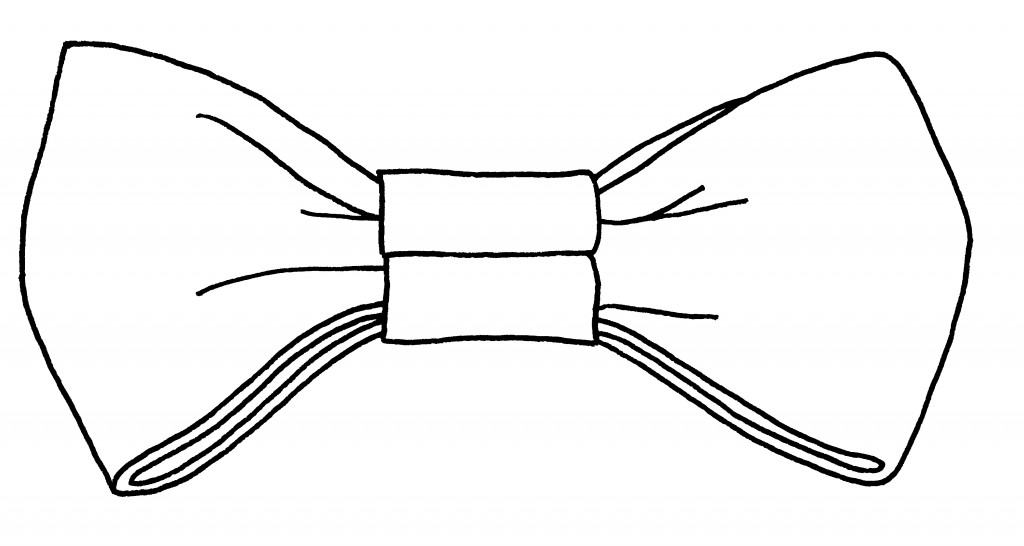
To make the strap, fold your 14” x 2” piece of fabric in half the long way with right sides facing and pin. Sew raw edges together with a straight stitch and scant seam allowance. 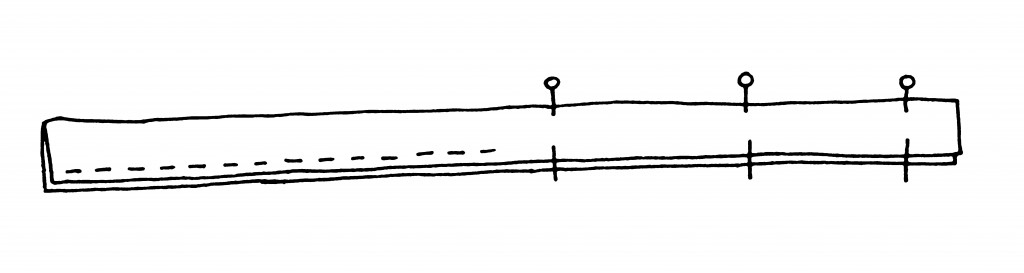
Loop turn inside out with a loop-turner or safety pin. 
Iron the strap flat with the seam in the middle. 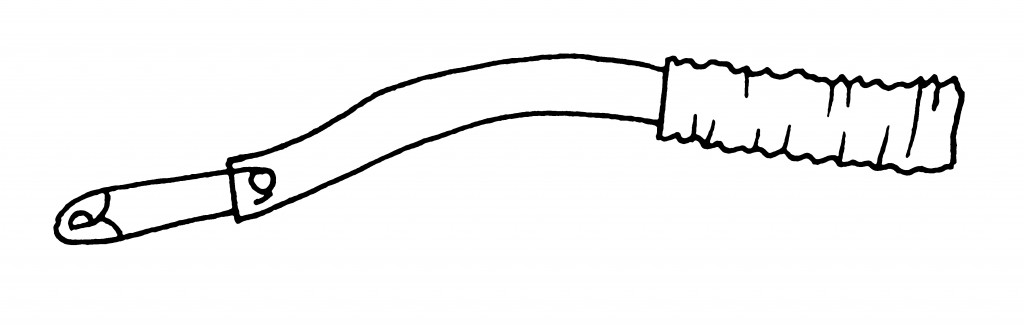
Slide your slider on one side and out the other. 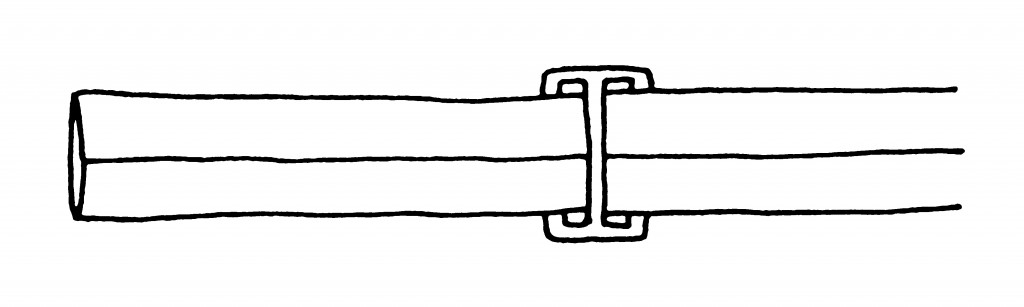
Slide the receiving end of the clip on and fold the end of the strap over and back through both sides of the slider. 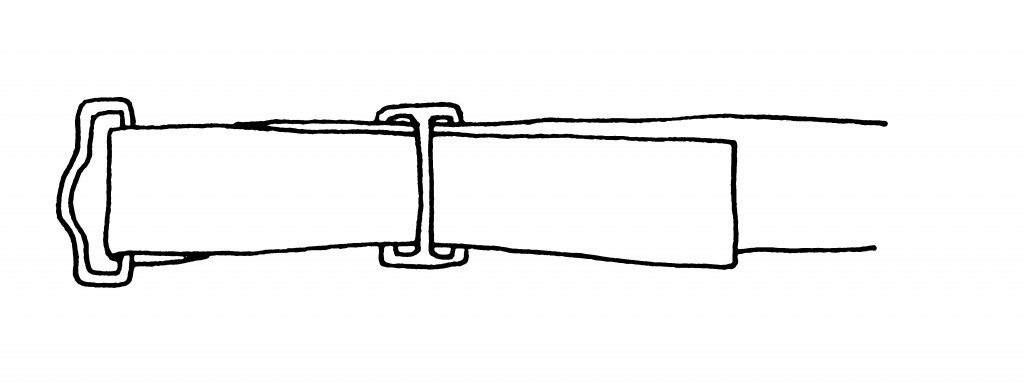
Cut notches in the end of the strap. 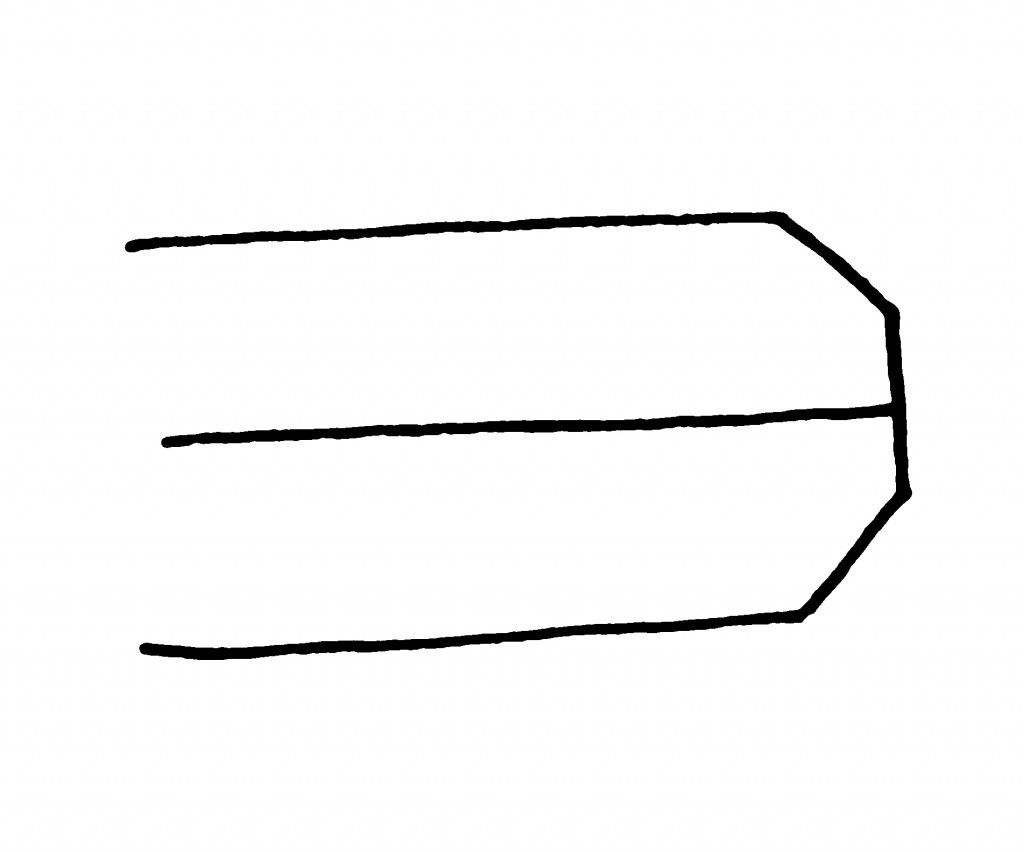
Fold the notched end under ¼”, then another ¼”, iron and sew in place. 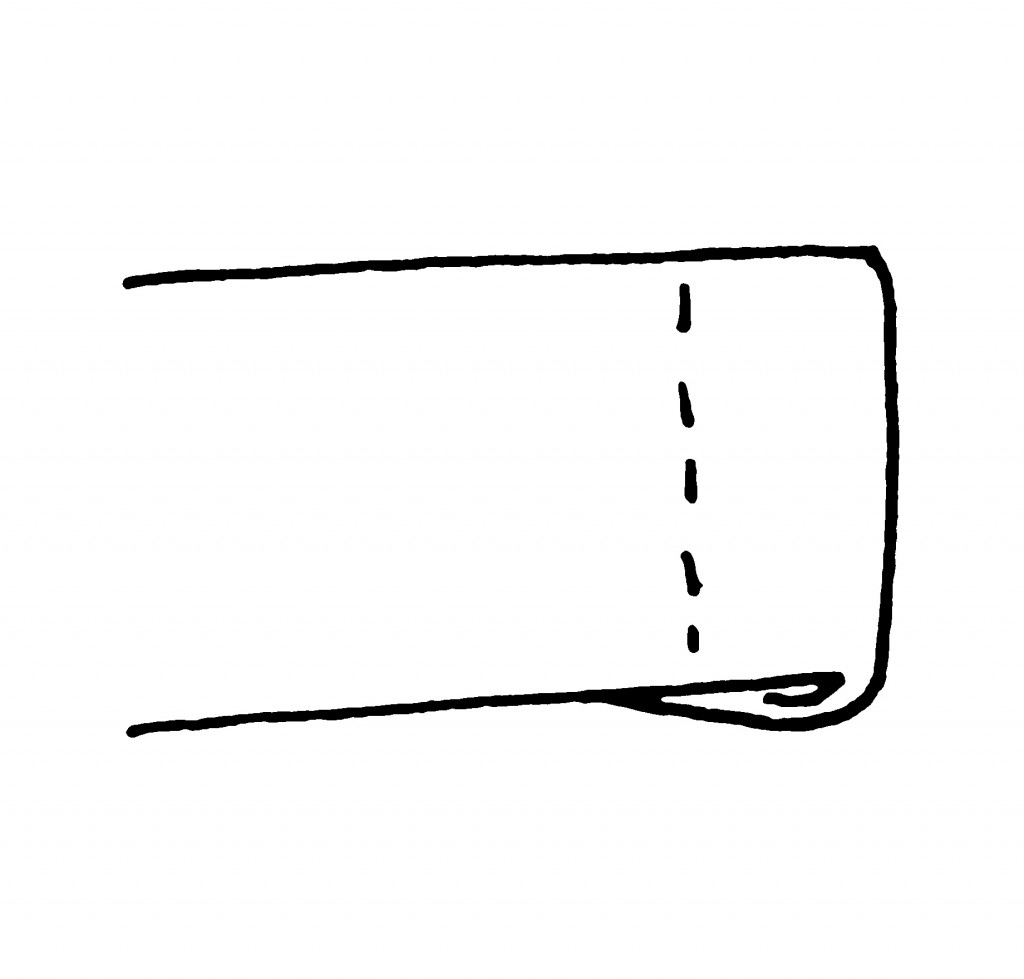
Slide your bow tie onto your neck strap.
On the other end of the strap, cut notches like above, fold ¼”, then another ¼”, and iron to hold the shape, but don’t sew yet. Slide the clip on, making sure it is facing the right way to actually clip into the other side, fold it back up along your ironing lines, and sew in place. 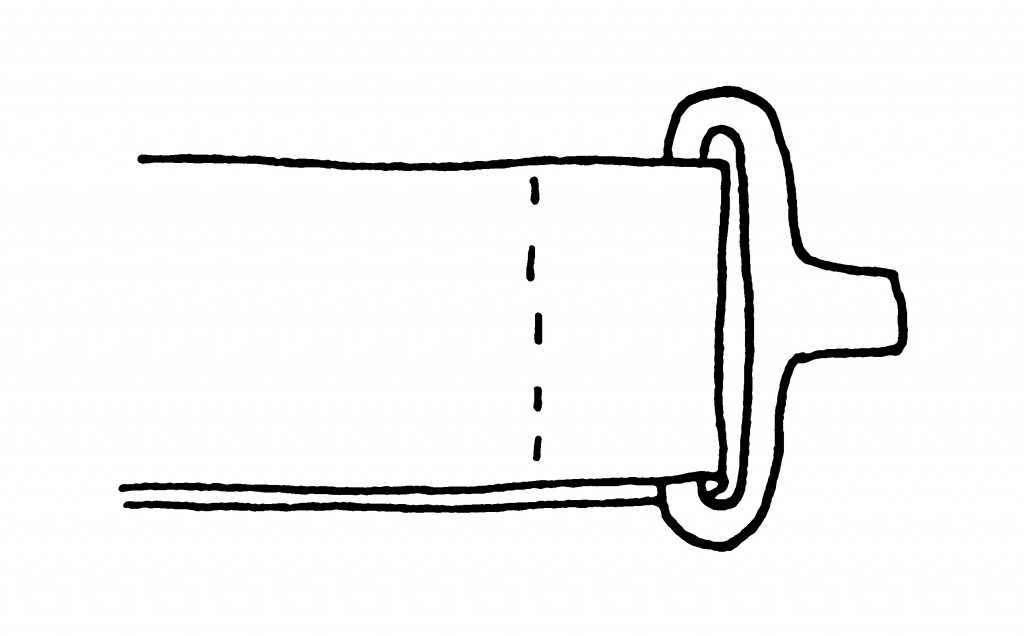
Dashing.
We can all thank Doctor Who for making bow ties popular again. My wife hates them though. I don’t know if it is actually bow ties, or she just hates Doctor Who. lol
[…] How To Sew A Bow Tie, by Pretty Prudent […]
[…] How to Sew A Bow Tie – 1 freebie(s)? […]
[…] HOW TO SEW A BOW TIE […]
Great advise