


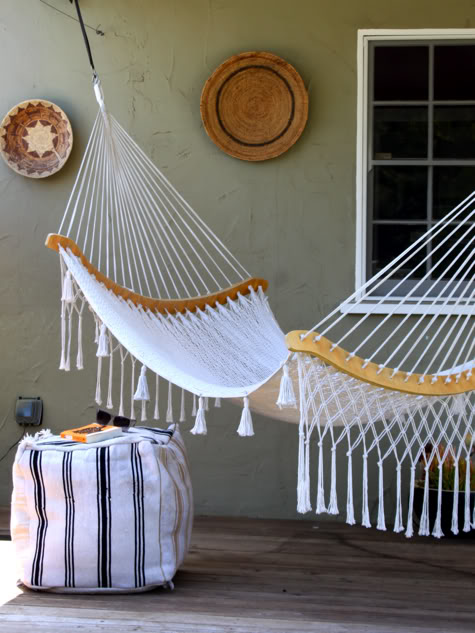
It was getting really challenging swinging in the hammock, reading a book, AND holding a wine glass at the same time, ugh life can be so hard, right? I needed some sort of pouf/table to ease this terrible burden. Made with five of these .99 Ikea flatwoven rugs and stuffed with extra linens and such from around the house, the whole thing cost just $15 bucks and also acts like a little storage unit. Get the full DIY Recycled Rug Ottoman tutorial after the jump…
DIY Recycled Rug Ottoman
1. I used these $2.99 2’X3′ flatwoven rugs from Ikea, but you could cut up any old rug. You need five square pieces about 1″ bigger then your final ottoman, these make up the top and four sides. I cut mine 19″X19″ and this made for a LARGE (18″X18″X18″) ottoman. You’ll also need two pieces for the bottom that will overlap, I used two of the remainders from my cut up rugs. 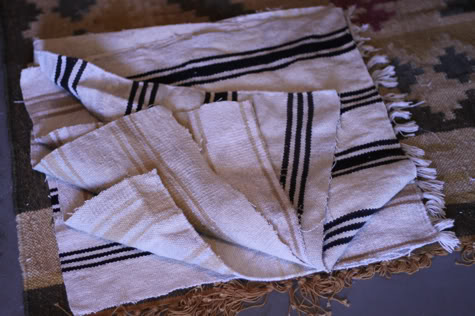
2. Lay them out in a cross shape. Your cross is three square pieces across: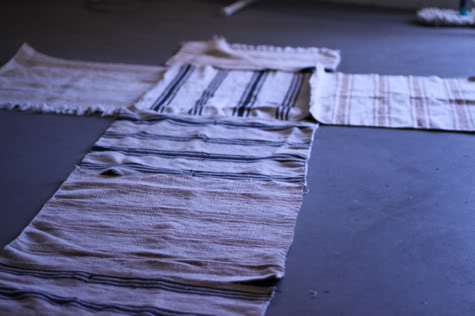
Then going down the cross: The top is one of your smaller pieces, then three square pieces, and the bottom is the other smaller piece: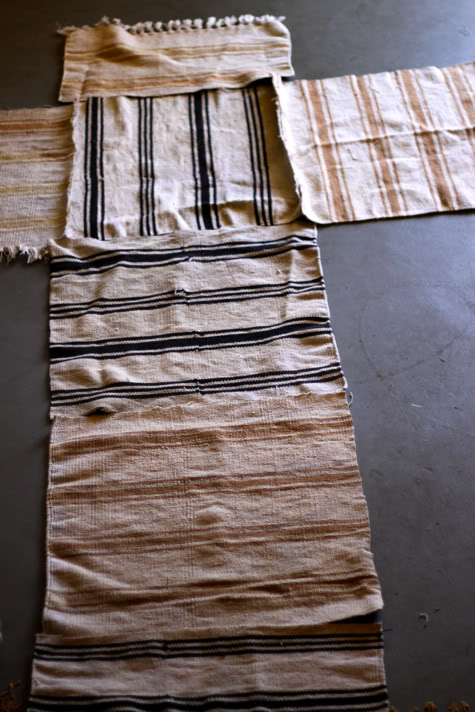
3. With a heavy duty needle in your machine, sew the pieces of the cross together at each edge with right sides facing (the right side is the side of the rug you want showing on your final ottoman). Make sure the seams are on the same side of your piece all the way around. The seams will look like this: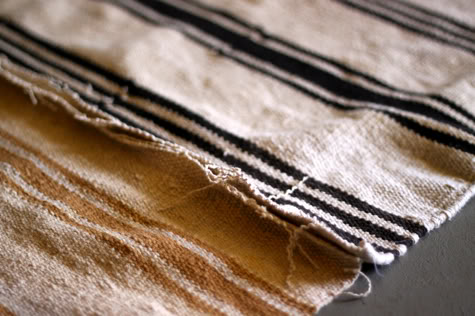
FYI: On one edge I left the fringe on a piece a sewed it to the outside just for a little extra detail, not required: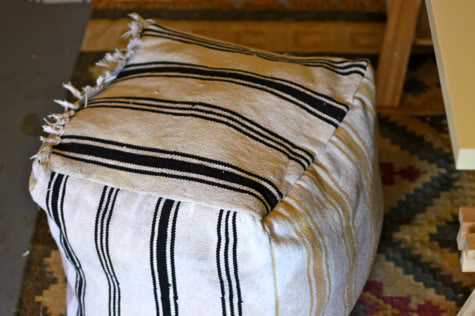
4. Now turn your cross over so the seams are on the bottom, then lift up the sides and sew them up where the edges meet, making sure the seams are still all on the same side of your project. Don’t sew the half pieces yet. You’ll have a floppy cube: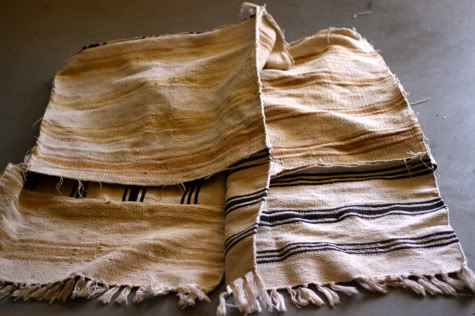
5. Now to sew the short pieces on for the bottom of your cube. I left the fringe on for fun. Align the edges of each side piece to the cube, still with the seams to the outside. Overlap the pieces and pin in place: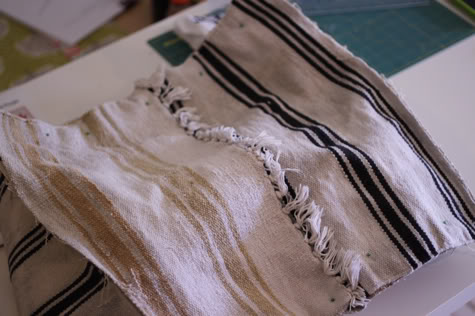
Sew them on.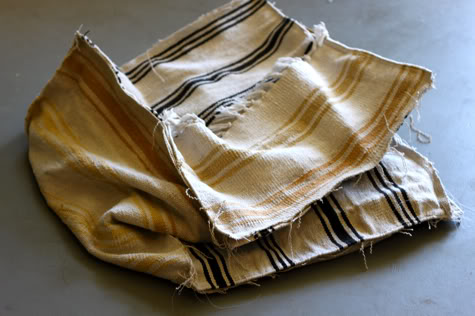
6. Turn your cube right side out and start stuffing through the space between the flaps. I started with some batting so the top would be soft and cozy: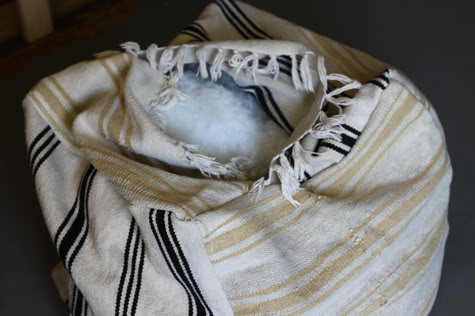
Then to fill the space and use it for extra storage I stuffed into it an old featherbed, some pillows, a few extra Ikea rugs, some curtains I wasn’t using, a couple blankets, some bologna, an old chair I found on the street, several umbrellas, scarlet’s outgrown baby clothes, a street lamp, six dog cookies, my maternity clothes, the bras I used to wear before I had a baby, a bunch of free vases that came with flowers, a stair master, a thigh master, and a bag of hard red vines. It’s extra cozy!
Turn it right side up. Done!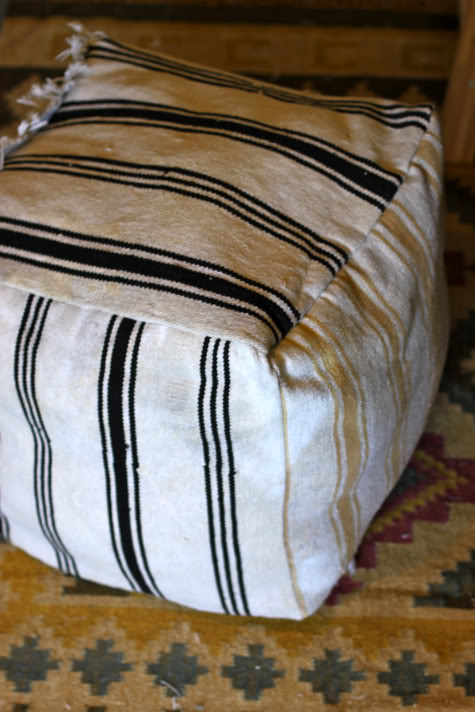
You know how I love that hammock! This is extra torturous. I've been wondering where my phone went all weekend, can you check your ottoman?
This is amazing and would look perfect in our Southwestern home! Thanks!
Ha ha! I love the stuffing! AND the ottoman too!
I think that I might use this idea to make a new bed for my dog (with old rags for the stuffing, not things I still want. Thanks!
Where did you get that hammock? It's lovely.
Oh no! I have a hammock but it is sadly not hanging…it would be even sadder still if I had a hammock ottoman but no hammock…reading this out loud as I type it to Nature Boy who is the hanger of hammocks in these parts…
Love it!!! I linked to your tutorial on Craft Gossip Sewing:
http://sewing.craftgossip.com/tutorial-make-a-cube-ottoman-from-woven-area-rugs/2010/06/15/
–Anne
I love this! And especially all the stuffing. 😉
Ok. I absolutely adore this. You have no idea how many of those little rugs my mother has around the house. She keeps trying to give them to me (probably so she could buy more). I'm so doing this.
Insanely Awesome!!
you are hilarious! love the line about stuffing bras u used to wear before having a baby…i can relat!
[…] Recycle a rug ottoman, make a beautiful side table, its functional and adds to the patio decoration. Link […]
[…] source […]
[…] Image source […]
[…] prudentbaby.com […]
I could not stop laughing at the stuffing part! Then I had to read it to my hubby so he could laugh too!!!
HA! I am glad someone understands me.
[…] prudentbaby.com […]
[…] 22. This recycled rug ottoman is great. Prudent Baby – Full Guide Here […]
[…] "script", "gv_script_7375428914024696161537146"); 22. This recycled rug ottoman is great. Prudent Baby – Full Guide Here 23. If I can make this, so can you. Design Sponge – Full Guide Here 24. … Even this too! […]
[…] prudentbaby.com […]
[…] Prudent Baby – Full Guide Here […]
[…] Guide: Prudent Baby – Full Guide Here […]
[…] Directions here. […]
[…] prudentbaby.com […]
[…] prudentbaby.com […]
[…] prudentbaby.com […]
[…] prudentbaby.com […]
[…] (prudentbaby) […]
[…] prudentbaby.com […]
[…] prudentbaby.com […]
[…] Source […]
[…] Visto en Prudentbaby […]
[…] Visto en Prudentbaby […]
[…] Visto en Prudentbaby […]
[…] prettyprudent […]
Lovely idea, and adored the stuffing section, had me laughing out loud
[…] Стъпка по стъпка – тук. […]
[…] via prettyprudent.com […]
[…] Recycled Rug Ottoman (via Pretty Prudent) […]
[…] an old rug and turn it into an ottoman! Pretty Prudent gives us a innovative and creative way to upcycle and creative a super stylish […]
[…] Source: prettyprudent […]
Hello Dear thanks for sharing such a content with us…..