The Easiest Cheat for Binding a Quilt


This Fall has been filled with quilt making projects and outings for us. We started off with the super easy and adorable cheater quilt, made quilt binding, and took a trip to the Quilt Market. Today we have a quilt project brought to you by Rae from Made by Rae for easy quilt binding.

Rae is always sewing up new projects like the cutest baby tights, the dapper dillingers, and the prettiest chevron purse. She is here to show all of you the Cheater Quilt Bind-Off. Intrigued? I thought so. Rae will take you through the step-by-step tutorial for using the back of your quilt for an easy quilt binding.

This is an easy quilt binding tutorial to show you how to use the fabric on the back of a quilt to bind it off.  Most quilts have a separate strip of binding that goes around the outside of the quilt. Here I’ll show you how to take the backing and fold it over the edge of the quilt to finish it. This works best for small baby or doll quilts.  The Crayon Box Quilt Tutorial for the quilt top used for the photos in this tutorial was first posted by me for Sew Mama Sew. The quilt pictured above is the Storytime Squares Quilt which is available as a free pattern download/tutorial on my blog.

Step 1: After quilting the layers of your quilt together, trim the batting along the outside of the quilt right to the edge of the quilt top.

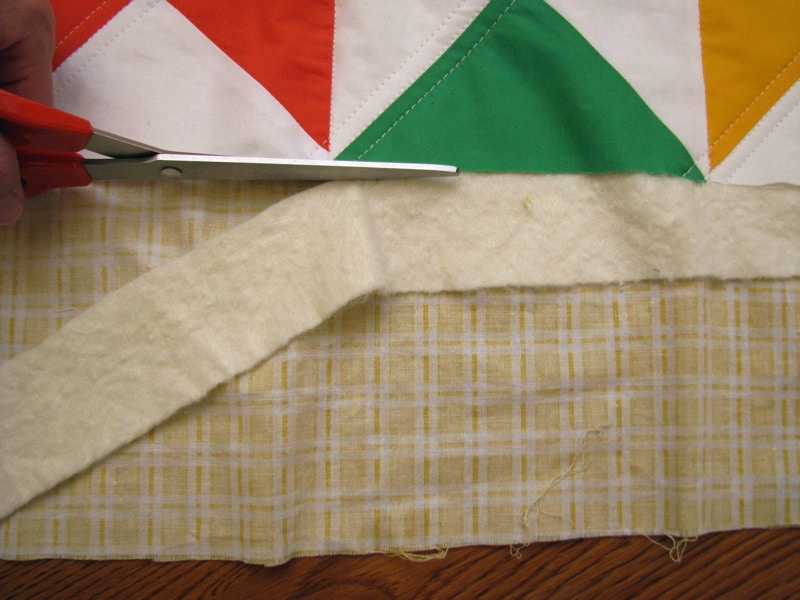
Step 2: Trim backing (the yellow plaid fabric in my photos) to ONE INCH all the way around the quilt.


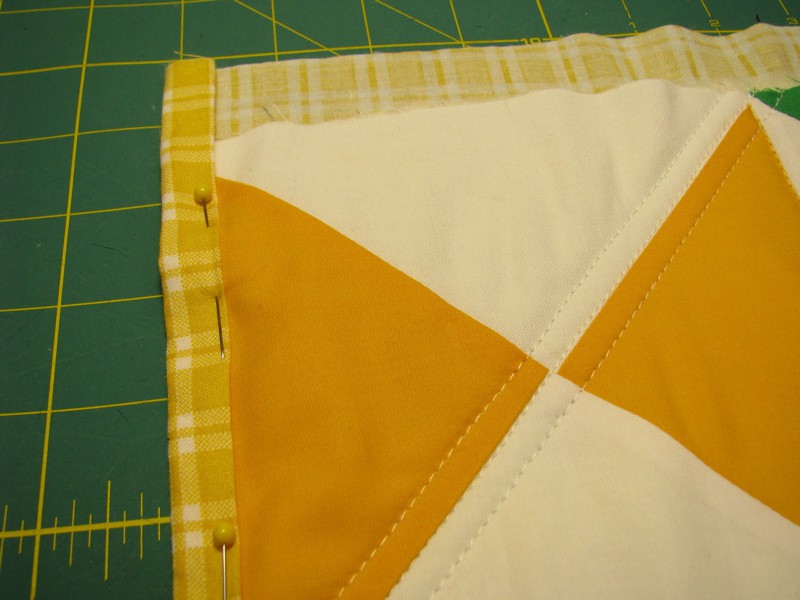
Step 3: Starting near a corner and working clockwise around the quilt, fold the backing in half so that its raw edge is lined up with the edge of the quilt top (it will now be 1/2″ wide).  In the photo below, I have folded the edge on the left:

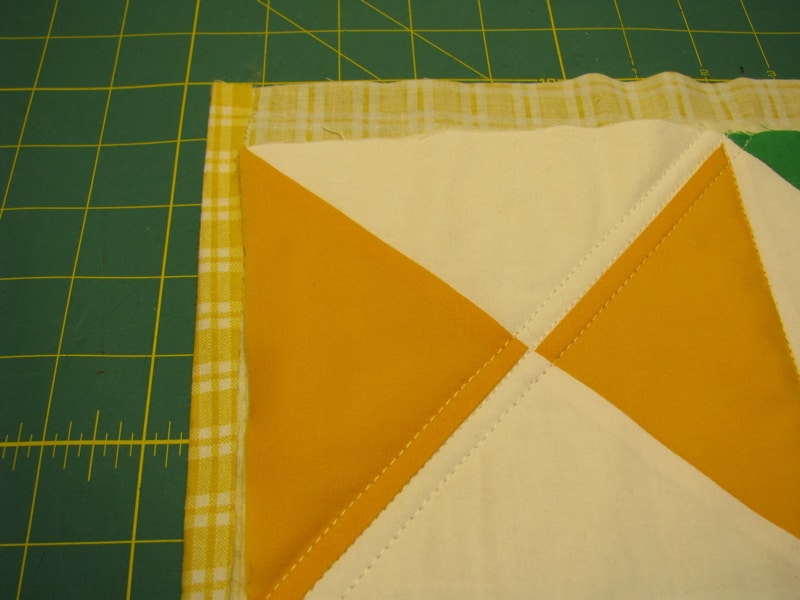
Step 4: Fold backing one more time along the edge of the quilt top so that it overlaps the quilt top by 1/2″.  Pin in place.

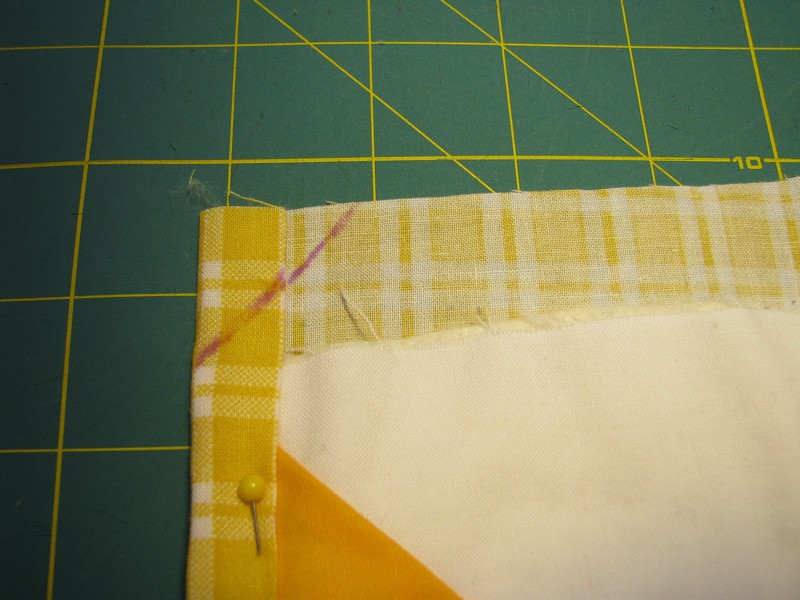
Step 5: Mark a diagonal line at the corner.  The base of the line should start where the corner of the quilt top is (under the backing) and end 1″ from the corner along the raw edge.

Step 6: Fold backing along line

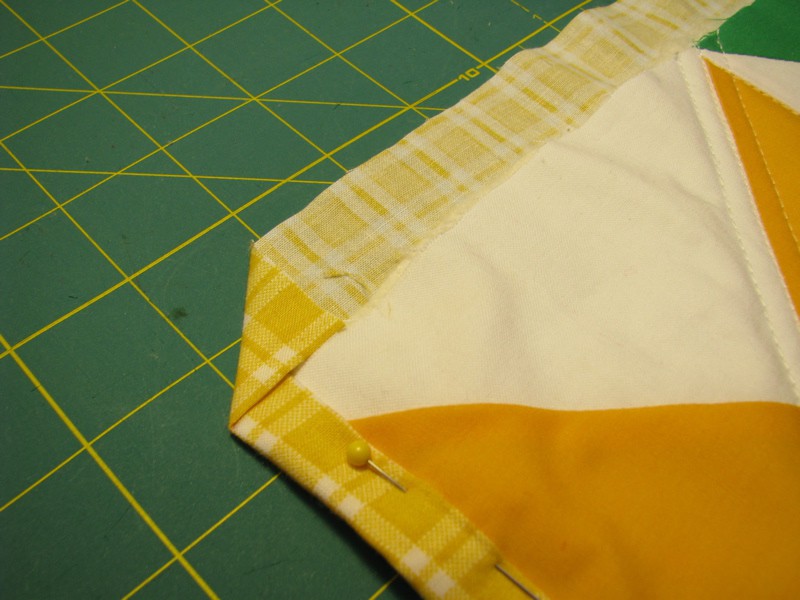
Step 7: Fold the backing in half again (I drew a line in the first photo with marker so you can see where) to line up raw edge with edge of quilt top.


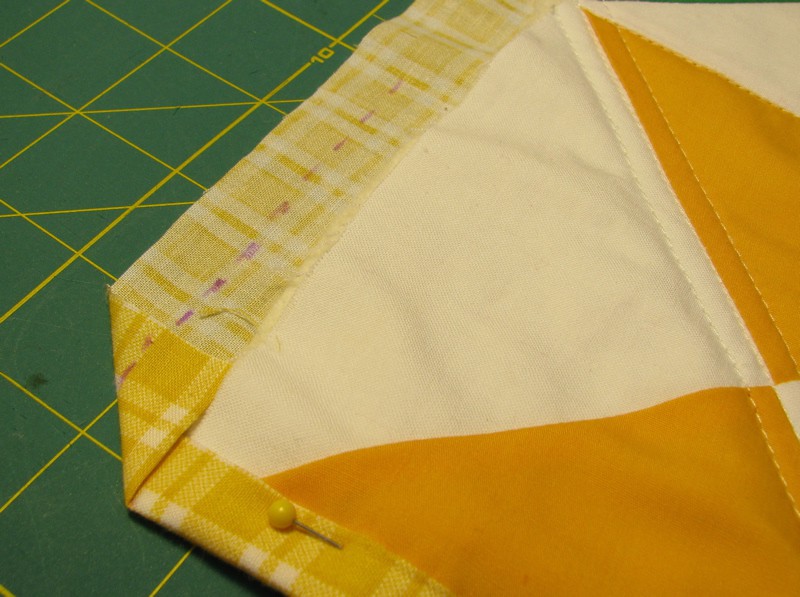
Step 8: Fold backing over again at the quilt top edge so that it again overlaps the quilt top by 1/2.” Repeat this method all the way around the quilt until you have the entire quilt backing folded and pinned.

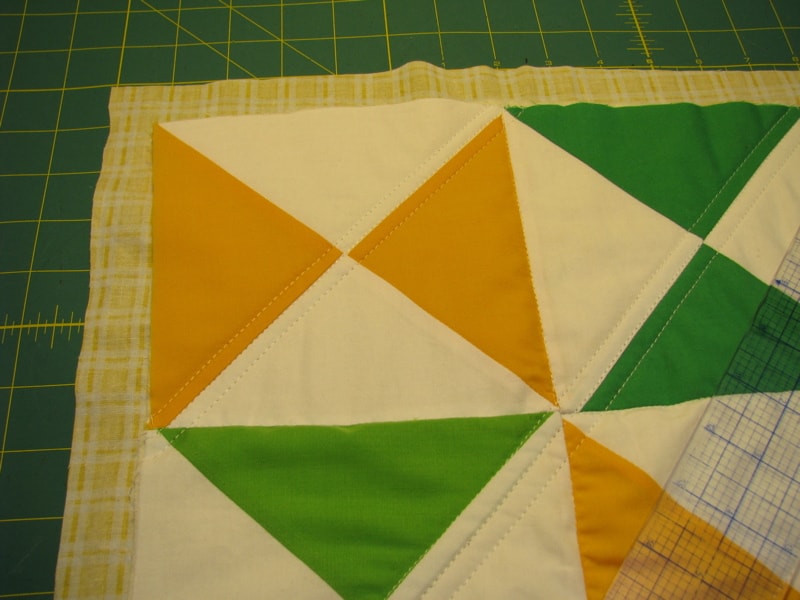
Step 9: Stitch close to edge of backing around entire quilt to finish.


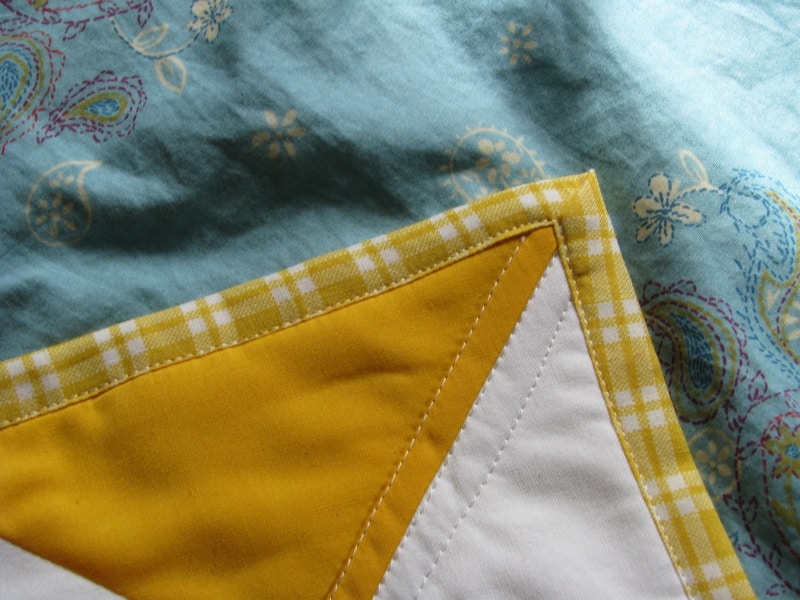
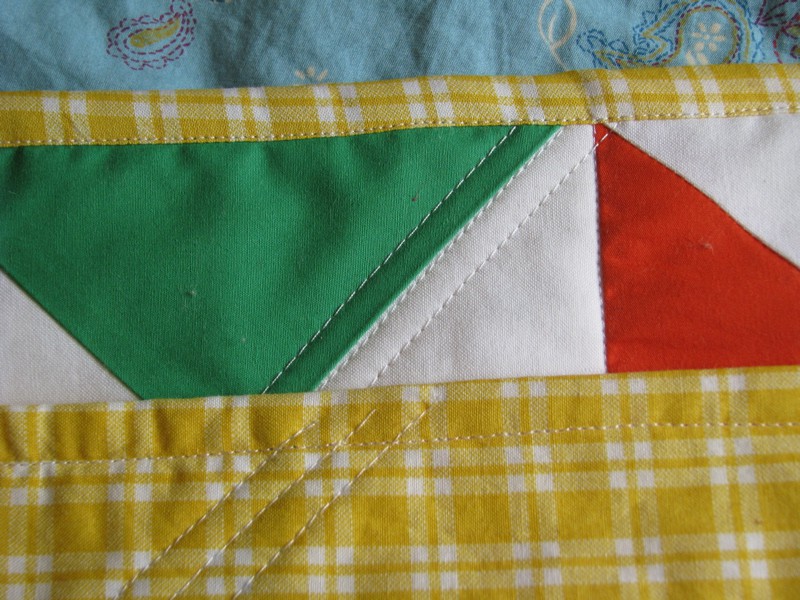
In the photo above, you can see that your quilting lines will be visible past the stitching for the binding since they go all the way to the edge of the quilt top. As long as my stitching blends in with the quilt backing, I don’t sweat this too much, but if you don’t like how this looks you can pull out those threads and knot them where you want them to end using a needle.

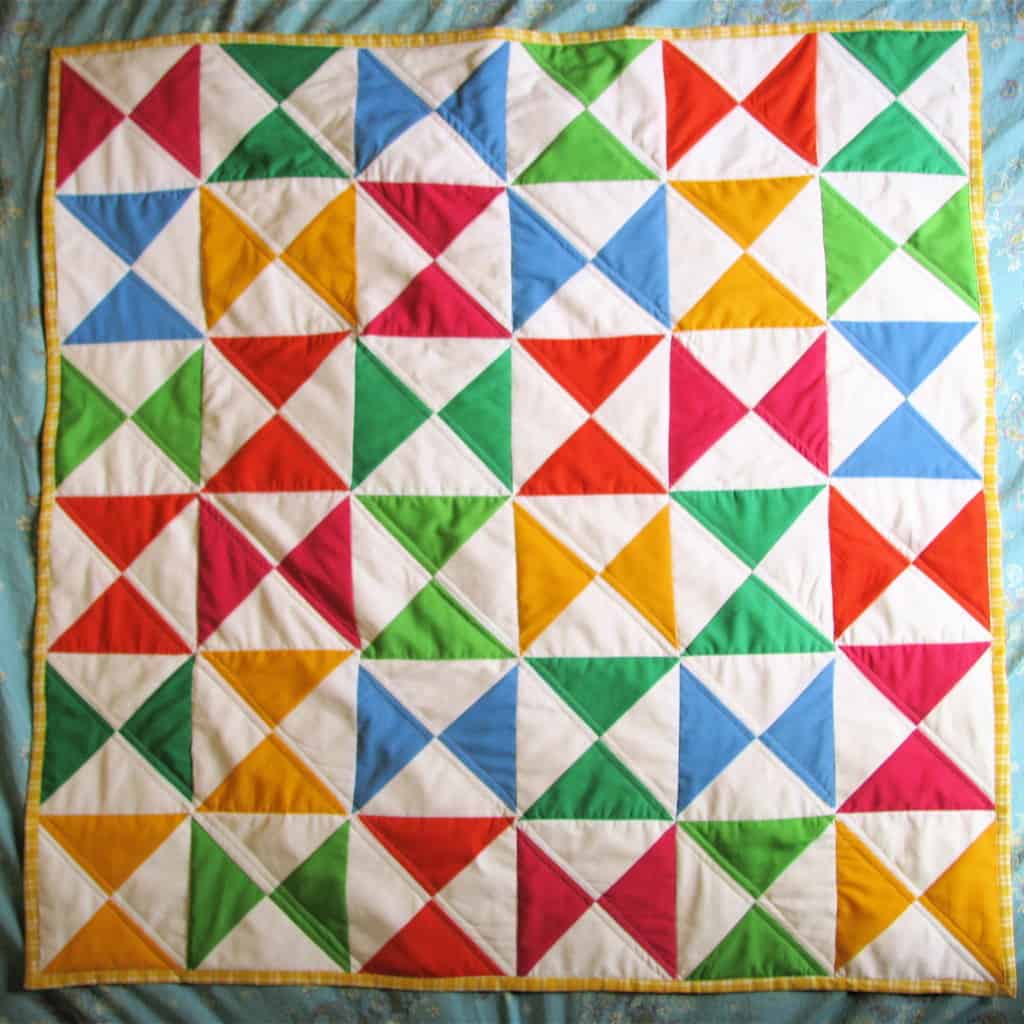
Ta-daaaah!  Finished quilt!

This is genius! Make sure to stop by Made by Rae for more exciting tutorials and patterns.

Love quilting? Make a quilted monogram, or try our Plus Sign Quilt Block Throw Pillow, or our more advanced Arrow Quilt Block Pillow. Follow us on Pinterest for more sewing inspiration.

by

55 Comments

Jess

COMPLETELY GENIUS! I'm notorious for making the front and back and quilting the whole thing together and then leaving it unfinished forever until i feel like binding it.

Reply
Lady Samantha

This is great! I always dreaded doing the binding. I'm working on a quilt right now. Can't wait to try this! Thank you 🙂

Reply
chichi-lover

Yes I've been doing this method for a few years now, so much easier to use your existing fabric, rather than have to cut more binding fabric, thereby saving fabric and effort. Well done!

Reply
Betsy C

After failing miserably at sewing bias tape, I was so excited to read about this method! I used it to finish up your Beginners Baby Blanket #3, without the curved edges. I’m new to sewing, but wanted a few handmade things to welcome my baby! Thank you so much!

Reply
Jan-Maree Warne

This looks so much easier than any other method I have seen before, others look so complicated to me. I need simple and easy.

Thanks for the tip I will use it on my next quilt.

Jan-Maree Warne

Reply
Ardis

What a great idea. Thanks for the tip. I just finished a tabletopper for Halloween and am going to try this method after I get it quilted.

Reply
sharmie

thanks for sharing this! i just used it to bind my first quilt and boy, was this helpful! surprisingly easy too. cheers.

Reply
Angie in SoCal

I do a lot of my charity quilts with this method, but usually square at the corners. Thanks for demonstrating how to do a mitred corner. Great alternative!

Reply
Llora

I did this technique with a queen size quilt. It took a little longer than a baby quilt, but it’s a wonderful way to finish off a quilt. I always hated the old fashioned way. It never looked good on back. Thanks!!!

Reply
Sandra J

What great tutorial. Fast and easy. Used it today to finish grandbaby birthday quilt. Sandra

Reply
Jill Walden

I rarely comment on websites but I have struggled with quilt binding for years. I just used your method and it came out fantastic! I never had corners look so good. I don’t think I will ever go back to the traditional method!

Reply
Jennifer S

I was recently asked to finish a quilt with your method and I was not exactly sure how to do this. I know my MOM made a few quilts this way. You make it look really simple and I specially like the mitered corners.

Thanks for sharing.

Reply
Lynette Burnett

OMG! I am so happy to find this! I don’t have enough fabric left over to bind the quilt I’m working on and the store is out. I am going to use this method! You are a lifesaver! Thanks!

Reply
Candice

I was wondering if you have ever used this method with a cuddly fabric? not sure if it would slip too easily and be a pain….?

Reply
Melanie Fleming

This is a great tutorial. I’m hoping I have an inch around my current quilt because I forgot to buy binding fabric and I can’t get out right now. 🙂

Reply
Nicola

Great method and really easy to follow tutorial, I just used it to finsh an aplique baby book and it looks amazing

Reply
affordable care act

Hey there! Would you mind if I share your blog with my facebook group?
There’s a lot of people that I think would really enjoy your content. Please let me know. Thanks

Reply
the ramones t shirt

Greetings! My wife and I frequently publish guest articles or blog posts for other website owners
to help increase publicity to our work, as well
as provide wonderful articles to blog owners. It’s a win win situation! If you are interested feel free to contact me at: precious.chambers@gmail.com so we may talk further. Thankyou!

Reply
Gretchen

I just finished my first quilt and used your cheat for the binding–so wonderful!! I was thinking that it must be possible to do something like this, but of course it wasn’t covered in any quilting book I could find 🙂

Reply
Jude Spero

This is a great method to get a binding done quickly and I’ve used it several times in the past. The only thing I don’t like is having the quilting stitches going into the binding area on the back. If that could be avoided it would be perfection! Thanks for sharing this technique.

Reply
Colour block quilt | Wit Konijn

[…] Now for the final step: binding your quilt. As mentioned above I like to use the backing fabric for the binding, it’s a bit of a cheat and the finish isn’t as clean as using proper binding, but at this point I usually just want to get it done quickly (in this case the baby was already two weeks old, so the gift was long overdue!). I used a 1/2 inch fold over. Instructions for the can be found here: http://prudentbaby.com/2011/11/by-craft/the-easiest-cheat-for-binding-a-quilt/ […]

Reply
Carol

Hi, I am in the process of finishing a quilt for a lady that the Dr.s have given 20 days to live. I am not a quilter. (I do sew.) I know how I would feel about this…. I would like to do a really great job with this. Since she left an inch all around, I am imaging this was her intent. Thank You for this tut! It is important to me, because I believe it is important to her.

Reply
Pam

I have just finished my entire first quilt(without a machine) thanks to you. My mother kept telling me that once I finished the quilting that my aunt would do my binding because it was the hardest part. I was determined to do it myself and googled for an easy way to do it. Your link was the first to show and I’m so thankful because it allowed me to do it myself. I think my grandmothers might be smiling down on me today. 🙂

Reply
Sue

I sure wish I had found this tutorial before I trimmed up my quilt sandwich. But I will definitely use this method on my next project!

Reply
Yana Abdel Khalik

This is awesome. I can never cut anything straight and the idea of cutting binding and then attaching it always intimidated me (one of the reasons it took me so long to try a quilt), and though my first project is almost finished (have to do the binding), I’ll definitely try it next time.

Reply
Pam

I am basically a beginning quilter and I was wondering why you said that this is best for small or baby quilts. I am in the process of making a full size quilt and I love “simple.” Would there be a problem using it on a quilt that size? Thank you.

Reply
Fabric Heart

great tutorial. I am sure The Fabric Exchange has so many choices of fabric for this kind of project.,

Reply
Kate

Hi, just curious what this design of quilting is called? I just finished an hourglass quilt top and my heart sank when I remembered I needed to quilt it lol… I’m a total newbie. I love this quilting design with the hourglass blocks, but have no idea how I would go about doing this on my own quilt!

Reply
Millie

I was going to use the method – however i accidentally cut the backing – when trimming the batting – any suggestions on how to repair and use the baking or do i need to trim the backing and bind traditionally. I am very new to quilting and upset the i made this mistake.

Reply
Adrienne Lindsay

This is awesome! Just made my first baby quilt using a jelly roll. I was nervous but I had so much fun! I used this bonding method but did 3 1/2 or 4 1/2” around the edge for a wider binding. It turned out great! Thank you for the awesome tip. I’ll be back for patterns.

Reply
Kim

I did this for a quilt and after a few years of using and washing, the binding unraveled and disintegrated. I had to take the binding off and put on traditional binding. There is only two layers of fabric doing the fold over method which does not give enough protection against the wear and tear. I purposely do not use this method anymore unless it’s for a wall hanging that doesn’t get washed and handled.

Reply

Leave a Reply

Your email address will not be published. Required fields are marked *