Winter has been settling in quite nicely here in Southern California. As much as I love beach days in January, it’s also great to wake up to dark, looming clouds overhead. With rain on the brain, this tutorial from Jessica at Me Sew Crazy seems perfect for embracing these winter months. You’ll notice it’s more of a poncho-style raincoat too. So cute!
On Me Sew Crazy you can also find a tutorial for winter Sherpa Boot Cover Ups. The Bustle Backpack and Fishtail Circle Skirt are great back-to-school projects. If you’re looking for more sewing patterns and tutorials, check out the online search engine SewSet that Jessica and her husband created.
Now, let’s jump right in to learn How to Sew a Raincoat…
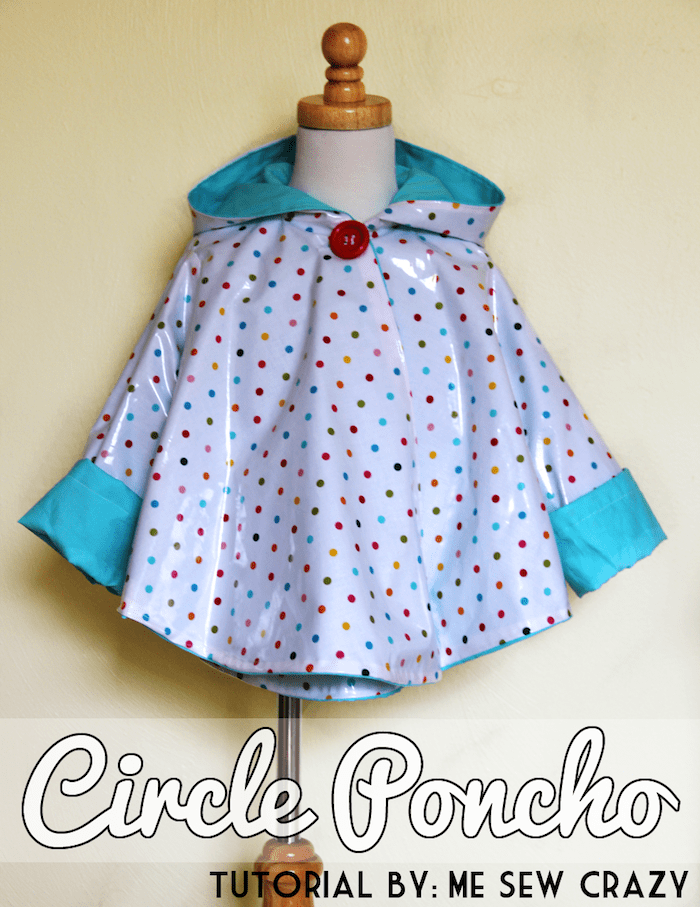
Looking for a quick raincoat for your little one? I happened to be on the market for two new raincoats since my kids outgrew their ones from a couple of years ago.
I stumbled across this adorable rainbow polka dot Sunny Skies fabric by Riley Blake in cotton laminate (my favorite), and fell head over heels…
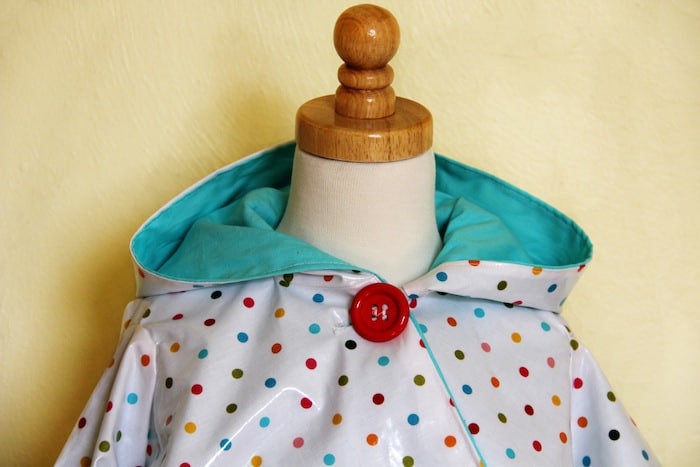
What is not to love?! Instead of a structured rain coat, this fun and happy fabric needed a swinging style. And I was more than happy to whip something up for the youngest daughter in the house.
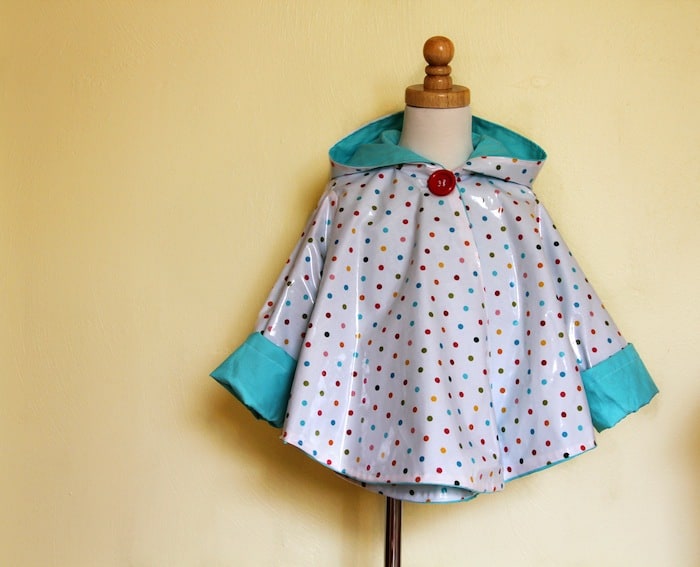
Making one is pretty simple. Don’t be scared off by working with laminates, it isn’t as hard as you think! I really love working with this versatile fabric. Let me show you what I did to make this poncho.
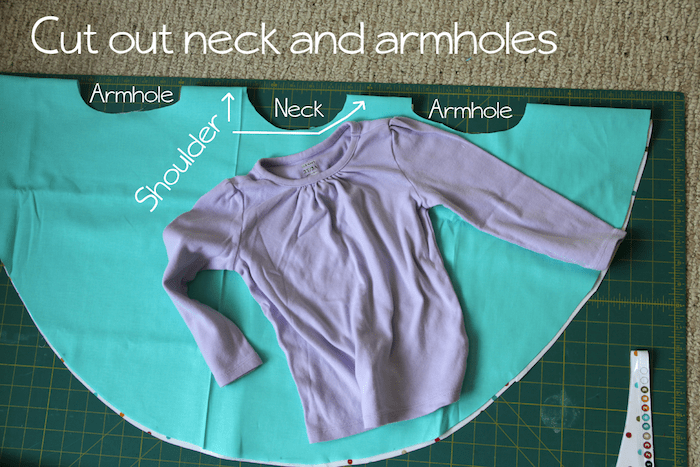
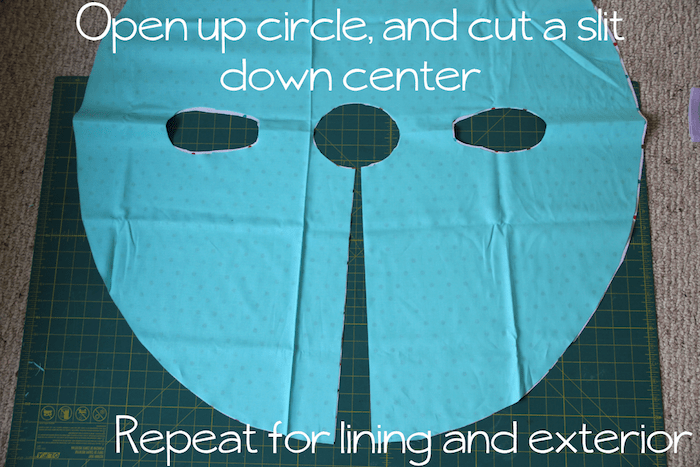
First off, I used 1.5 yards of laminate cotton for the exterior, and an additional 1.5 yards of regular cotton for the lining. Using a pre-existing T Shirt for sizing…
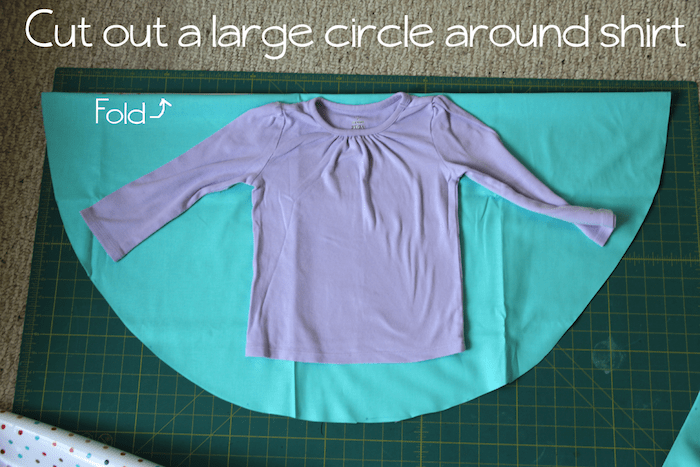
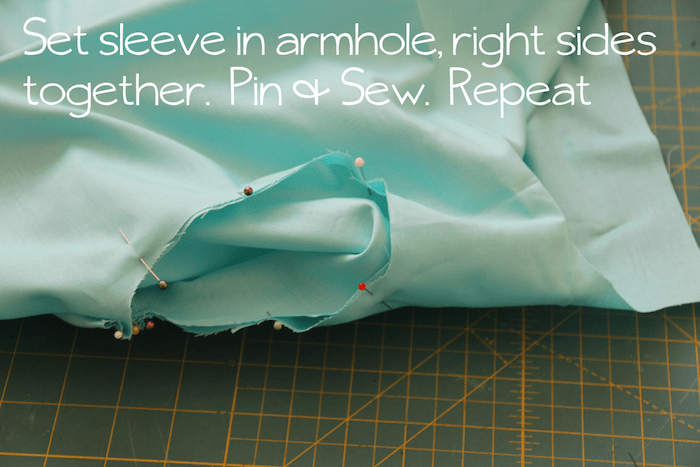
You can actually omit cutting the armholes if you don’t want to add sleeves to the poncho. I like sleeves for my kids so they can still wear their backpacks in the rainy weather.
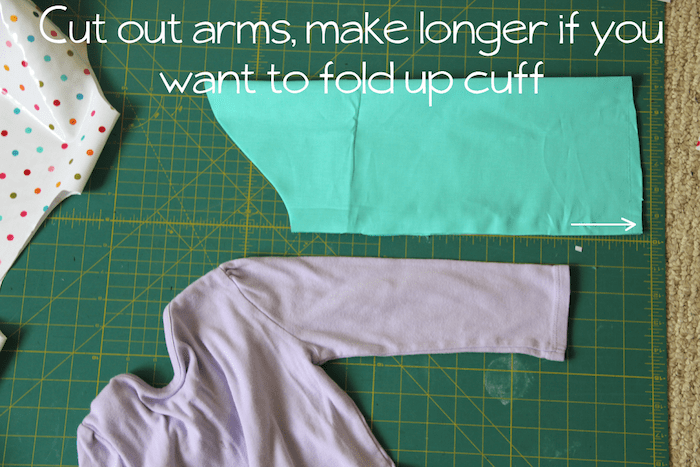
I always make my sleeves longer than necessary, lesson I have learned throughout the years to extend the life of your kids clothing!
The great thing when you are doing all of this with the laminate is that you are working with the wrong side constantly against the sewing machine, so you don’t need to worry about the ‘sticky’ factor.
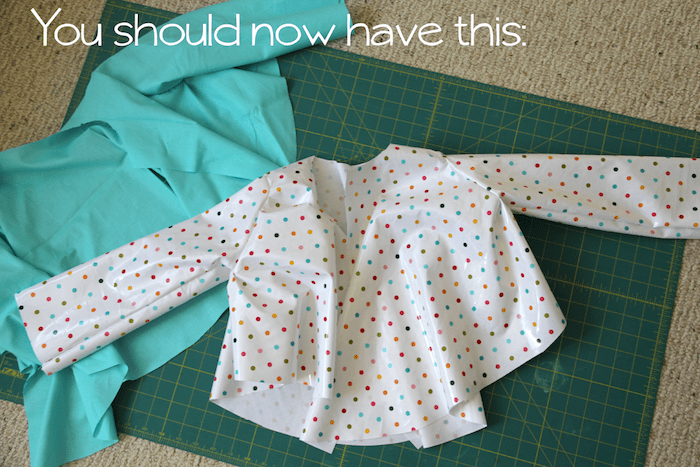
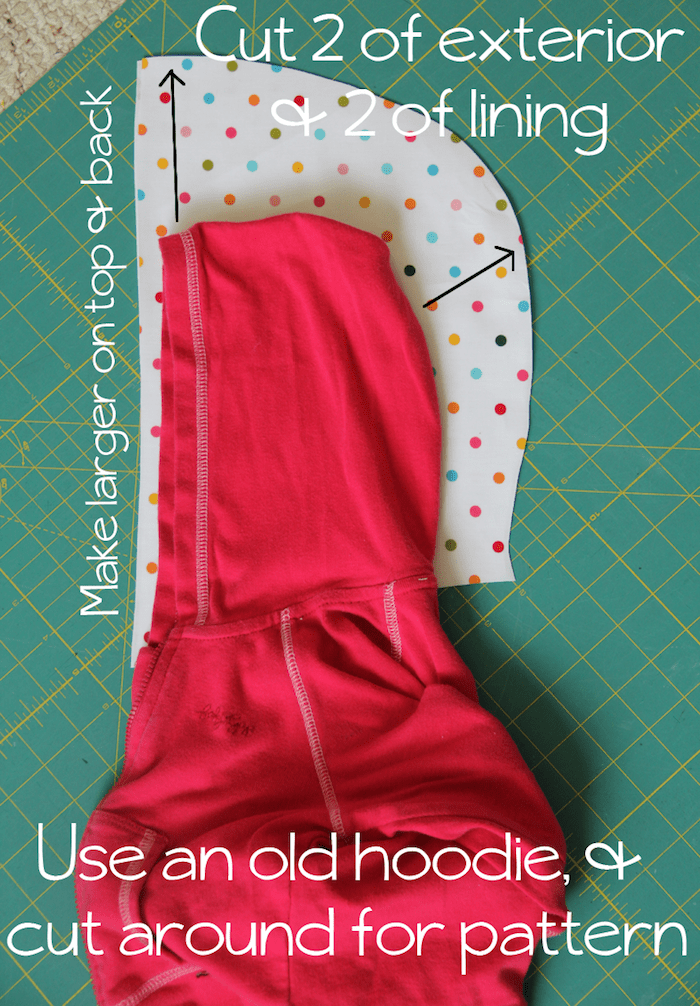
Now for the hood. Grab a pre-existing hooded sweatshirt for pattern sizing. Be sure to add extra room around the back and top of hoodie for pattern for a nice roomy hood.
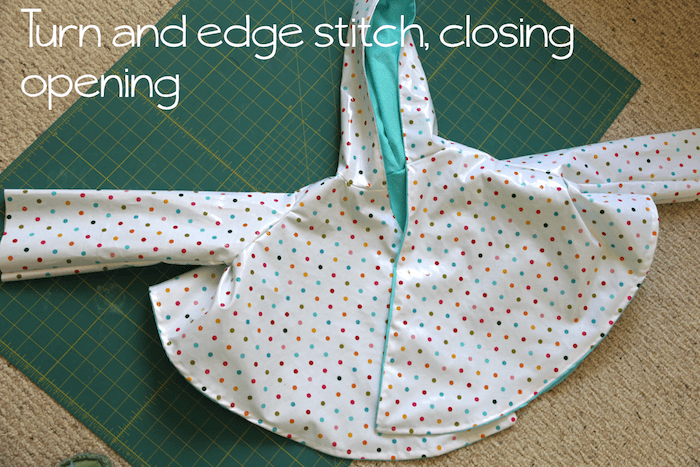
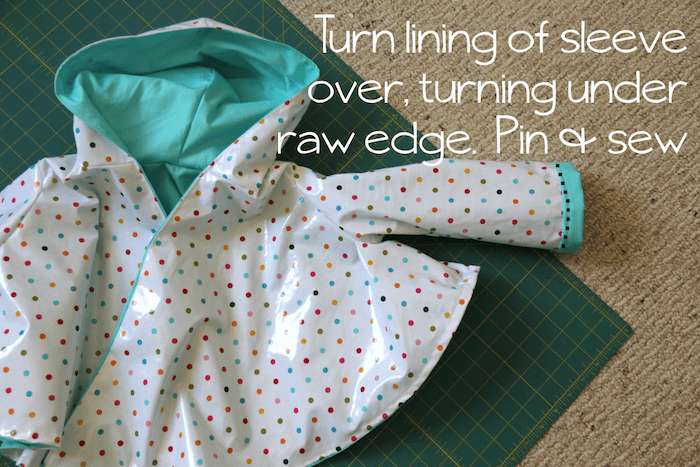
I like using this method for hemming the sleeves as it eliminates any tricky sewing with the laminate. Your machine is always on the cotton!
You will be thrilled with this poncho, and it will last for a couple of years (which in kid life is an eternity). Cotton laminate can go in the washer and dryer, or better yet – just get wiped off. How stinking cool is that?! And with all of the absolutely fantastic designs coming out now in this fabulous fabric – you just have to try working with it for yourself!!!
Got some skills? Try sewing an inside back panel pocket so that the poncho can fold in on itself and turn into a bag you can carry around. You know you want to.





Thanks so much! Happy New Year to you both!
Cute! I’m going to make this for my son!
Perfect!!! Was just thinking about raincoats today and would love to make them. Thanks so much!
[…] tiny poncho rain coat for your wee one…could there be anything cuter? I doubt […]
Hello, I was just wondering if I could ask a total novice question. I am somewhat new to sewing but have attempted a few of your ideas with much success! I am absolutely loving this raincoat and am determined to give it a try. My question is with the sleeves. I am unfamiliar with making sleeves and noticed there is a very distinct looking wave to the way it is cut at the attachment point… Is there a link or template someone could direct me to that I could see how to do that? Otherwise can I just sort of eyeball what it looks like in the picture? Thank you, thank you!!
Hi Melinda- I usually just eyeball it in cases like this but you could also trace it from an existing garment. It’s fairly forgiving. Good Luck!
I would trace around a cup or saucer at the under arm. That will allow for a smooth curve that will be easy to sew and should fall well on the outside of the coat.
Forget that advise…I had a completely different coat in mind! So sorry!
[…] I was completely shocked at the astronomical prices of cute rain coats for kids, which is why this cute rain coat DIY from Prudent Baby was such a welcome find! This DIY is a bit more involved than the others […]
[…] was so excited when I saw this tutorial at Prudent Baby. It was two days before my son returns to school from his winter break and the weather forecast […]
[…] Spring will soon be here. Stave off those April showers with this adorable children’s raincoat. […]
excelente trabajo me gusto mucho. bien explicado. estoy facinada con los trabajos de esta pagina. muchos cariños desde argentina provincia de misiones.
hey there and thanks in your information ?
I’ve certainly picked up anything new from right here. I did alternatively expertise a few technical points the use of this website, as I experienced to reload the website lots of times previous to I may just get it to load correctly. I were wondering in case your web host is OK? Now not that I am complaining, but sluggish loading circumstances occasions will sometimes have an effect on your placement in google and can damage your high quality ranking if ads and marketing with Adwords. Anyway I am including this RSS to my email and could glance out for much extra of your respective intriguing content. Ensure that you update this once more soon..
Hi there,
I am a new in sewing raincoats and just looking for more detailed information how I could do it in the right way. I am wondering if it is necessary to put any glue or use specific material so as to stop water from the seams?
Many thanks in advance for your time and advice.
All the best,
Yani
Hi, great tutorial! I was wondering if you could give an estimate on how much yardage you used for this project. I’ve been itching to try a kid raincoat with 57″ Amy Butler laminated cotton, but the fabric is expensive and I don’t want to over estimate. Approximately what size garment did you make and how much fabric did you use? Thanks!
[…] Looking for a quick raincoat for your little one? I happened to be on the market for two new raincoats since my kids outgrew their ones from a couple of years ago. Read more… […]
[…] DIY […]
[…] DIY […]
Hi, I am a novice sewer and have only really sewn cotton fabics so far. Which stitch should I use when sewing laminate (or PVC) to cotton? I had a little practice and it seemed that the laminate was a bit stretchy, so the 2 pieces didn’t sew together evenly. It is hard o explain when I don’t have the sewing vocab!
Absolutely amazing. I love it!!!!
Great post.
Thanks for sharing.
C
visit me at http://punchik.com
[…] so cute! It is a great thing to do for your little girl – or even as a gift. The tutorial at prudentbaby.com is so detailed, with photos from the whole process. You have to check it […]
Could this pattern be used to make an adult sized version?
Hello- I have found some fabrics that I intend on using to make these for my daughters (making big enough for hopefully 2 springs worth, as the rain has already started, and my kids grow like weeds!!!!!!) My girls at wearing sizes 6/7 and 12. I am fairly new to sewing. I am assuming I am going to want a wider fabric, or perhaps doing this slightly differently and putting two pcs together placing the seam either down the back, or under the arms to get the circumference I want. About how much fabric would I want to get if I want this to hang down plenty for their sizes?
I would measure the template of there original clothes x2
[…] fabric can also be made into adorable autumn coats for small children. We especially love this circle poncho style jacket; the tutorial shows you that it is pretty easy to make; and we think it would look in both plain and patterned […]
So cute 🙂
Hi, his thick is the shower proof fabric? Could you use thicker than a shower curtain? Great poncho!
Do you think I could do the inside with a stretch knit? Also hoe big did you cut your arm holes so that they match up perfectly with the sleeves? Thanks!
Cut it the same no extra give as stretch fabric already gives. But use knit stitch to sew stretch lining And attach to outer fabric in normal stitch. It would still not make your coat stretch so might be pointless using the stretch knit although would add warmth
Also give the armholes extra ease by adding a few centimetres to them and add around 2-3cms each side of the sleeve pattern plus seam allowance
I sewed this up for my little one yesterday following the instructions & “eyeballing it” where information was missing. I have to say it looks great but the cut is just not functional for a babe that doesn’t walk.
[…] solely using online sources. Inspired by the rainy weekend and this super fun polka dot raincoat by Pretty Prudent, I decided to learn how to make a raincoat for my son – although I think I am going to go for […]
Thank you for posting this helpful tutorial. My questions: Is it necessary to line the cape? Would some kind of bias tape work for finishing the raw edges?
You can overlock the seams but by lining the coat you get the perfect cuff for sleeves and you won’t see exposed seams in the hood. Plus lining the coat saves time on serging the seams