Pretty Potholder: Part 2


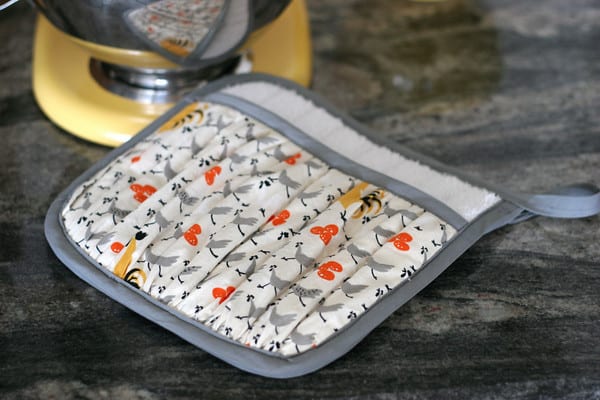
A potholder! What a satisfying little project. When I saw Jaime’s Pretty Potholders Tutorial last week, I knew I had to try it. Oddly, we are very particular about our potholders here, but with a few tweaks I was able to recreate our favorite style… and with a ruffle of beautiful fabric!

Check out this version of Jaime’s Pretty Potholder after the jump.
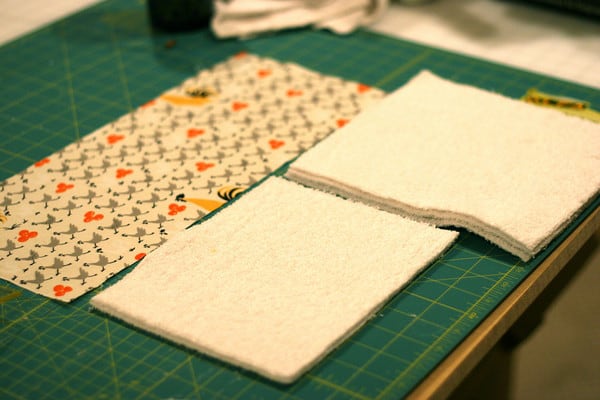
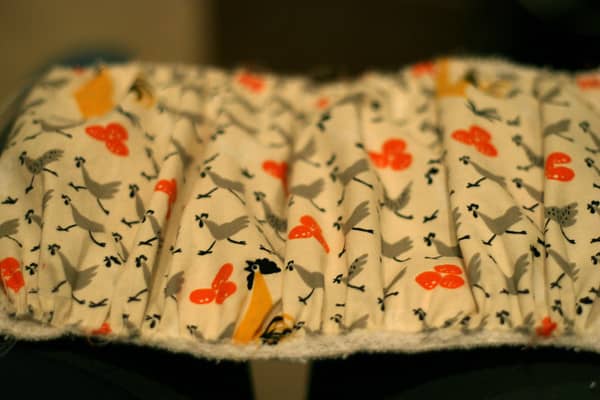
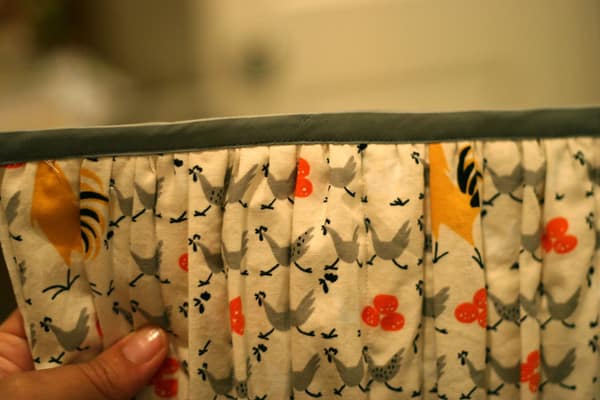
1. I used an old cotton towel as my batting, as well as, the outer surface for all layers minus the outer pocket. Cut 3 layers of 9″x9″ towel, 2 layers of 9″x7″ towel and 1 18’x7″ piece of fabric. If you want to skip the ruffle effect, cut it 9″x7″. This is Alexander Henry Farmdale Crossing in Oatmeal, which is sold out, but they still have the even cuter pink!

2. Baste stitch (your longest stitch, usually a 5) along the very top and bottom edge of your fabric rectangle.

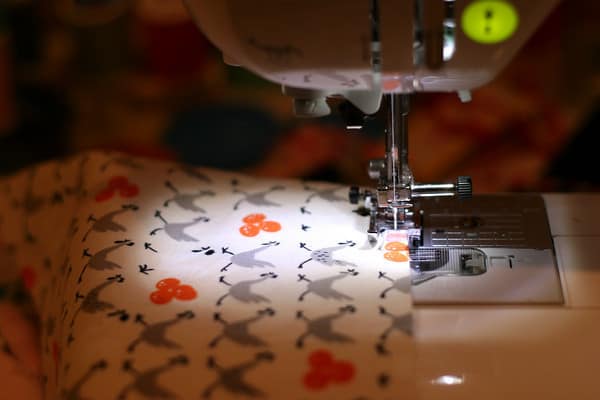
3. Gather the fabric down to 9″ wide by pulling on the back thread on one side and scrunching the fabric.

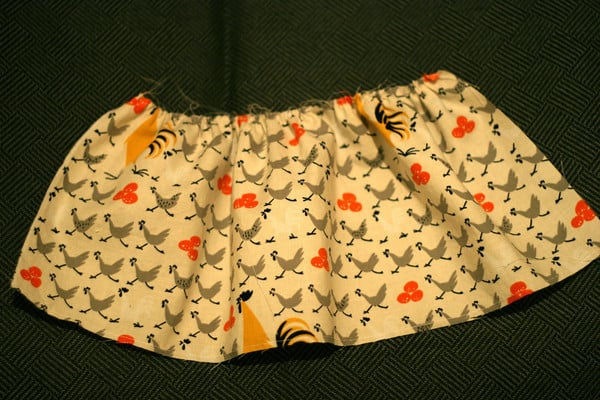
4. Repeat on bottom. Tie threads together at all 4 corners to secure ruffle.

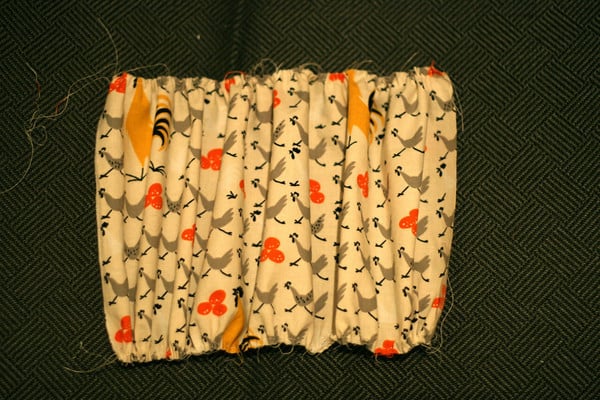
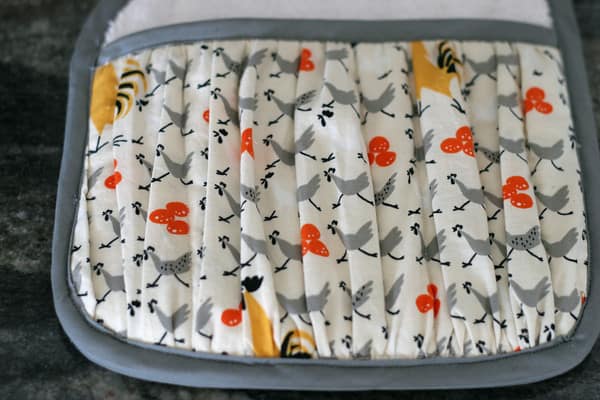
5. Pin ruffle to top of double layer of 9″x7″ towel.

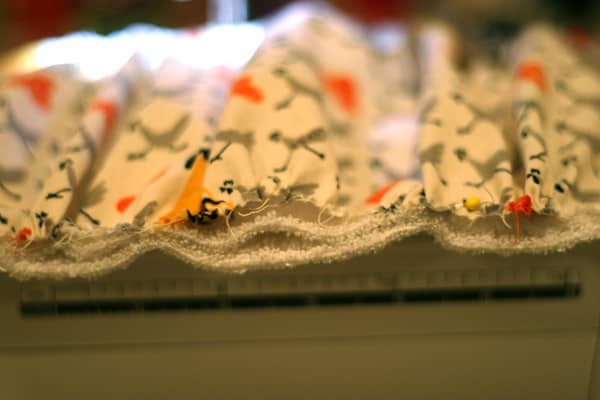
6. Sew all 3 layers together all the way around 1/4″ from edge.

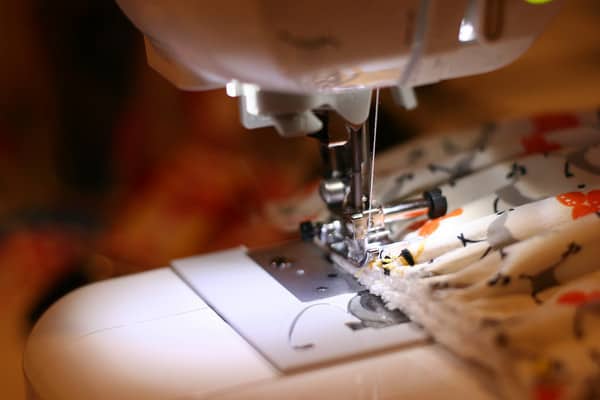
7. Start quilting the pocket by sewing straight lines down from top to bottom. I used my handy Stitch Guide Foot that came with my sewing machine for perfectly spaced 1″ lines.

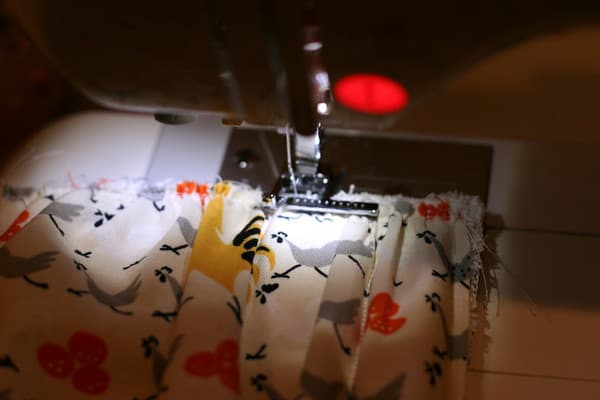
tip: try not to cross over large folds, create flat spaces to hide your stitches.

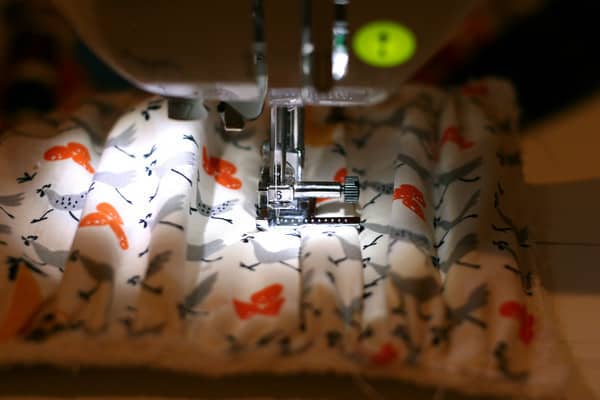
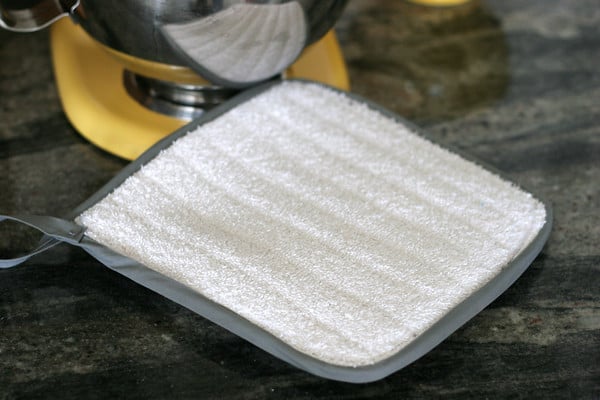
This is what the back looks like/

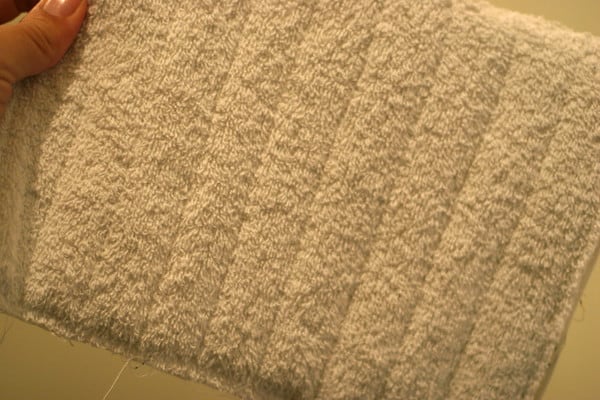
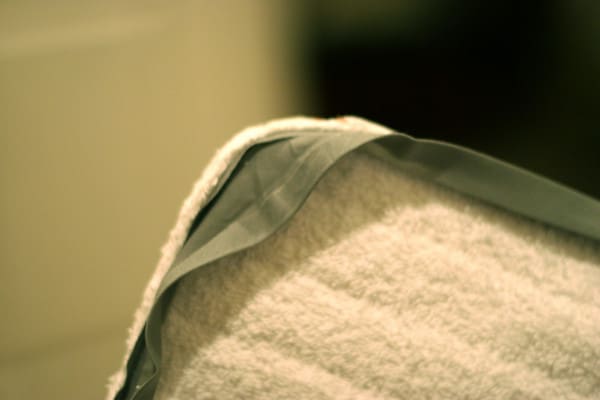
8. Along the top of the pocket, add 1/2″ double fold bias tape. Here is a refresher on How to Sew with Bias Tape.


Set pocket aside.

9. With 3 – 9″x9″ layers in a stack, sew 1/4″ from edge all the way around.

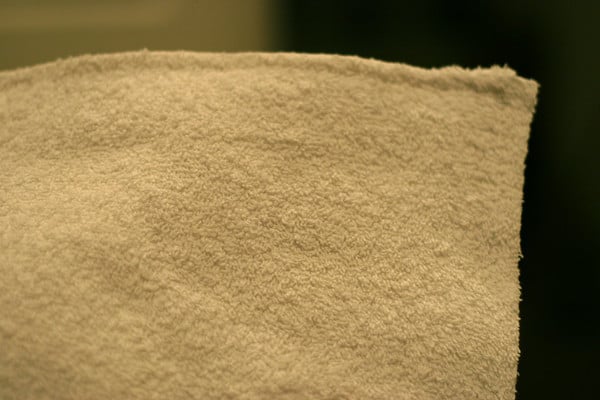
10. Quilt in straight lines 1″ apart.

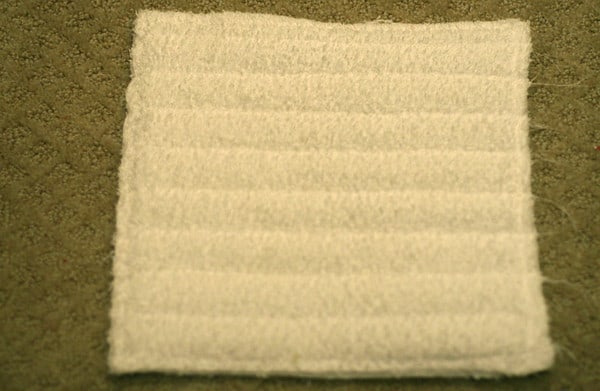
11. Pin pocket to main square.

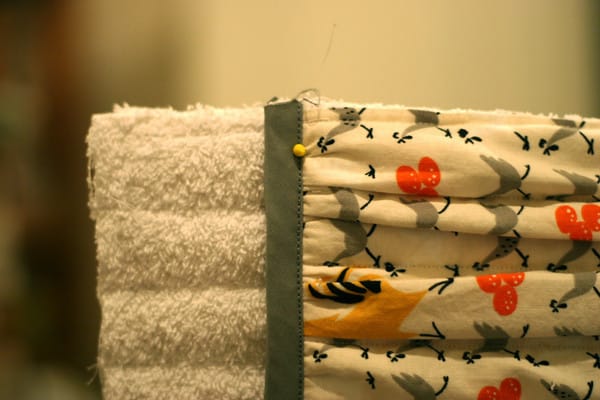
12. Turn over and draw round corners on all but top left corner (which is actually top right corner on front.)

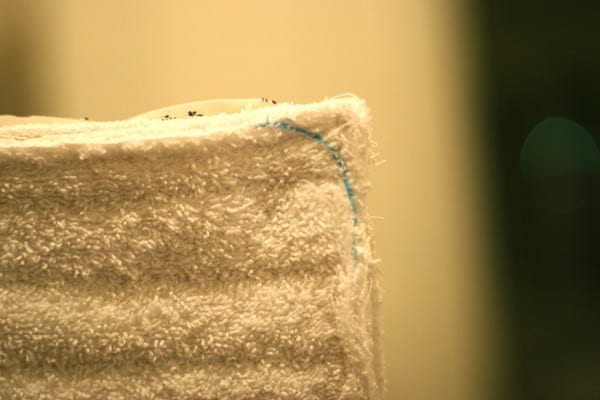
13. Starting on that straight corner and down left side, pin bias tape, following curved line as you hit the corners. When you get back to the start, leave a tail approx 4″ long.
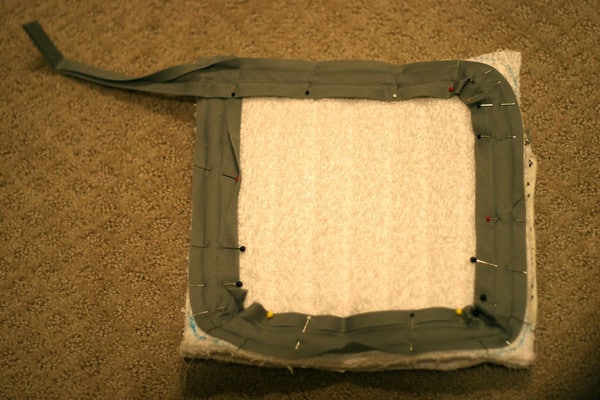
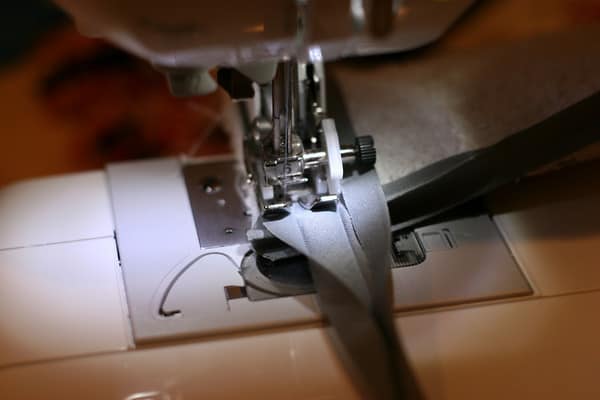
14. Here I switched to a walking foot because of the thickness and sewed around first fold.

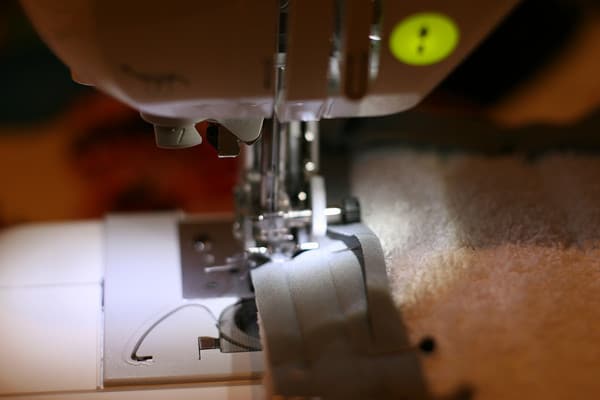
15. When you get all the way around, make sure your original tape is closed around the top edge and just sew until you meet the original tape edge.


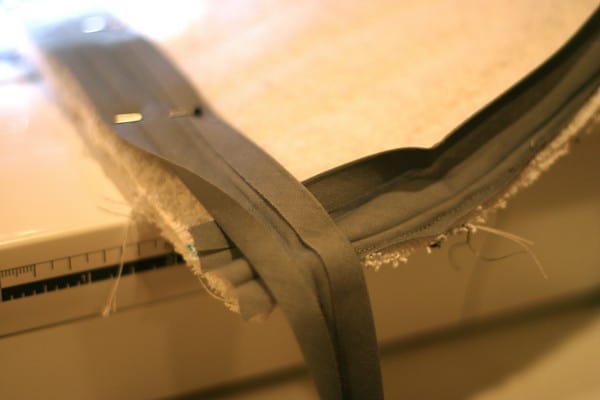
16. Use the bias tape edge as your guide and trim the rounded corners and any uneven edges.

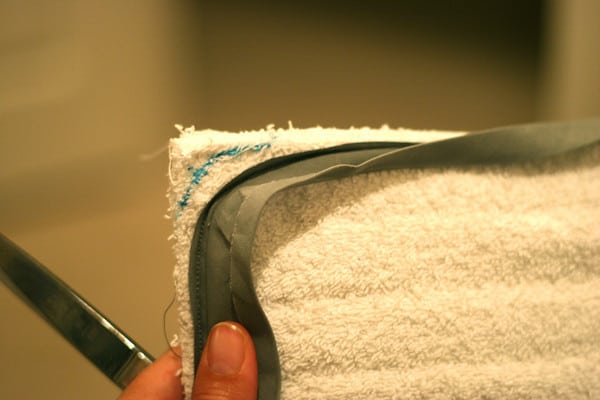
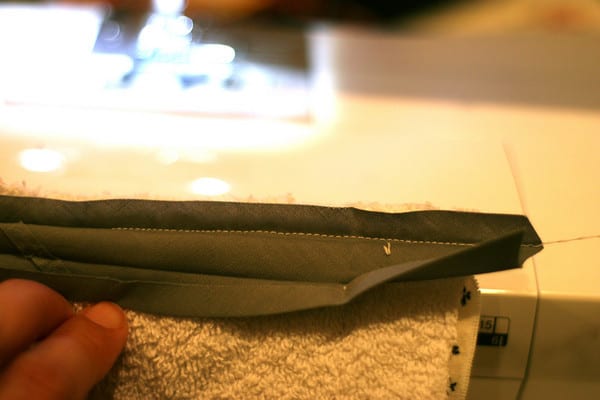
17. Fold bias tape up and around front of potholder and sew in place starting with the top right (not tail) end.

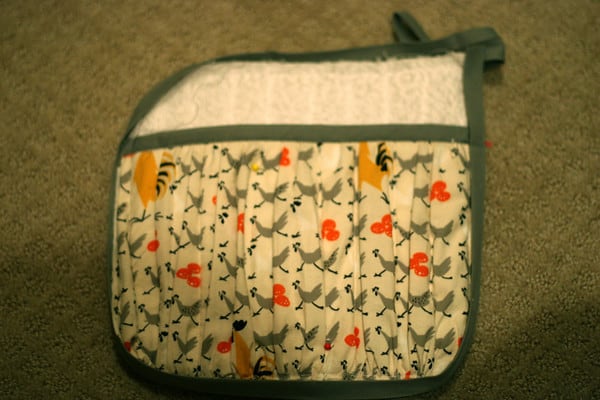
18. When you get to the end, keep sewing until the end of the tail.


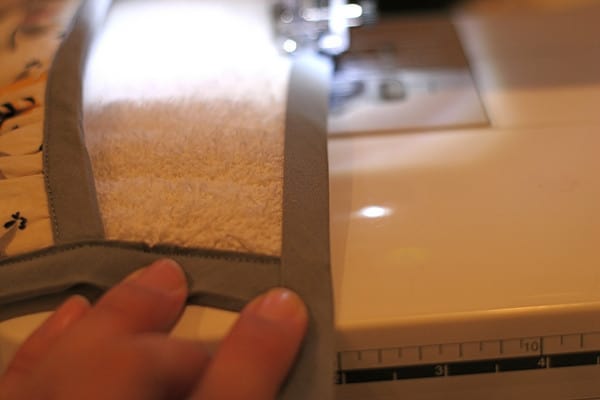
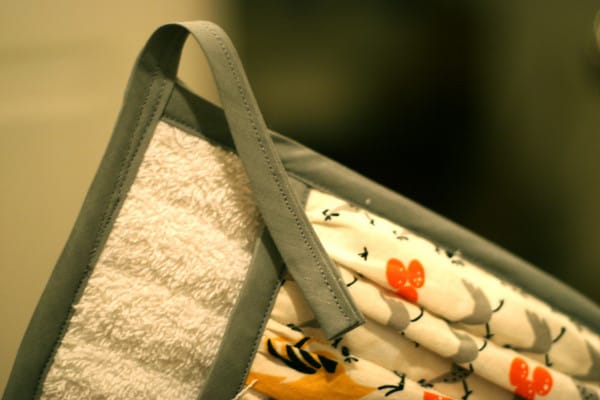
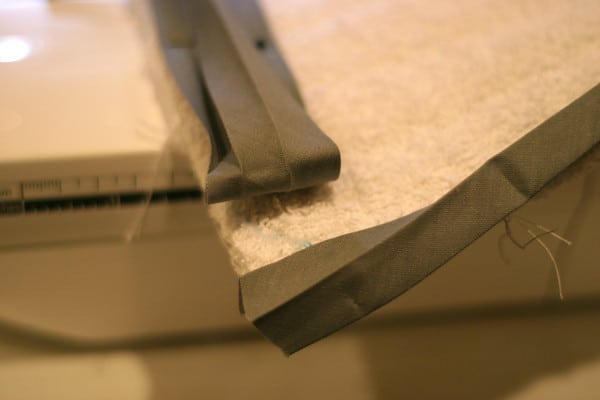
19. Loop the tail into a well… loop and secure with several forward and backward stitches.

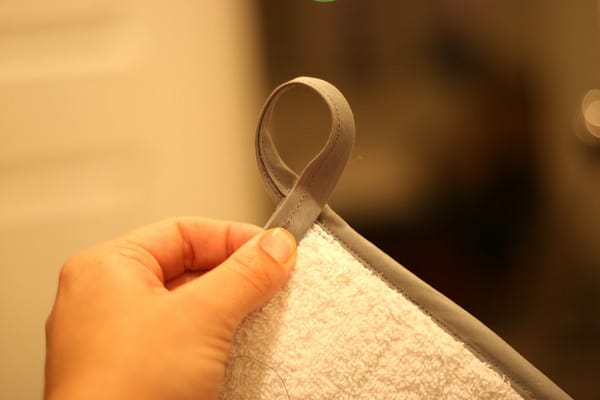
20. And your done! Highly functional potholders, just like Daddy likes, but with a little style, just like mommy likes. It’s all about compromise they say. Clare just says “it’s ugly because the ribbon is gray.”


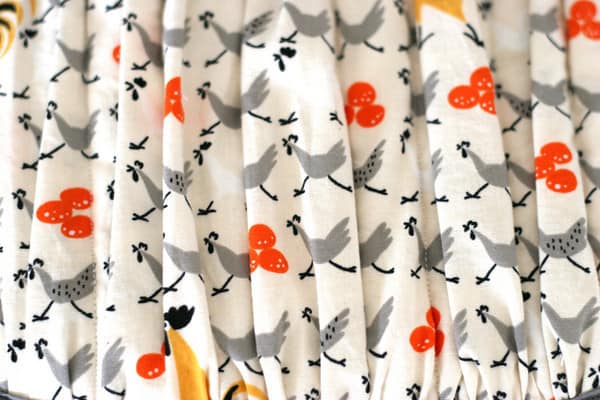
So, what do you think? Are you inspired to replace those grundgy potholders? Remember to enter your potholder into the SEWING MACHINE DOUBLE DOWN CONTEST for your chance to win a new Brother Sewing Machine!

by

33 Comments

Tammi

OMG…I love, love, love this!!! It totally rocks. I know what I'll be making tomorrow…thanks for sharing.

Tammi xx

Reply
Jennifer

Yeah…I'm embarrassed to say that my potholders need replacing! thanks for another great project πŸ™‚

Jennifer

Reply
Tonya Lynn

Oh my I love these! We have a huge family Christmas shindig each year which requires a small gift for about 40 people – I'm going to be starting these very soon as they seem fairly simple and easy to crank out assembly line style.

Reply
Jill @myheartisyoursblog

I never say this…. OMG! Look at all the ruffly goodness! I would slap a ruffle on anything…. No seriously I would. If I could put one of those ruffle butted onesies on my son I would… what? Is that wrong???

Reply
Jen

These are beautiful. Who knew that pot holders could be beautiful?? I've bookmarked these as I know I'm going to use it as part of a Christmas gift for next year (but I'm working on them early this time around!) Thanks for the great tutorial.

Reply
Courtney

I love these and put them on my list to add to my favorite things thursday post tomorrow! i cant wait to take making some of my own!

Reply
Mrs. Rogers

Those are great and you always have such super cute fabric! Totally have all the materials in my sewing room this moment…I think I here them screaming to be made into potholders while the kids are taking a nap this afternoon….

Reply
Fay

The chickens are so adorable. I never thought I could combine "chic" and "chicken" in the same sentence until now. Awesome fabric find!

Reply
Jan

I don't think it's at all odd to be particular about your potholders … I am too! Some are too big and thick (although they protect from heat) to get a good grip on a cookie sheet and others are too thin and flimsy … easy to get a grip, but no protection from heat.
I have some beautiful, barely used potholders, but always reach for the icky, stained ones that are flexible, easy to handle and safe. (Embarrassing when I have guests and I'm guessing that is why I receive pretty ones as gifts.) πŸ™‚
I will definitely be making a few of these beauties. I even have all supplies needed on hand! (Dang, no extra trip to the fabric store!)

Reply
Lucha Lovely

This may be the version I use for my super fabulous, I'm the best sister in the world, cooking themed present for my big sisters birthday present! This resolves my issue of making this a super awesomely cost effective gift as well.

Reply
Allie

Love love love this! That fabric is great and I love ruffles anywhere-especially on the unexpected things! πŸ™‚ Great work!!

Reply
Kate

I wish I could figure out how to sew straighter lines. I would love to sew a gazillion potholders (I cook so often mine are always in the wash).

Reply
Mimi

Thank you for sharing. This is something that I can do especially with your step-by-step photos and instructions! These would be perfect gifts or for a bazaar!!

Reply
Hilda

this is so pretty! I'm actually getting to the point where I seriously need to make some new potholders. Most of mine I got as handmedowns from my mom when I moved out. I've been married for 6.5 years now with 3 kids… you'd think I'd have my own pot holders by now πŸ˜‰

Reply
Precious

I seriously can't wait to try this! Just yesterday as my 4-year-old was helping me put the cold cookie sheet full of oatmeal cookie dough drops, I was thinking how "manly" those potholders looked. Now I know they just need some ruffles! Thanks for sharing!

Reply
Carol F

I'll be making some of these. They are just like, at least very similar, to my very favorite potholders that need to be retired. I like the terry cloth, and the use of an old towel is perfect! Thanks for the tutorial!

Reply
Elisabeth

My husband would love nothing more than for me to replace the beat up pot holders we've had since we were married (ten years ago yesterday! woohoo!) But sadly, I can't….well not supposed to start anything new until I finish my mending projects. I wonder if he'll notice me slipping in one or two or four pot holders in between the mending… πŸ˜‰

Reply
Emily.

I keep coming back and looking at this. It's awesome. I love the ruffled look on the pocket…it makes the chickens look like they're running fast. πŸ™‚

Reply
Mama Bear

Wow, this looks great! I think I may even like it better than the first version. My pot holders are all stained and gross so I can't wait to try this out!

Reply
Sarah

I LOVE this potholder! It's totally fab and pretty. However, I've had issues with sewing five layers of towel. I feel like I'm really pushing my machine a little too hard. Perhaps it's the towel I used, but on the next one, I'm going to try to cut the ruffle side towel short maybe about 1/2 inch on the three sides so that when it's all sewn together, my machine only needs to sew through the ruffle fabric (which will be attached to the towel by the vertical seams). I think that will work better for me and my machine πŸ™‚

Reply
Donna

I love this potholder because its the most unique one I’ve seen in a long time, and I love the colors to

Reply

Leave a Reply

Your email address will not be published. Required fields are marked *