


So it’s finally happened, despite all of my anti-baking protests… I’ve become addicted to decorating fancy sugar cookies. Jacinda is a true expert at this craft, as you can see here, here, here, and especially here.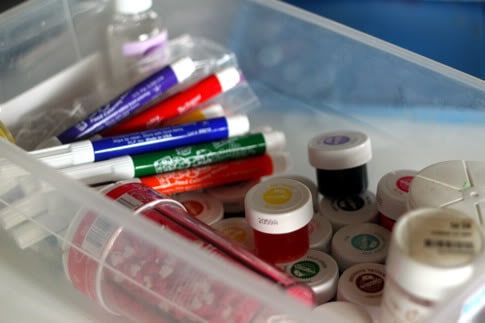
She once told me something I now understand to be so true: “Decorated sugar cookies are one of those things that people enjoy receiving – they love how cute they are and appreciate the hard work that went into them – but it’s actually like fifty times more work than they realize.” You sugar-cookie decorators know exactly what she’s talking about, right?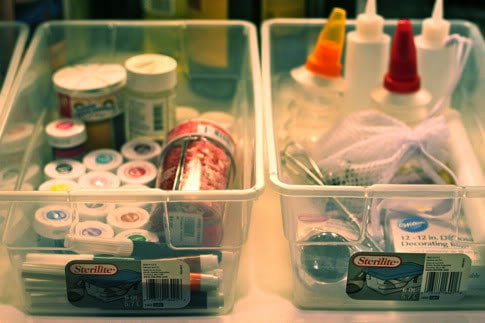
Once you get into the craft of cookie decorating, you find yourself collecting various supplies (decorating bags, tips, flower nails, couplers and of course, cookie cutters. After treating myself to a Sur La Table cookie-supply shopping spree armed with Jacinda’s list of Ten Tools for Decorating Sugar Cookies, I set down to get organized. Decorating tools and cookie cutters require specific maintenance – from removing the sticky tags (note: why do they put sticky price tag goo right onto cookie cutters???? Don’t they know we are going to put them on our food? There must be a better way!), to avoiding rust, to efficient storage and organization. 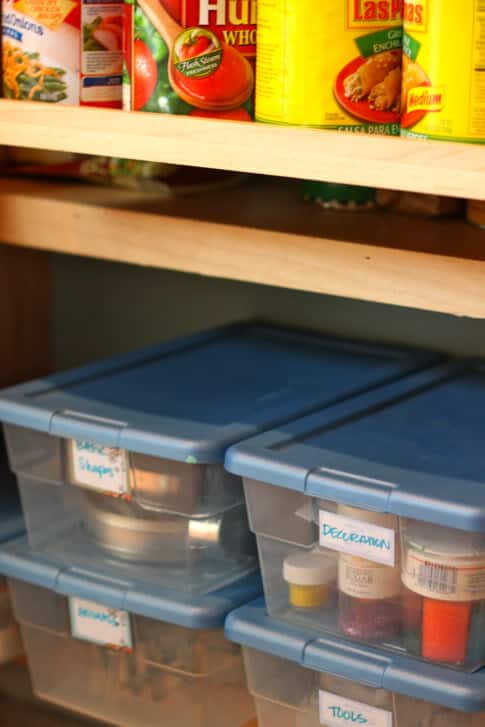
I’m going to share the details on how to care for cookie cutters and my take on Zen and the Art of Cookie Cutter Maintenance after the jump…
Let us know your cookie cutter maintenance tips in the comments, you just might win that gorgeous Kokka fat quarter!
Zen and the Art of Cookie Cutter Maintenance
First let’s go over How to Clean Cookie Cutters:
Most cookie cutters are made of tin. If they aren’t properly cleaned and stored, they will get rusty around the edges and you’ll end up with something you would never put near your food, like this: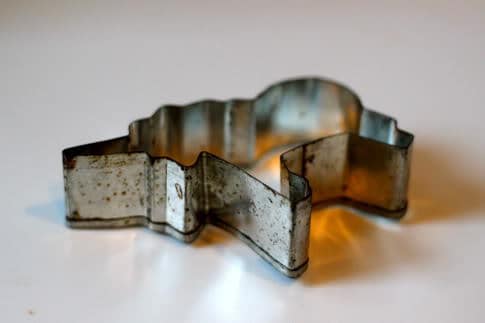
So let me show you the right way to clean cookie cutters.
First off, when you get home from the store, they often have a stupid sticky price tag on them, ugh, it makes me crazy. I even bought a box set, and inside the box, every cookie cutter had a sticky tag, blech: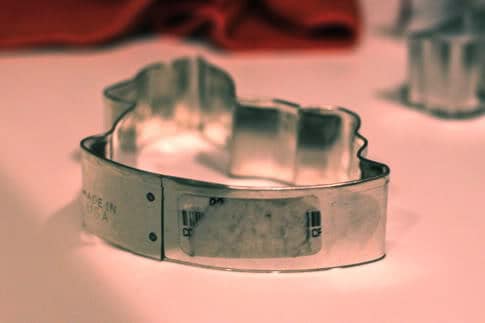
So we’ll need to remove that. I use Goo Gone.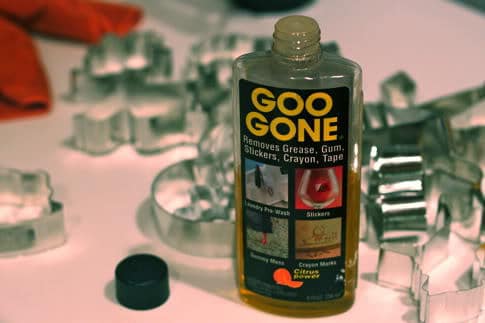
So douse the tag with a bit of goo gone and let it sit for a few seconds. Then you can just rub the tag right off. Sometimes it might take a few applications. Don’t add water, that doesn’t help. Sometimes the tag will all come off in one swoop, but often it’ll go about this far: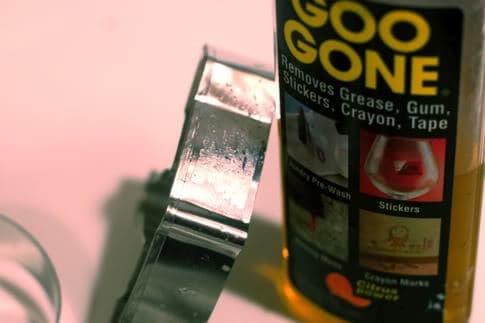
Then you’ll give it a second dose and be able to wipe the rest of the tag off. You don’t need a scrub brush or sponge (they will just get gunked up), but you may want to wear gloves, particularly if you are doing a lot of cookie cutters at once.
Now, you don’t want to eat goo gone, so immediately dunk the cookie cutter in a bowl of hot soapy water. Dawn works great to cut the grease away quickly. Give it a quick wipe with a sponge, rinse until the water is clean, then immediately dry the cookie cutter. You DO NOT WANT your cookie cutters to be wet for any amount of time, this invites rust. So dry that sucker before moving onto the next cookie cutter. Lay them on a dry towel as you move through your stash to let them further air dry. 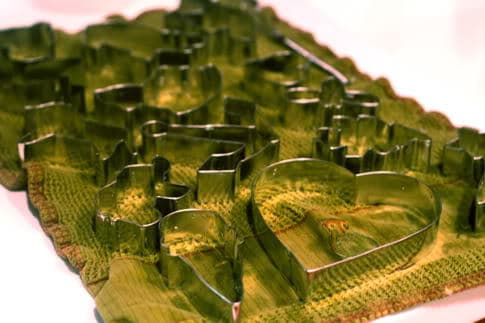
If you live in a moist environment, I would even suggest giving them a quick blow dry to ensure they are completely dry before you put them away. This same cleaning process goes for every time you use a cookie cutter. Never put them in the dishwasher. Moisture is the enemy of tin cookie cutters.
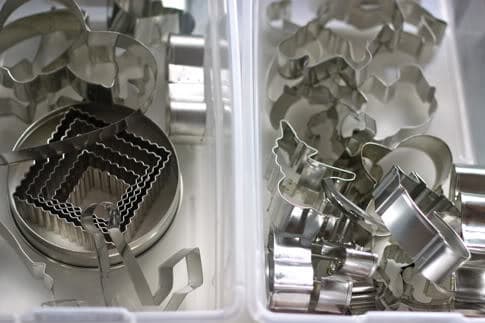
Now it is time to organize them (this is the zen part for me, it feels so good to get organized)! Depending on how many you have, you can go different ways, but if you learn to love baking and decorating cookies, your collection will grow quickly. I find that plastic shoe storage boxes are the perfect size to allow you to store them, but still be able to see them all and pick the one you want without having to empty the box.
I have a collection, but not a huge collection, so I split mine into three categories: Holiday, Animals, and Basic Shapes. Holiday holds Christmas, Hanukkah, Fourth of July, Halloween, etc. Animals is pretty self explanatory, but, I am about to outgrow the shoe box and I think I will be splitting it into Animals and Bugs (I have a lot of bug shaped cookie cutters, why is that?). Basic Shapes includes circles, squares, stars, anchors, etc. I debated whether the heart-shaped cookie cutters should be holiday (Valentines Day, right?) or basic shapes, but I decided that I will use them throughout the year, so they went into the shapes box. Is this too much detail, ha. I added a cute label to the front of each box: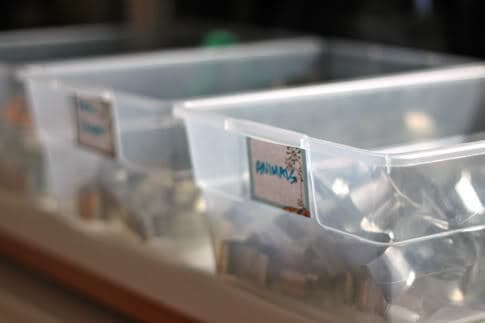
I also needed to move the decorating supplies out of the regular kitchen drawers to make space for things I use more often. So to that end, I created a box for “Tools” and a box for “Decoration.” 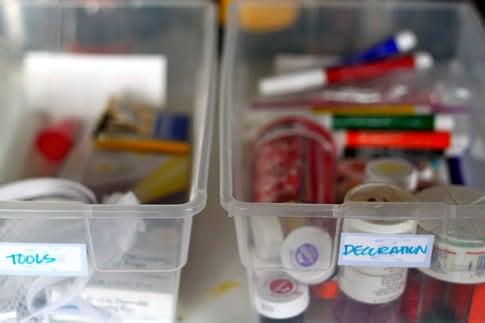
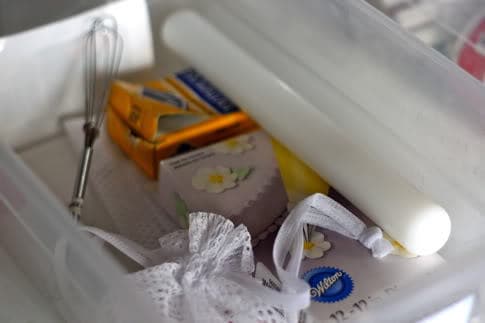
The Tools box includes:
Disposable Bags
Couplers
Toothpicks
Fondant Roller
Rolling Pin Guide Rings
Squeeze Bottles
etc. etc. It also includes decorating tips, which are so easily lost (you know you’ve put so many down the garbage disposal), so I store those in a mesh tip storage bag, which can also be used to put all your tips and couplers in when you throw them in the dishwasher.
The Decorating Box holds:
Gel Food Coloring
Edible Coloring Pens
A variety of sprinkles and sugars
Shimmer Dust
Cake Sparkles
A few random cupcake toppers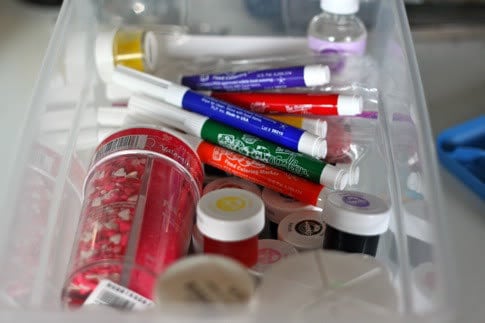
When I took these pictures, the boxes looked a little empty, because so much of my stash was in use: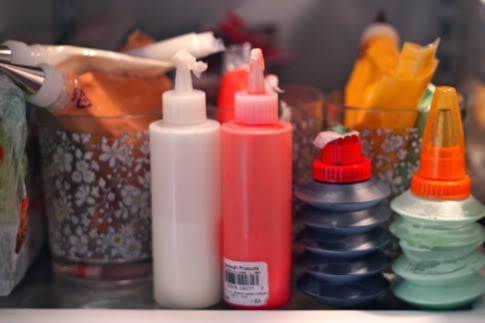
Looking at that makes me want one of these… and so it goes, the stash continues to grow…
The boxes fit perfectly at the bottom of our pantry, and because they are plastic shoe boxes they stack well: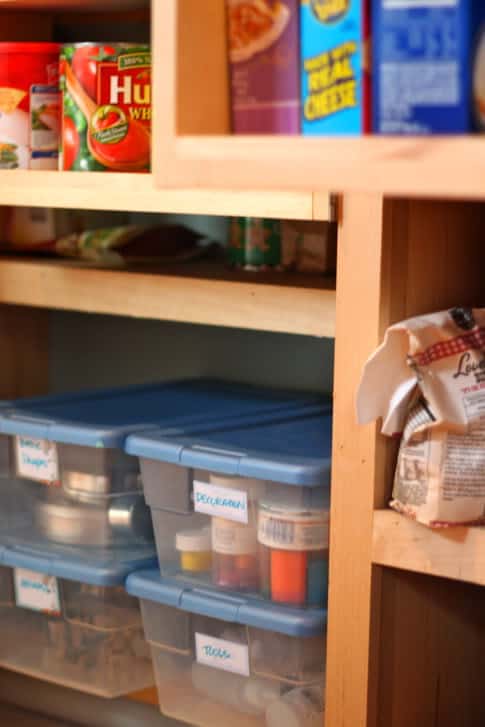
So, I feel more Zen. Do you have any cookie cutter maintenance tips for us?