Isn’t this one of the most stunning cakes you have ever seen? Leslie from The Hungry Housewife is the brains behind this beautiful and delicious masterpiece and today she is going to show you how to make your own. When I spotted this bit of sweet ombre magic on The Hungry Housewife I had to delve into all her many other delicious treats. Oh how I’d love to start my day with her Pumpkin Pie Oatmeal and Crescent Cinnamon Rolls and top it off with a piping cup of Nutella Hot Chocolate (before the unbearable summer heat kicks in).
Keep reading for the Blue Ombre Petal Cake Tutorial after the jump…
Hi all you beautiful Prudent Baby readers.
My name is Leslie Green, also know as The Hungry Housewife.
When the lovely ladies here asked me to share my cake with you, I jumped at the opportunity! Life is all about sharing what you know with others, right?
Feel free to stop by my site when you have a spare second. I am all about family friendly meals!!
I made this beautiful cake for my sons 9th {sigh}Birthday.

Usually he gets a themed cake, like the soccer cake or the Sponge Bob cake, but I just was too busy this year to get all fancy for a more in-depth cake, so this is what he got. He thought it was cool, and that’s all that matters.

I posted a photo of it on Instagram (follow me at Hungryhousewife) and Facebook and everyone loved it. I got emails requesting a tutorial and y’all know I aim to please. Pretty sure I got all the tutorial bases covered, a video, on the cake and just icing. I hope you all find it useful! Petal Cake Technique Video Tutorial
And if you are short on time and don’t feel like watching the video, here is a photo tutorial.
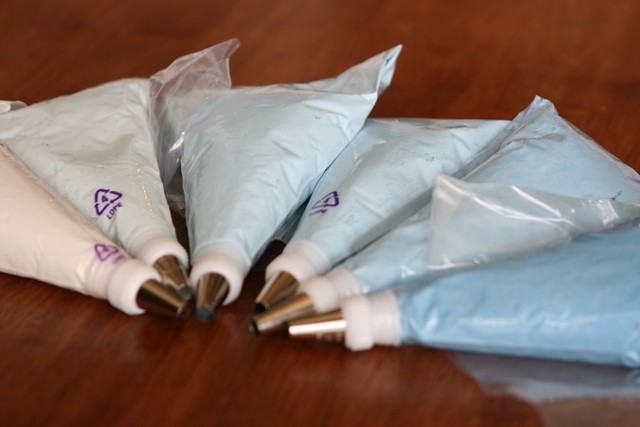
What you will need
- Crumb Coated Cake
- Pastry Bag
- #12 Tip
- Icing, your choice of color. Jacinda’s Evil Buttercream Decorator Icing recipe is a must try.
- Off-set spatula or small spoon
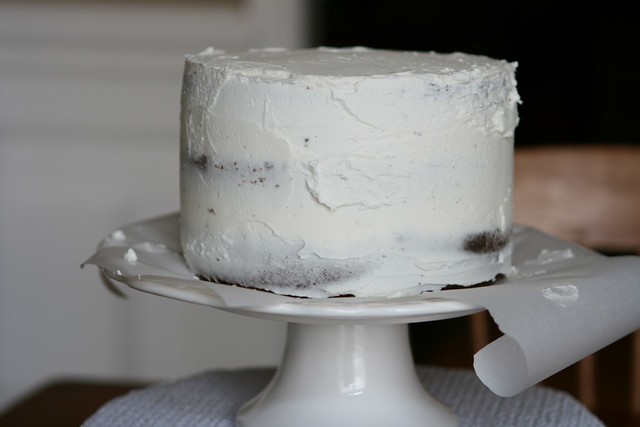
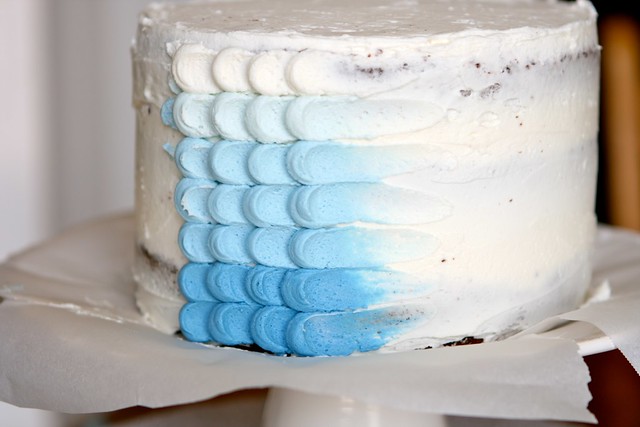
A messily crumb coated cake
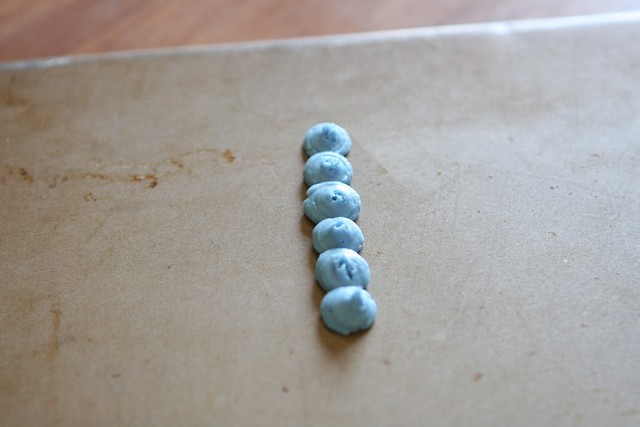
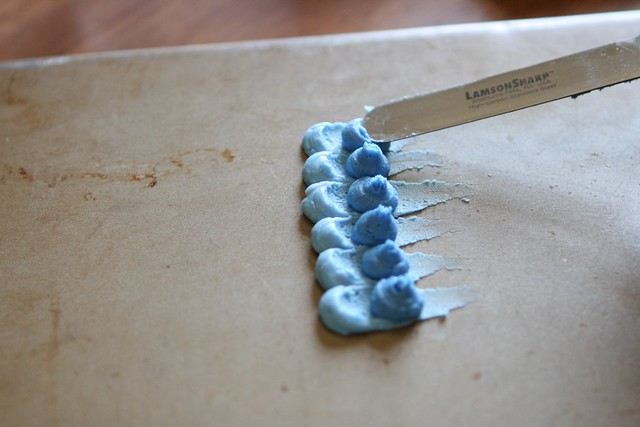
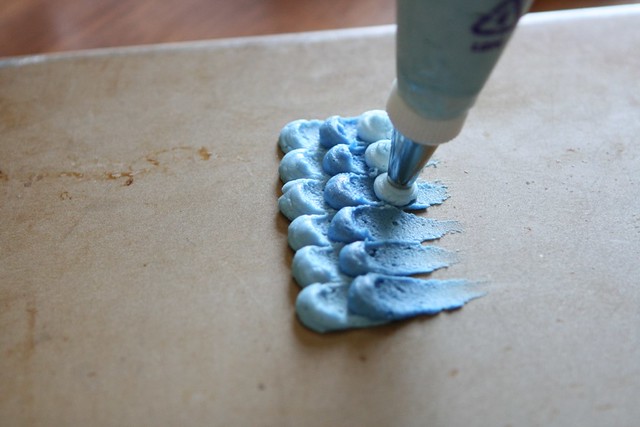
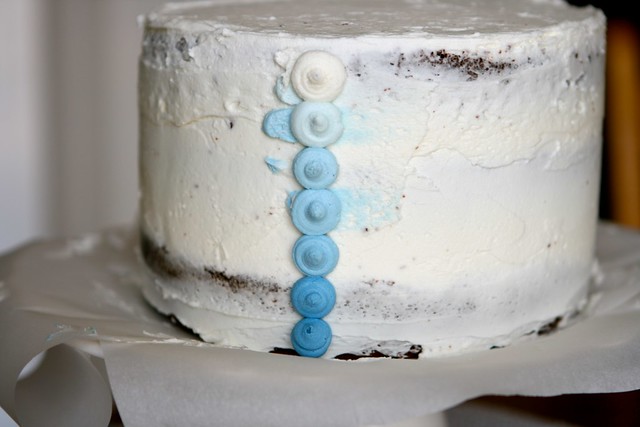
For the Ombre effect, take graduating color frosting with a #12 tip.
Pipe a vertical line of icing dots. If doing the Ombre effect, start with the lightest icing first.
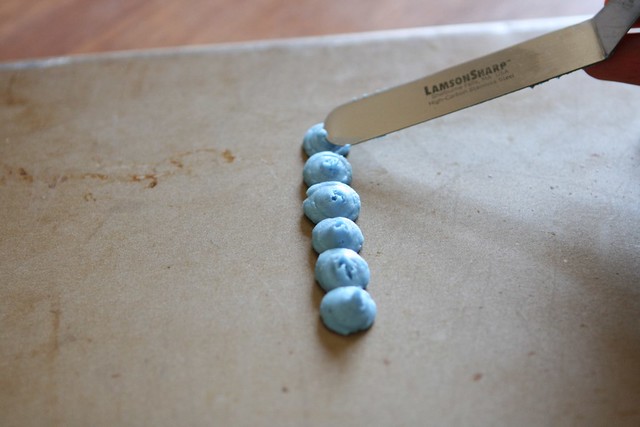
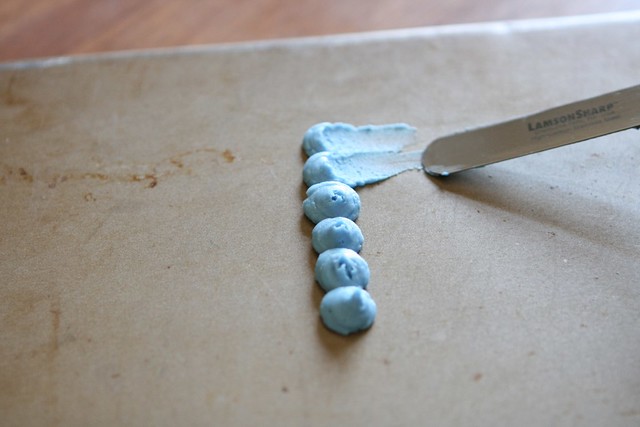
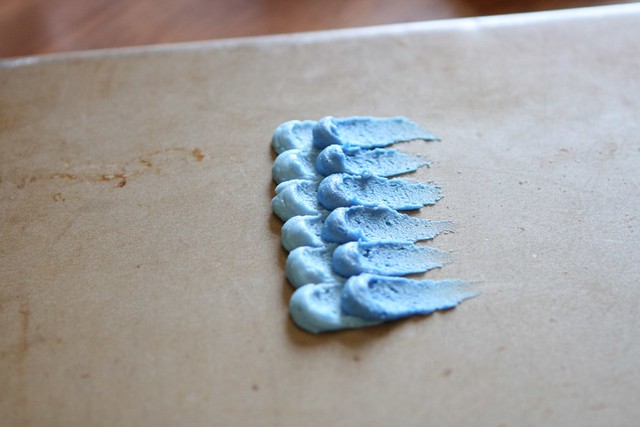
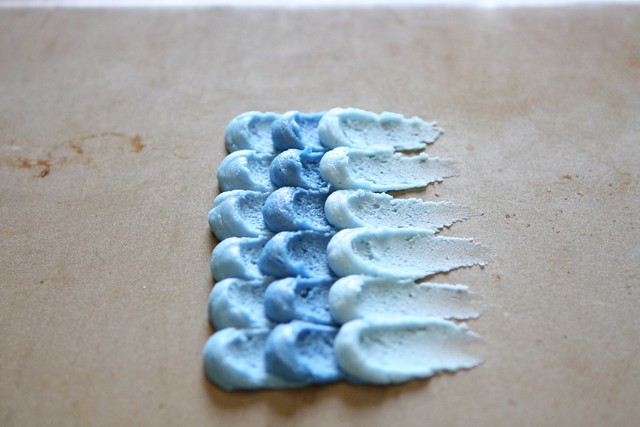
Place the off-set spatula in the middle of the dot, press down and drag.
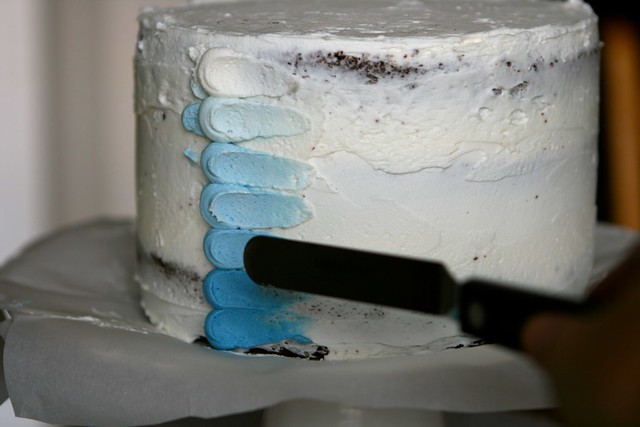
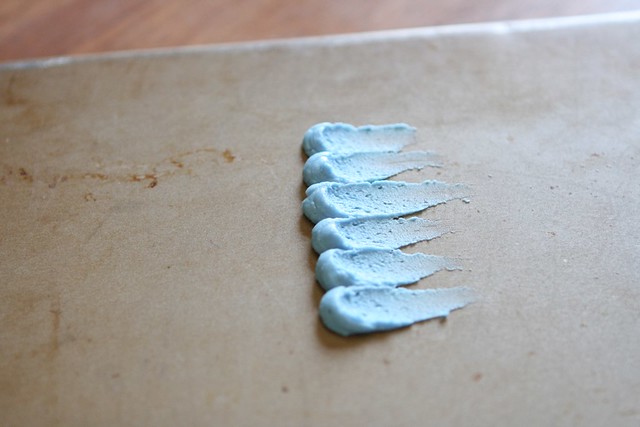
Continue around the cake
****I forgot to show how to “end” the cake. When you get to the end, just pipe the final vertical line of dots and don’t swipe. This will be the back of your cake. It really is not even that noticeable.*****
And if you want to see it off the cake..I got that for you too (not the ombre effect)!