


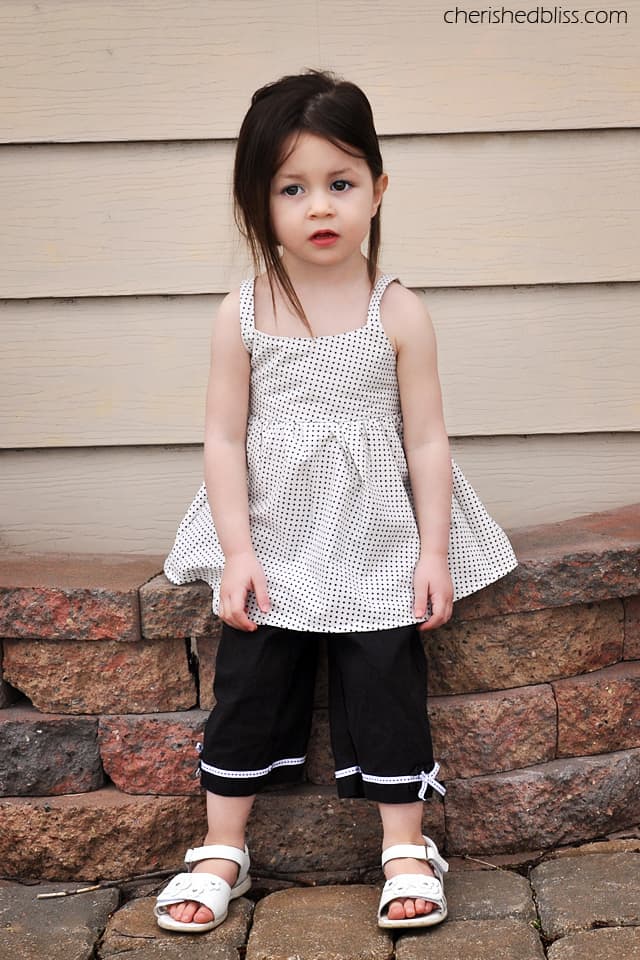
Start off your summer sewing with the DIY Peekaboo Toddler Tank created by Ashley from Cherished Bliss. Ashley will walk you through the steps for how to make this little beauty. After you’re done, you can embellish it with a French Pouf, and complete the look with a pair of DIY Ruffle Shorts.
Don’t forget to add Cherished Bliss to your daily blogroll to see more DIY projects and home decor inspiration like the Ruched Fabric Flower Headband, Vintage-Inspired Baby Headband, and her beautiful Vintage Travel Nursery Reveal.
Find out how to make the DIY Ruffled Peek-a-Boo Toddler Shirt after the jump…
DIY Ruffled Peek-a-Boo Toddler Shirt
Sewing for my daughter lately has been so much fun! I wish I would have started making more of her clothes a lot sooner, but clothes aren’t exactly my strong point. It started with the Addison Ruffle Dress I made for The Sew Off competition I was in, then I sewed an adorable floral dress using See Kate Sew’s pattern. Today I’m going to share this little top I made. It was inspired by a shirt I saw at Gap Kids (it’s out of stock now) but it’s ok, because mine is way cuter ; )
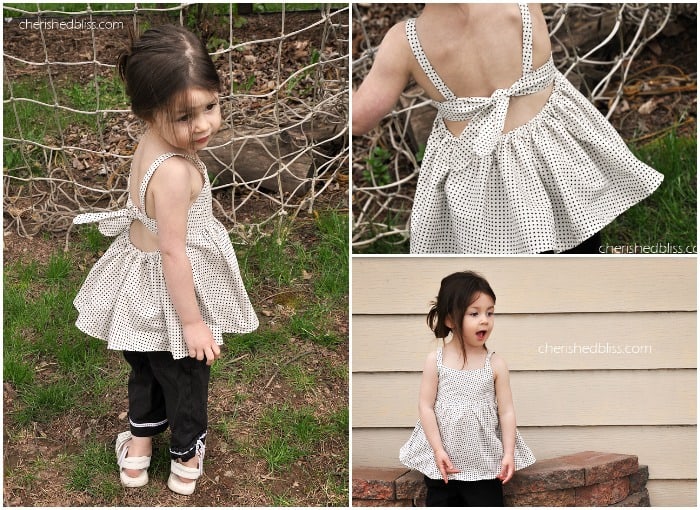
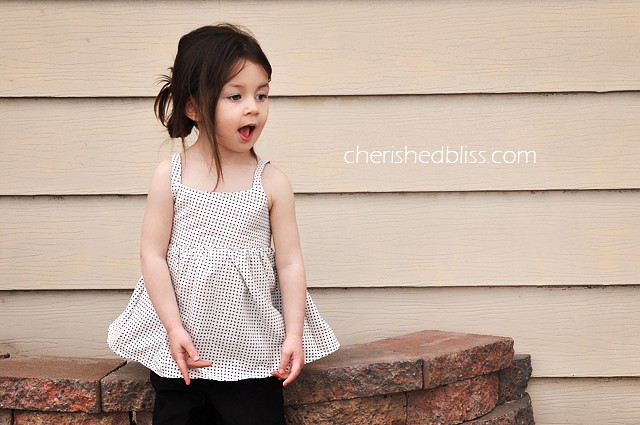
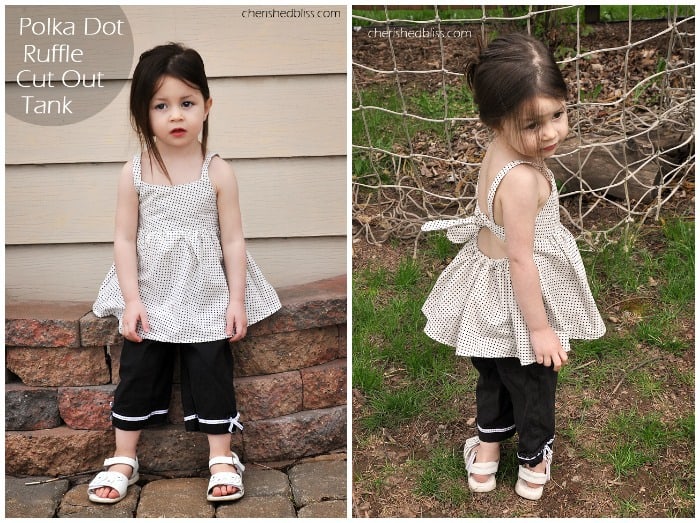
DIY Peekaboo Toddler Tank
I have to warn you up front though, this is more of a how-to than an actual pattern. I am not a super fantastic seamstress. I can follow tutorials and patterns, but when it comes to making up my own, let’s just say there is a lot of trial and error, and there is a reason they made seam rippers! : ) The good news is I mainly made this by going off the measurements of another one of Addison’s shirt and made slight adjustments where necessary. So if you are pretty good at kid’s clothes, this shouldn’t be too difficult. Oh, and try to to laugh to hard at my super awesome sewing lingo ; )
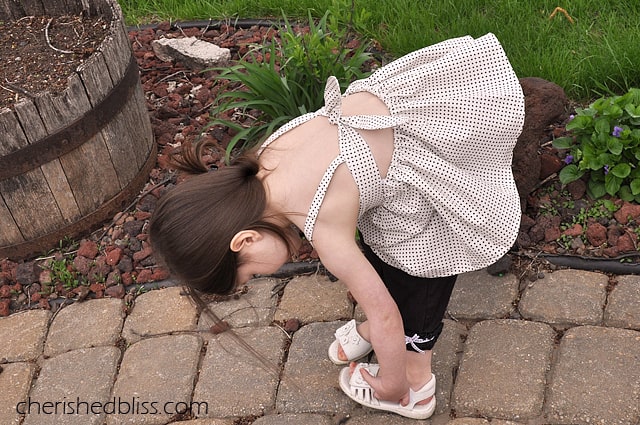
The back of the shirt is totally the best part! How cute is that?! To be honest I was surprised it turned out so good! So let’s take a look at how I made it!
Supplies:
– 1 yard of fabric (for approx a size 3T)
– Elastic
– All your basic sewing necessities.
Cut List:
I made this shirt specific to my daughter’s measurements, so yours will probably vary, but I will try and explain how I got some of them.
– Bodice (2 pieces)
– Straps
– Ties for bow in back of shirt (you want these to be the width of the bottom part of the bodice (the underarm part) & about 1″ – 1 1/2″ longer than the width of the bodice – this is wear my mad sewing lingo skills come into play! : )
– Front ruffled panel
– Back ruffled panel
The How-To:
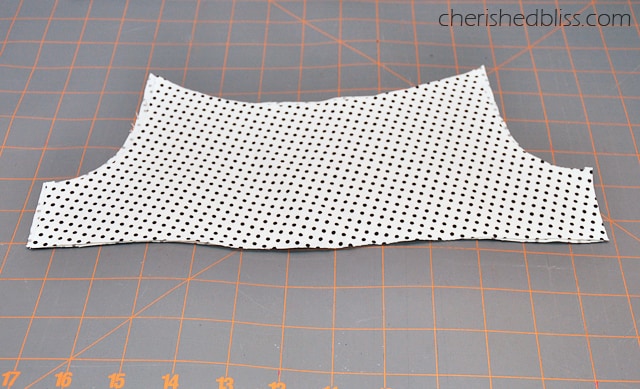
The first thing I did was trace out the bodice of the shirt using another one of Addison’s shirts that had the same general lines I was looking for. When tracing, just leave extra room for your seam allowance. Cut two of these out.
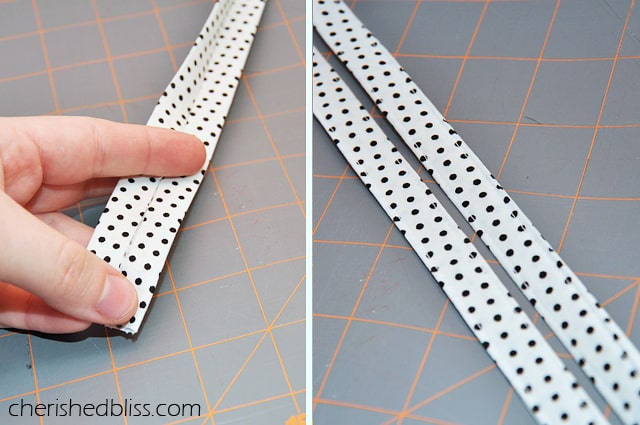
Next I cut out my straps. I made my straps like double binding. Mine were two inches wide and I pressed it in half, then folded the raw edges in to meet that center line and stitched up both sides.
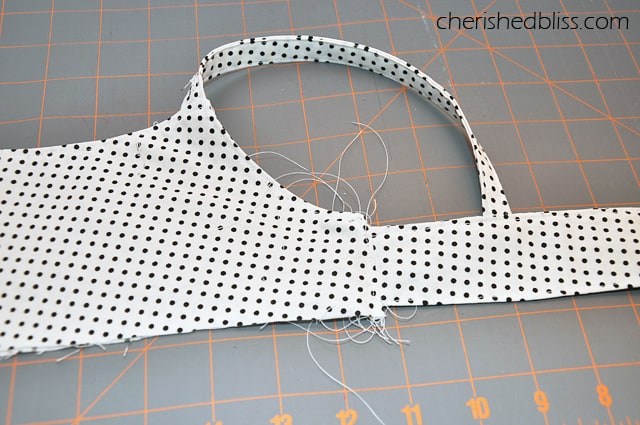
Next, you will need to take your ties for the bow (mine were about 11″ long and 2″ wide after sewn and turned right side out). We are going to attach all the straps to the bodice. With your bodice pieces right sides together, pin your straps in place, and your bow pieces. Sew around all sides except the bottom, turn right sides out, press and top stitch. Make sure you leave enough room under your bow pieces so you can attach the front panel.
Now, I totally forgot to attach my straps to the bow pieces, so I just ripped the seam where I wanted them, and top stitched them in place – yes I know… all you ladies who actually know what they are doing are probably cringing right about now! Below is how it should look when you are done, maybe without all the extra threads hanging out though ; )
Up next is attaching the front panel. I went of the measurements of the shirt I used for the bodice, but I added a few inches because I wanted it to ruffle a little more. So once I ruffled the fabric, I serged it onto the bodice, right sides together. Make sure and leave seam allowance on the sides to attach the back panel to. Then I pressed the seam towards the top and top stitched.

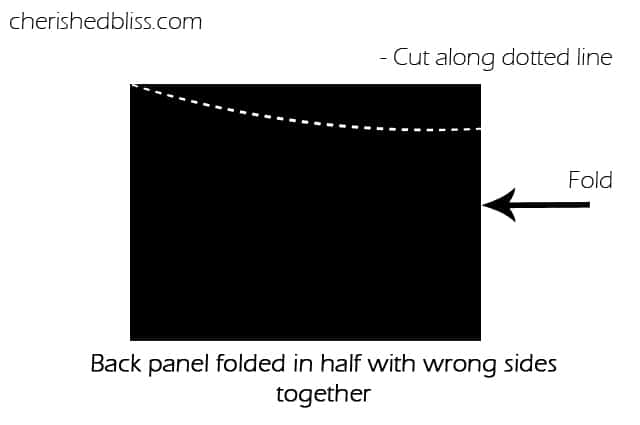
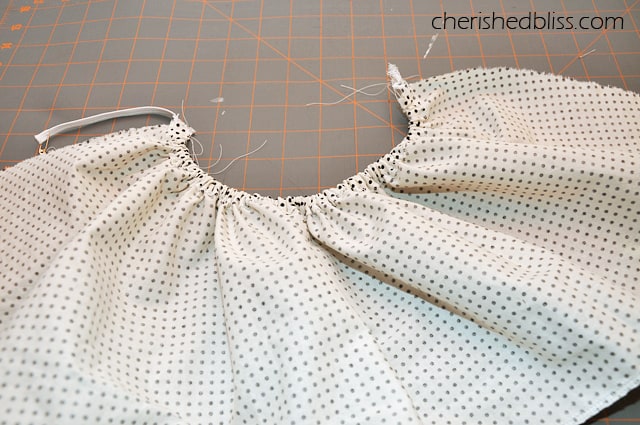
Now for the back panel, you want it to be the same length as the front panel, but you have to take into consideration the extra allowance for the casing for the elastic. But before you make the casing for your elastic, you are going to cut out a little off the top of the panel so it creates that cut out look under your bow. To do this I folded my back panel piece in half, wrong sides together. Starting at the fold I measured about 1 1/2″ down and cut out curving up towards the corners of the raw edges. You don’t want to make too big of a dip here because once you add the elastic it will look more drastic. I made a diagram to help explain where to cut.
Now, on the curve, serge your top edge and then fold over to create your casing for the elastic. Press, and stitch in place. Using a safety pin, feed your elastic through. (I cut my elastic a little shorter than the width of the bodice. Then stitch your elastic in place with a basting stitch.
Now, put your front and back panel pieces right sides together and sew or serge the side seams.
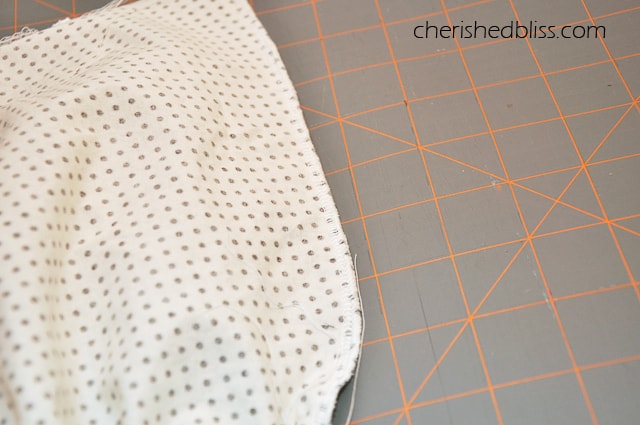
Once that is done, finish your bottom edge and hem. You are done! Now you have an adorable little shirt. Addison wasn’t into posing much this day… she was more into running around everywhere, so it was kind of hard to get good shots of it, silly toddlers ; )
If you love sewing, be sure and check out a few of my other sewing tutorials : )