


This week we will be sharing how to make a beautiful duvet cover with stripes of coordinating fabric but before we do, we want to give you a quick refresher in three ways to create impressive (and durable) finished seams. Finished seams will keep this duvet (or any DIY Home Decor) going strong after many washes. It also will make an item look totally professional for gifting or selling.
Here are a few ways to finish your seams:
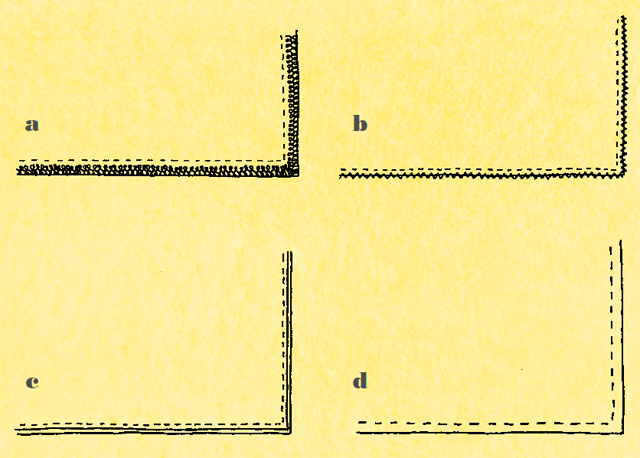
SERGE: If you have a serger, use it to serge all the raw edges. Then straight stitch ¼”–½” (6 mm–12 mm) in from the serged edges to make sharp, sturdy seams. (a)
EASY OVERLOCK STITCH: You can fake an overlock stitch by setting the sewing machine to the zigzag stitch. Normally, the needle moves from left to right and back again, sewing through the fabric each time. This time, align the fabric so that when the needle moves to the right, towards the outside raw edge it doesn’t sew through the fabric, but just falls off the edge. Follow with a straight stitch ¼”–½” (6 mm–12 mm) in from the serged edges to make sharp, sturdy seams.(b)
FRENCH SEAMS: Rather than placing your two pieces of fabric with right sides together to sew a seam, place them with wrong sides together. Sew with a ¼” (6 mm) seam. Trim the seam allowance to ⅛” (3 mm), then turn the fabric so the right sides are facing. Using a ½” (12 mm) seam, sew a second seam, parallel to the first, that encases the first seam in the fold. (This second seam will lock in and hide the fabric’s raw edge.) Turn the fabric right side out. (c, d)
Illustrations by: Sonya Benham