


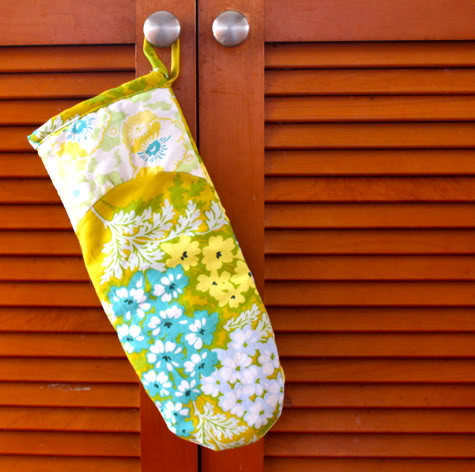
I wanted to see a little piece of Heather Bailey’s gorgeous Nicey Jane fabric every day, so I made an oven mitt. Now I have to make an apron to match!

Get the free downloadable pattern and full Oven Mitt Tutorial after the jump…
DIY Oven Mitt
1. Â First go ahead and download, print, and cut out our oven mitt pattern. Â You’ll need to print this one on a legal size (8.5″ X 14″) piece of paper, or print it on 2 8.5″X11″ pieces and tape them together.
Prudent Baby Oven Mitt Pattern
2. Â Cut out the pieces as described on the pattern. Â I used two different fabrics, but not required. Â Cotton batting is preferred over polyester for heat resistance, and the more layers of batting, the more useful in holding hot items your oven mitt will be.

3. Â Then take the two pieces from page 2 and tape them together. Â Using this bigger shape, cut out one piece of lining and one or two pieces of batting (depending on how thick/useful for touching hot things you want your mitt to be):

3. Â Now you can use some pre-made bias tape, but I made some for this oven mitt. Â You only need a small piece so it’s pretty quick. Â Cut a piece of fabric on the bias (diagonal from the selvedges) 1.75″ wide and 18″ long:

Fold each long edge into the center and iron. Â You can use this $5 doo-dad called a bias tape maker or you can just do it by hand:

Now your tape looks like this. Â This is single fold bias tape, but we want double fold:

So go ahead and fold it in half again and iron:

Set that aside.
4. Â Now take your two top pieces and align them at the curved edge, right sides facing. Â Start by pinning them together in the middle like so:

Then pin the corners, then continue to pin the edges together:

Sew in place:

Lay your lining pieces right side down, your batting on top, and your outer piece right side up (so wrong sides are facing, with batting sandwiched between), like so:

Sew in place all the way around the curved edges. Â Finish by serging, sewing with a zig zag stitch or cutting with pinking shears:

5. Â Repeat the same process with the oval shape and the other mitt shape. Â You can use all one fabric or alternate as you please:

6. Assemble your mitt with right sides facing, so you see your lining. Â Pin together, with the thumb part of the mitt sticking out like this:

Sew around the edge of that part first:

Then pin in down and sew around the outside edge. Â Stop when you get to the thumb seam and back stitch, then jump over it and continue all the way around:

7. Â With your mitt still inside out, open up your bias tape and pin the right side around the opening with edges aligned. Â Let the excess hang off like so:

Se win place along the fold:

Turn your mitt right side out and fold the bias tape over the edge, and fold the excess bias tape flat, and pin in place:

Start by sewing the excess bias tape closed:

Now turn it to create a loop, and tuck the end of the loop under the bias tape and pin. Â You may need to cut some of the bias tape length to get a loop the size you desire:

Sew in place around the edge of the bias tape, securing your loop and finishing your mitt!

Let child use mitt as puppet:


