


You are going to love the DIY Woven Coasters project.
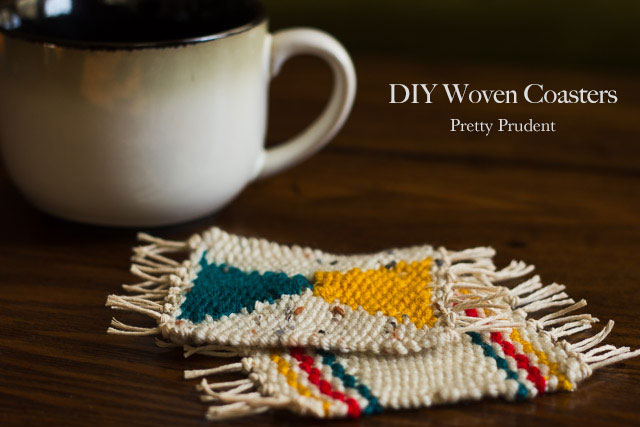
I have been drawn to the art of weaving for a while now, especially after I fell in love with Maryanne Moodie’s weavings on her Instagram. The colors she uses and the designs and textures she creates are breathtaking. After gawking at her designs, I decided to try my hand at making a set of coasters for the blog. I’m so happy with how they turned out! You will need just a few materials and a piece of cardboard for your own DIY loom. Ready to get startedwith this little online workshop? I spent a good evening making a handful of new coasters while watching TV. This would make a neat house warming gift for a friends new sweet home.
Check out the tutorial for the DIY Woven Coasters after the jump…
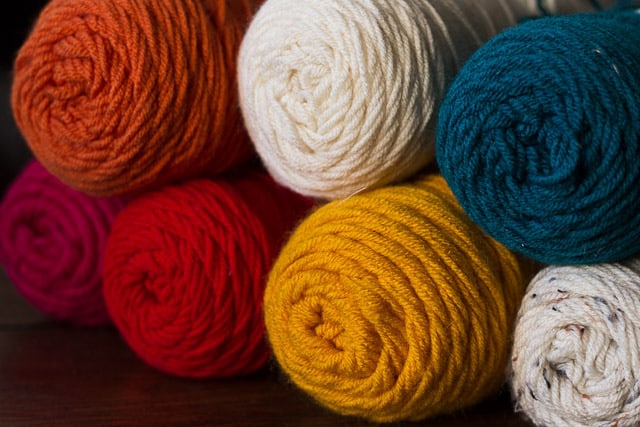
Start by picking out your colors of yarn.

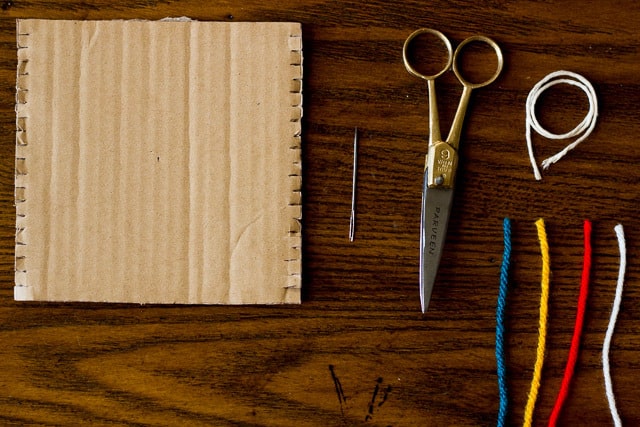
DIY Woven Coasters Supplies:
- Yarn for your coaster material
- Twine or sturdy string for your warp threads
- Tapestry Needle
- Scissors
- Cardboard (a thin piece of cardboard will do.
- Ruler
- Kitchen Fork (optional) for adjusting weave as you go
- A bit of Mod Podge (optional) to secure loose ends
Detailed Instructions with step-by-step photographs for your coaster project:
Cut a out a 5×5 inch piece of cardboard for your cardboard loom. Cut slits or notches at every 1/4 inch. If you are doing this project with younger kids or prefer a wider weave, I suggest making less slits by making one every 1/2 inch to accommodate a different skill level.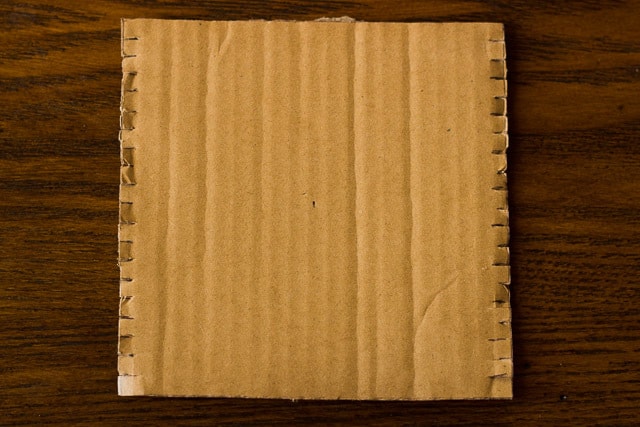
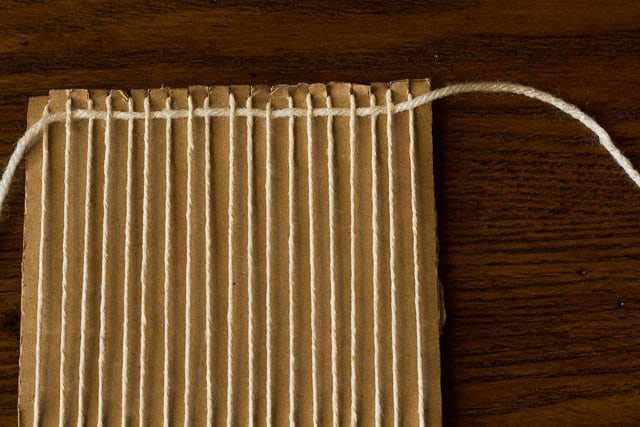
Wrap your twine (or warp string) around the cardboard, this is your first warp strand. Wrap the yarn around the front and back of the loom, fitting it into the first slit, then second slit and then each slit all the way down to the bottom of the cardboard where you make your final slit.
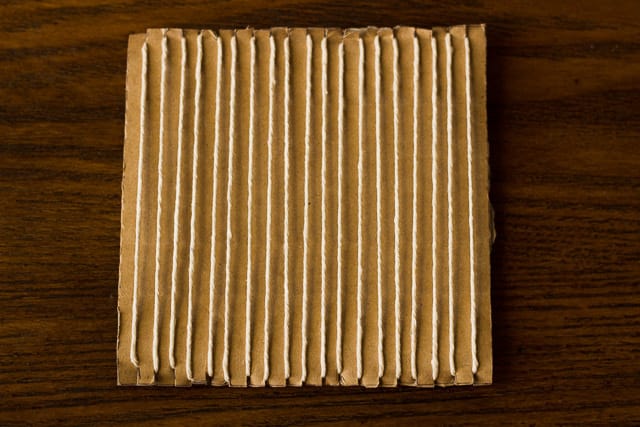
Leave about a couple inches of tail at each end of your warp. Your warp threads should be vertical with about 3 inches of remaining warp at each end.
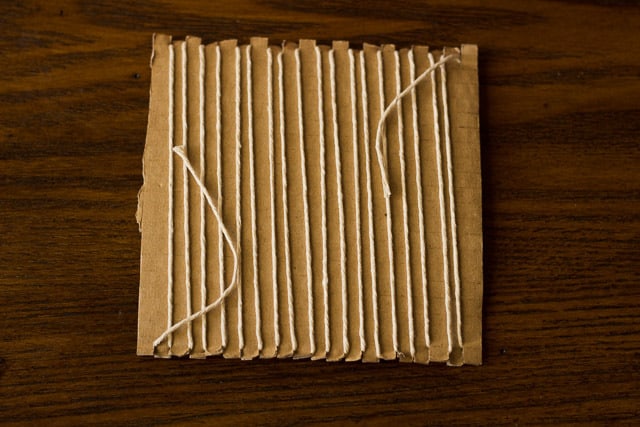
Weaving instructions:
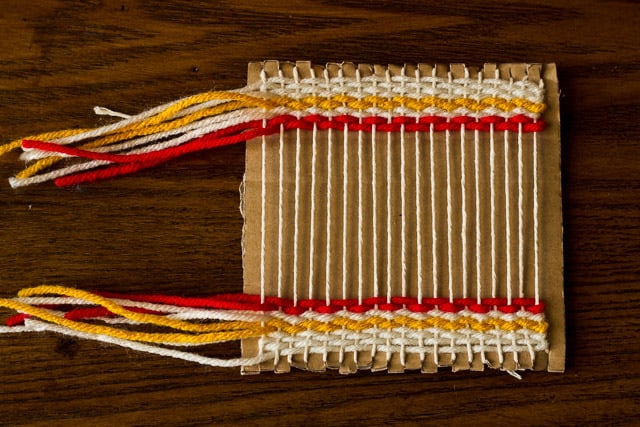
Starting from the top edge, thread your first piece of yarn through going over and under each alternate strand of twine from the left side. This is your first row. When you are weaving you don’t want to pull it too tight or it will start to make an hourglass shape. That’s one of the best tips I learned, to use the right amount of tension on the horizontal lines of yarn. This is what the front of the cardboard should look like.
Start a new row. Continue with each new colour yarn to create your design. Leave about 3 to 4 inch loose tails at the beginning and end of each piece of color yarn you choose. keep repeating with a fresh row until you complete the entire length of the loom.
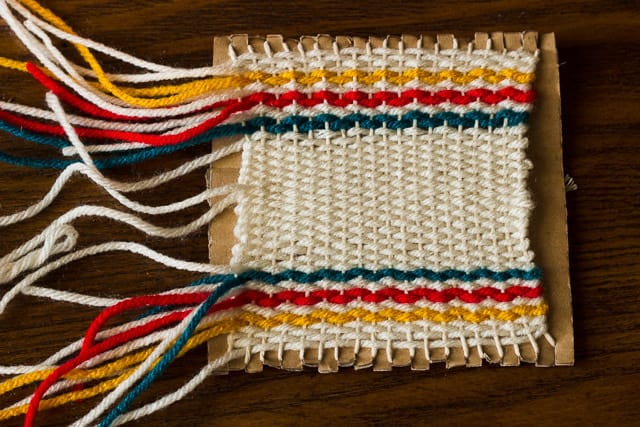
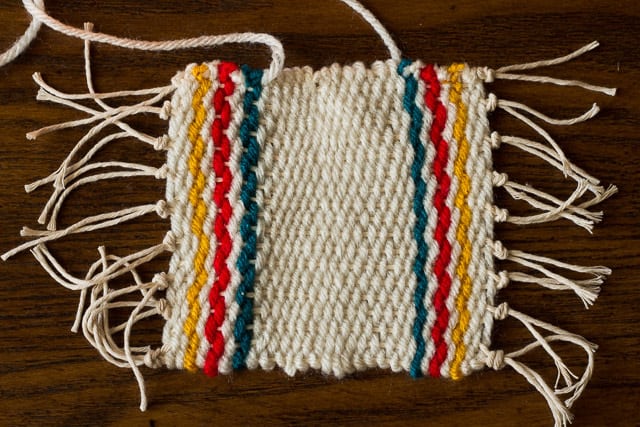
You should end with something like this when you get to the bottom edge.
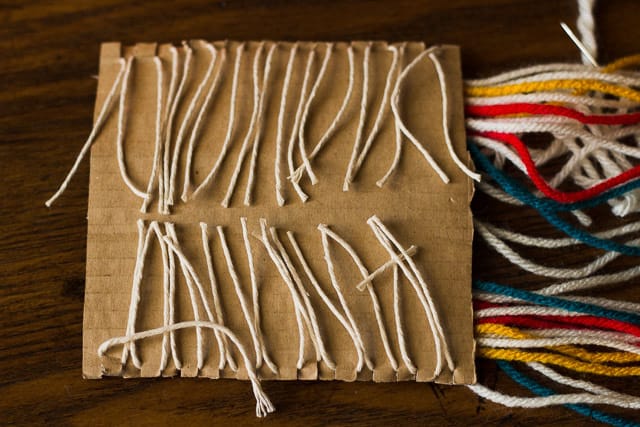
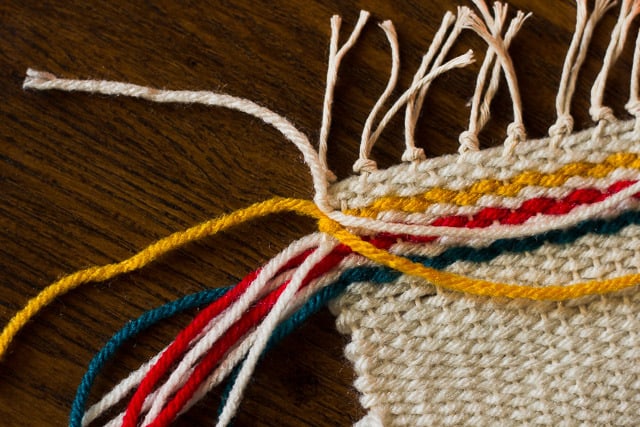
Flip to the backside of the cardboard where you will see your back warp and cut the twine down the middle.
Knot a couple pieces of twine together all the way down to secure the yarn in place. I chose to knot three pieces of twine together first and then continued with two pieces for each knot.

There are two ways to secure the yarn in place at the ends to avoid unraveling. Below is an example of how I took two pieces of yarn together and just did a simple double knot and trimmed the end.
This is how it looks once you’re done with the knots.
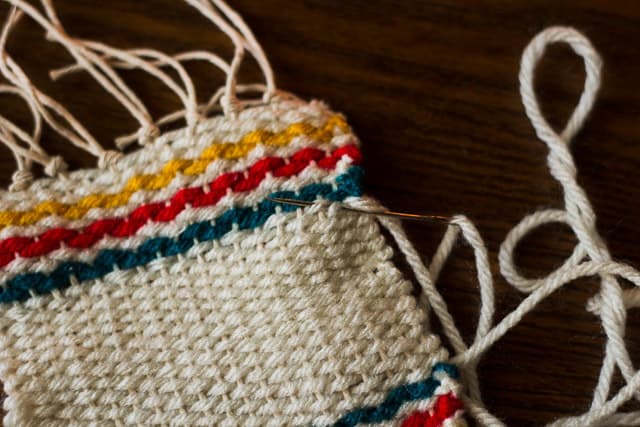
I took the other two pieces of yarn and secured them with the second way. You can do this by taking the tail end and threading it through the needle. Then, thread it through the back of a piece of woven yarn. This is super simple to do and doesn’t show through. Snip the end.
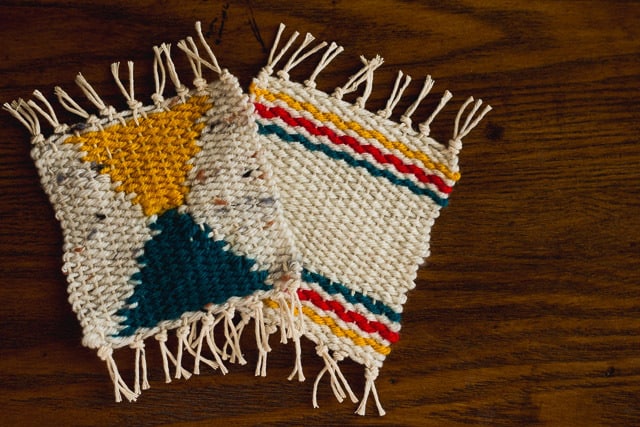
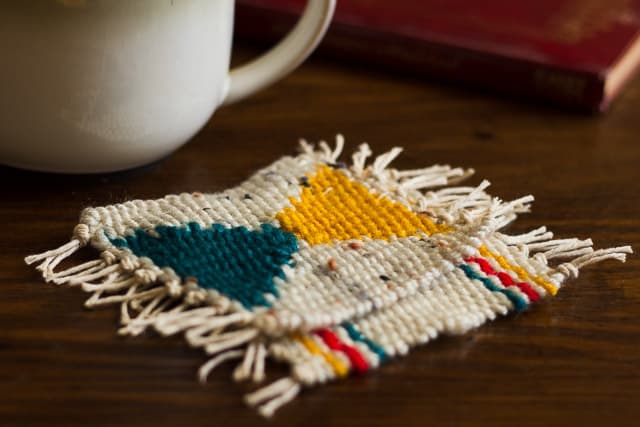
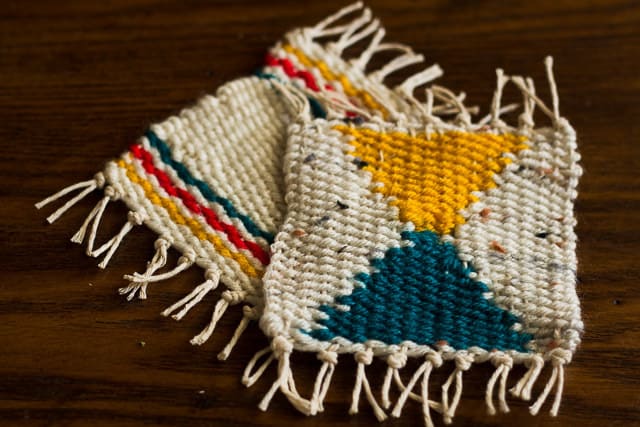
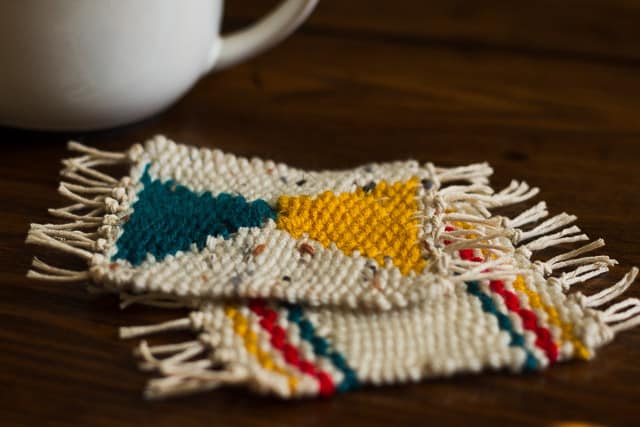
When I did the second coaster with the triangles I started first with creating the triangles and then filled in the blank space with the off-white yarn. If you want to get a little fancy.
I marked a center point of the coaster and worked out from there. I did my rows in doubles, so the first two rows were woven once, then three times, then five, and so on. It takes a second to figure out, but once you get the hang of it you are kind of addicted to weaving triangles.
That’s it! Congratulations! You are a weaver!
You could also use this project for a doll rug or a mug rug.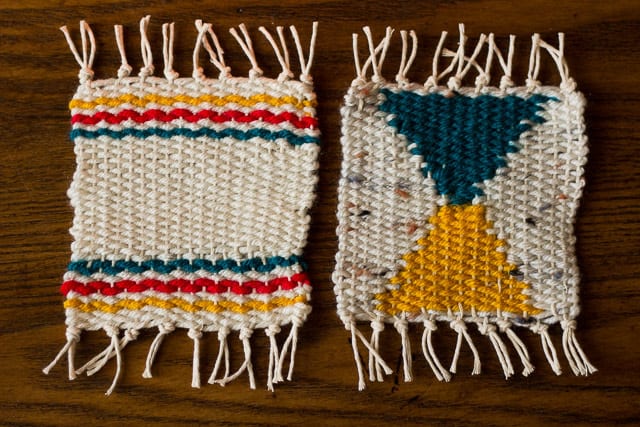
Pretty simple, huh?
Do you love yarn projects? you can see all of Pretty Prudent’s yarn and crochet projects here.
Try a Crochet Granny Square Christmas Stocking or a sweet crochet bunting for the nursery or a party. Maybe try a crochet granny square poncho.
Want to make more projects using fabric and yarn scraps? we have so many. Try our Scrap busting fabric bowl. They are addictive to make.
Want to make more coasters? You can see all of our DIY coaster projects here.
Originally posted 2014, updated 2023