 Kathy from MerrimentDesign is here with us today to share another of her awesome Sewing 101 Lessons (see What You Need in Your Beginner Sewing Kit and How to Sew French Seams). Take it away Kathy… I’d like to thank Jaime and Jacinda for letting me talk with you today about gathering. Gathering is one of those techniques that you’ll see in a ton of sewing projects like skirts, blouses, puffed sleeves, dresses, and pretty much anything you’ve ever seen with a ruffle. Gathering is just a way to bunch up fabric so that it’s a little more ruffle-y and full. Gathers can either be really tight and frilly like the ruffle I made for Elise’s baby sunhat:
  as well as Jaime’s magicalist magical tutu dress of magic:
 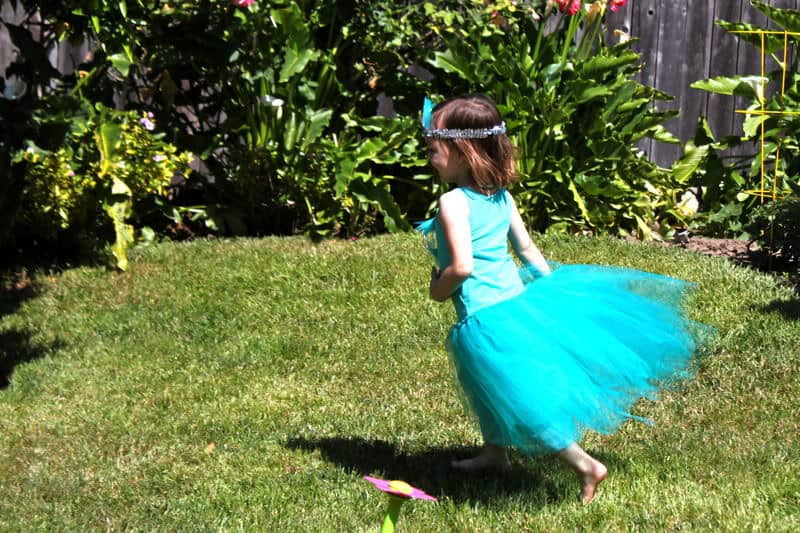 and Jamie’s delicious layer cake skirt:
  Or they can be more subtle and streamlined like the delicate gathers on my tiered baby dress pattern that features Jacinda’s lovely and striking Modern Texas fabric available at Spoonflower:
 You can use gathering on teeny projects like on Jacinda’s pin cushion ring…
  …or along super wide edges like Elise’s gathered crib bedskirt
  And in practice, there are as many different gathering techniques as there are applications for it. Today I’m going to share how to gather fabric with your sewing machine… How to Gather Fabric There are handfuls of old fashioned manual ways to gather fabric. This is the method that I learned to do it from my mom Norma back during my 4-H Clothing days (yep). I like it because it makes pretty gathers while eliminating the frustrating process of tinkering to get the gathers even only to realize that the gathered piece is now too long (or too short) and needing to fiddle around again. First set your machine to a really wide straight stitch width (or basting stitch). I set mine to 4 which is the highest that my machine will go.
  Now this is very important: You’re not going to backstitch when you start sewing this basting-slash-gathering stitch. Trust me, I’ve mindlessly backstitched a gathering stitch many a time which guarantees a do over. So…start sewing a straight gathering stitch close to the edge of the raw fabric edge that you’d like to gather. Because I usually end up sewing 1/2″ seams I usually sew about 1/4″ from the raw edge like so.
  And remember: Don’t backstitch! Leave a couple of inches of thread free on both sides.
  Now this is a step that I like to do that many gathering projects I’ve seen out there don’t include: I sew a second gathering stitch just shy of 1/2″ parallel to my first row of stitching. I do this because: (1) It’s the way my mom taught me. (2) I think it makes it easier to pull evenly spaced gathers. (3) If you get a little rough by pulling too hard and breaking one of the gathering threads, you have a second one to fall back on …this happened to me when I was making Elise’s gathered crib bedskirt with its really super long ruffles.
  OK so everything’s sewn and you’re ready to gather. Starting on the left side, gently pull the two front threads, leaving the threads on the back alone (the wrong side) and gathering up the material as you pull. When your gathers reach the middle, shift to the two front threads on the right side and repeat.
  Keep gathering, left side, right side, until your gathered fabric is the exact width that you want it to be. In my case, I was making ruffles for a ruffle tiered dress. Don’t worry too much right now about getting the gathers even — you’re going to even them all out soon. Just focus on getting the exact overall width that you need it to be; getting the overall width right is the key.
  So again this is a step that I like to do and others may skip. Important pause here! First, again, be extra sure that your gathered fabric is the exact overall width that you need it to be. Now starting on the left side, tie the two front gathering strands together into a knot. Trim the threads.
  Tie off the two left back threads and trim. Now repeat on the right side for the front and back threads.
  So why did I tie these off before making sure that my gathers were even? Well, if you first can constrain the gathered ruffle to its proper overall width, then you can more easily wiggle your gathers around using your fingers to spread them as evenly as possible.
  I like to tie off and trim the gathering threads because it locks in the overall width so that you are just fiddling with spacing. And times when I haven’t tied off the threads I’ve gotten so frustrated cycling between evening out gathers and then discovering while pinning that the ruffle is now too long, or too short, all Goldilocks back-and-forth …arg. This tie-off method also helps you flatten out the areas that will be inside the side seams so the fabric will lie flat there rather than catching part of your ruffle in the seam (keeping the frilly on the front). But I’ll say it again: Only tie your gathers once you’re sure it is the width that you want it to be. And now that your gathers are even and lovely you can pin. Pin your seam with the flat fabric layer on the bottom and gathered layer on the top – it will sew more smoothly that way. And gathers are an occasion when I do use pins, as much as I generally try to avoid it if I can.
  Switch your stitch length back to its normal, non-basting stitch length and sew. My seams are usually 1/2″ so I sew just to the left of my gathering stitches.
  Now if you want to be extra sure that your item wears and washes well, stitch the gathered piece to the fabric again, but this time sew on top of your 1/4″ gathering thread. This extra stitching will prevent strain on the 1/2″ stitch line to avoid the seam pulling loose. But if you’re going to topstitch your ruffle like I did on my tiered baby dress then you can skip the 1/4″ reinforcement. If you’re lucky enough to have a serger and know how to thread it, it’s nice to overlock the edges. I zigzagged mine in lieu of overlocking.
  So that’s basically the way I do it. Let me know if this the same or different from how you like to gather.
  This post is sponsored by Disney Baby. We’ll be joining the Disney Baby blogging team next month, and look forward to sharing these kinds of stories (projects/ideas/etc) with you over there! Stay tuned for more details!


