Remember when I showed you the Double Gauze Dress and asked if you wanted a full pattern and tute? The reponse was affirmative, so here it is. It’s definitely a bit different, but trust me, this way is much easier.
With a neck tie, there’s no worrying about getting the strap length justright, and with the snap closure, you can get it on and off without a zipper. And you’ve been clear that you’d rather just avoid the zippers if possible (we hear that).
I can’t wait to hear what you think and see some reader versions! I hope it lives up to the expectations and is simple to execute. Let me know in the comments! And in addition to dropping mad knowledge bombs on all of us Prudent Mamas, your comment could win you that train-tastic fat quarter up there on the left!
Get the Snap Wrap Dress free pattern and tutorial after the jump…
Prudent Baby Snap Wrap Dress
I made this dress with the ridonk-awesome Naomi Ito for Nani Iro 2010 Fuccra Eggplant which is a double gauze, but it would work for a lightweight fabric like voile or cotton lawn (Alexander Henry has amazing cotton lawns available here). Just don’t do it with a regular quilting weight cotton. Well actually you could, it might just be a little stiffer and definitely more poufy and less flowy. Who am I to tell you how to live? Make it how you want it.
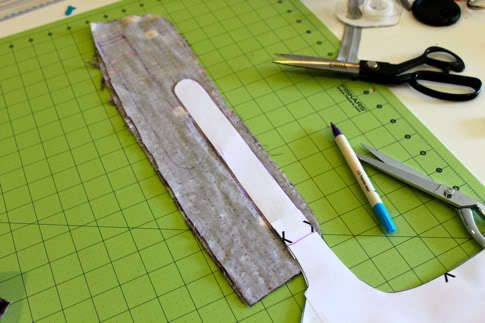
1. First download and print out our pattern. You can download it here: Prudent Baby Snap Wrap Dress Pattern. This pattern is three pages, so print them out:
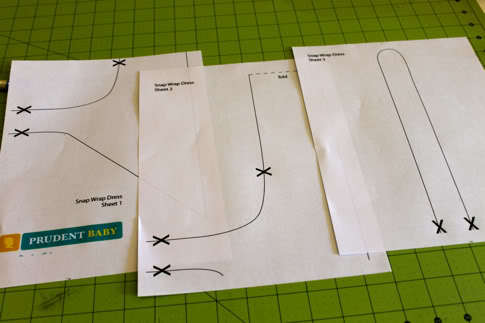
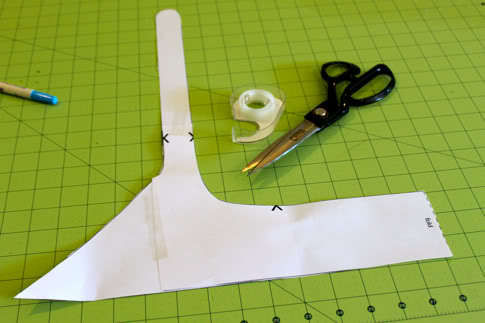
Then you need to cut them out and tape them together at the X’s like so:
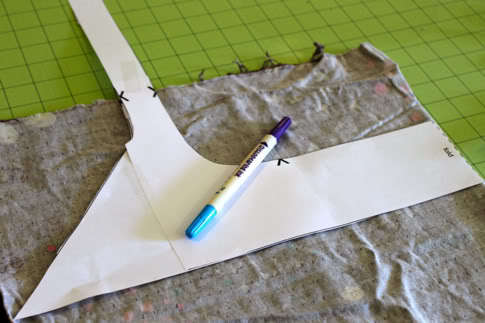
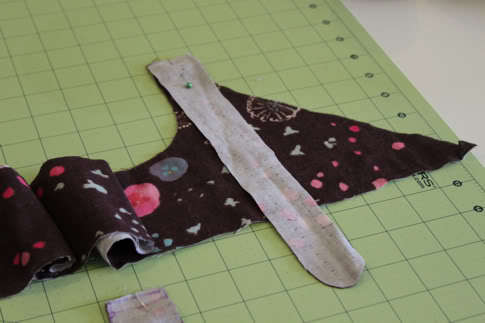
2. Now, you can cut out two pieces just tracing the pattern, but that would waste fabric, and we are too prudent for that. So to make this whole dress out of one yard, do it this way: Line up the pattern on the fold (as marked) with the top x at the top of the fabric, like so. Trace it:
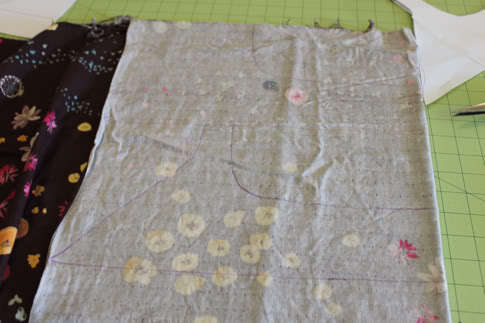
Then right beneath that do it again, i hope you can see my tracing lines here:
Then cut those babies out:
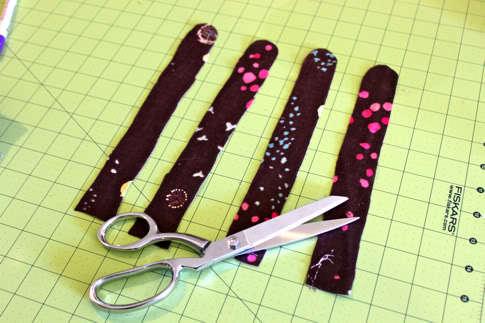
Then use the scraps leftover to trace the straps. Leave a little just below the x for your seam allowance. Pile the two scraps on top of each other and trace twice, so you get four straps, like this:
And cut them out:
You also need the skirt portion of the dress. That is just a big rectangle. Use the width of your fabric yard (so 44″ or so – doesn’t have to be specific) and cut it the length you want your dress plus one inch. I cut mine 19″ for my extra tall 2.5 year old.
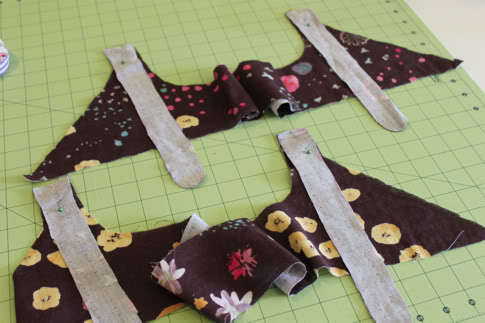
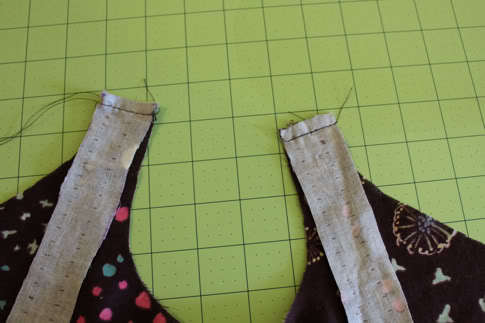
3. Now take your two bodice pieces and lay them right side up. Pin a strap to each side of each piece, right side down:
Here’s all four of them pinned on:
Sew them in place with a straight stitch:
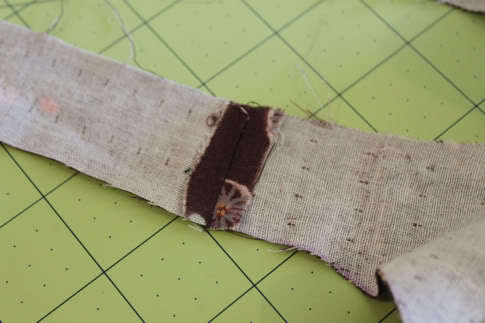
Then trim your threads and iron the seams open:
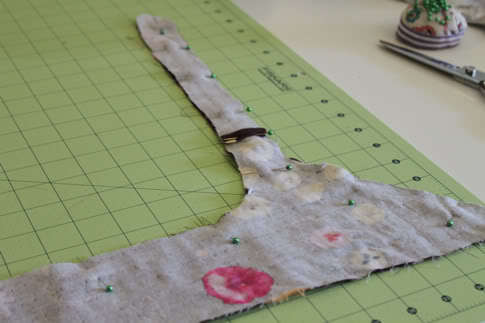
4. Now take one complete bodice piece and lay it right side up. Lay the other piece right side down on top, so right sides are facing. Pin all the way around the entire thing except the bottom (straight) edge:
Sew all the way around the top of the bodice and straps with a straight stitch, and leave the bottom flat edge unsewn:
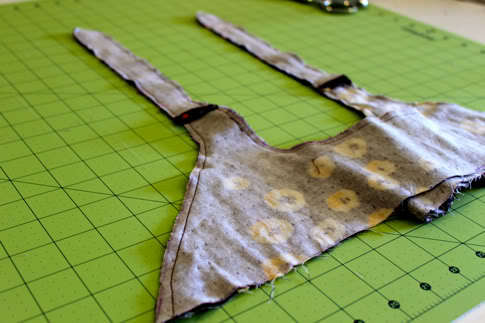
If you need to trim your edges, do it now. You can also make score marks around the curves if you like, but not 100% required. Sorry, I don’t have a picture.
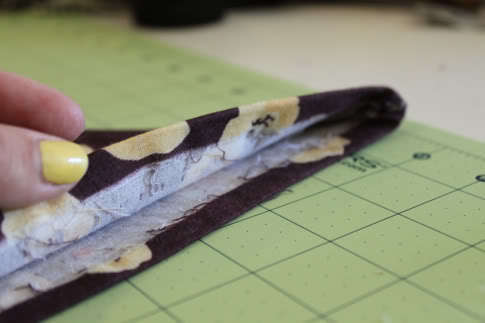
5. Now it’s time to turn it inside out. Turning the straps inside out is a little tedious, just use the eraser side of a pencil to push them through if you need to, and gently tug them to turn. Push the seams out and iron flat (I folded it up here just to fit it all in the picture):
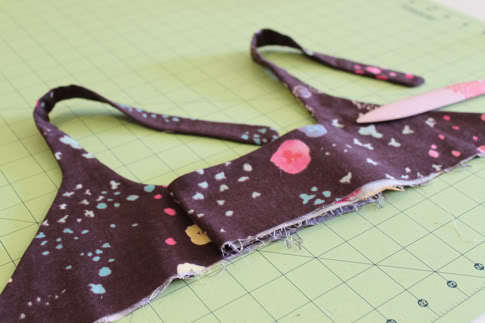
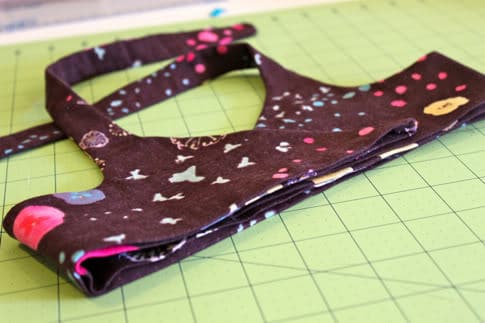
6. Now iron the bottom unfinished edge under about 1/4″ or 1/2″ all the way around:
Fold your bodice up, isn’t it cute?
Set it aside for a minute.
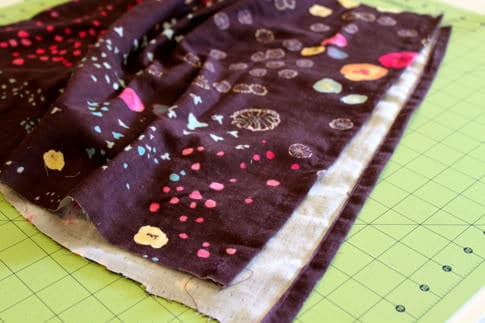
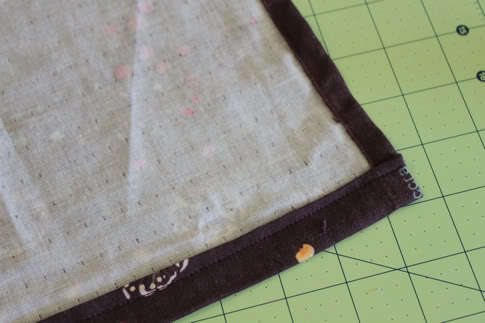
7. Now take your big rectangle of fabric and finish each short side edge by folding to the wrong side 1/4″ and ironing, then another 1/2″ and ironing, then sewing in place with a straight stitch:
8. Now normally we would wait to hem the length until the very last step, but since we are going to gather this skirt, I think it’s easier to do it now. So take the bottom edge of your fabric panel (pay attention to which direction your pattern is to choose the bottom edge) and finish it by folding to the wrong side 1/4″ and ironing, then another 1/2″ and ironing, then sewing in place with a straight stitch:
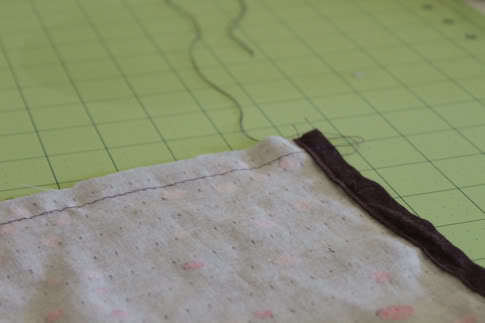
9. Now along the top unfinished edge of the panel sew a basting stitch. Make sure you pull a nice long length of thread out of the machine before you start. To sew a basting stitch, use a straight stitch set to the widest width your machine will allow, usually a 5. Baste all the way across, then leave a long length of thread at the end:
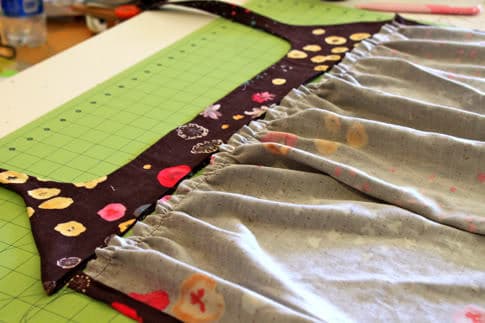
Open your bodice and lay it out flat. Pull the bobbin thread on your basting stitch to gather the fabric until the skirt panel is the length of your bodice:
Snip the corners at the top of your skirt panel at an angle (so they will fit into the bodice):
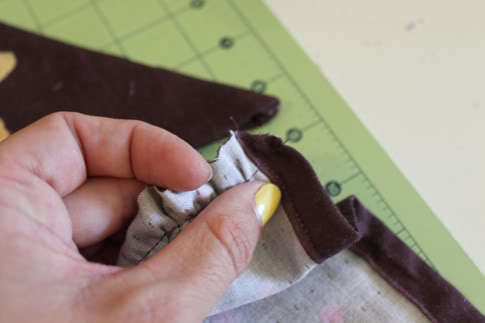
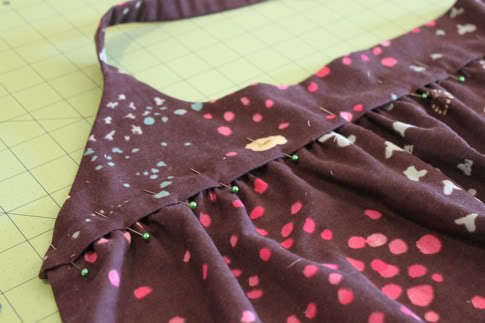
Choose which side of your bodice is going to be the front (the side that will be away from the kid’s body and show) and lay that side up. Lay the skirt right side up as well. Fit the skirt into the bodice and pin. Make sure the gathers are evenly spaced and use lots of pins, it helps with sewing it all in place, especially with double gauze:
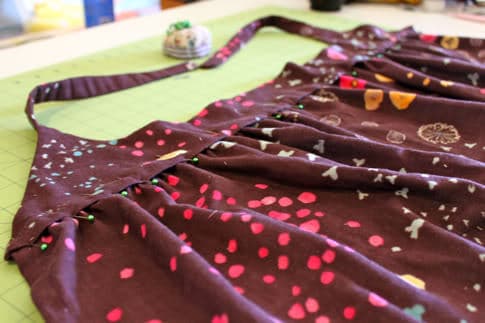
Double check that your basting line is not showing, that it’s nicely pinned inside the bodice:
10. Sew straight across the bodice at the edge to secure your skirt in place:
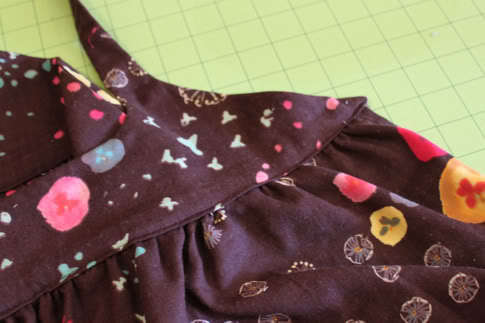
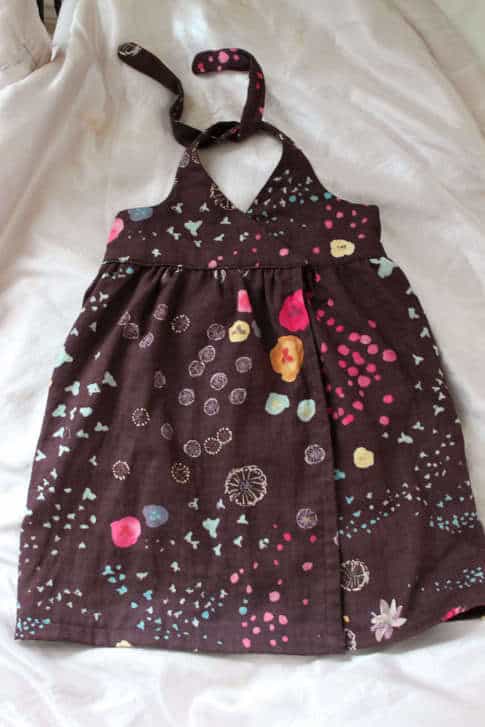
Eeek! Fold your little dress up, so cute!
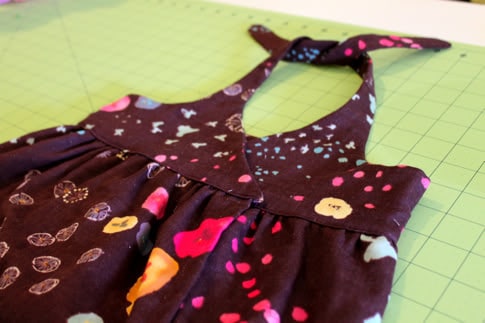
11. But we still need to actually close it. There are so many options. This is what you are working with:
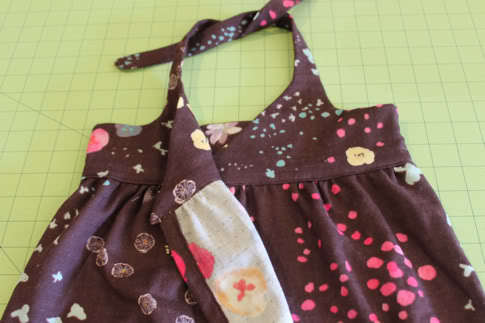
Because we overlapped the fabric so much, I think just securing it along the bodice edge is enough to keep little girls covered but also allow them freedom to move. It works best with leggings or a matching diaper cover underneath. Now is the time to try it on your wearer if you can, to mark where your fasteners will go. You could do a button on the bottom panel (maybe a matching fabric covered button?) and a buttonhole on the top panel. However, I like snaps because you can put them in a few spots to allow for sizing (the dress could grow into a top as kiddo gets taller). I hand sewed three set of snaps, one on the inside point, one on the outside point, and one in the center. I sewed them only to the inside layer of the top of the dress, so they don’t show, and also so I could remove them later and move them when she grows bigger.
YOU ARE SO DONE AND SO PROUD RIGHT?!!?!
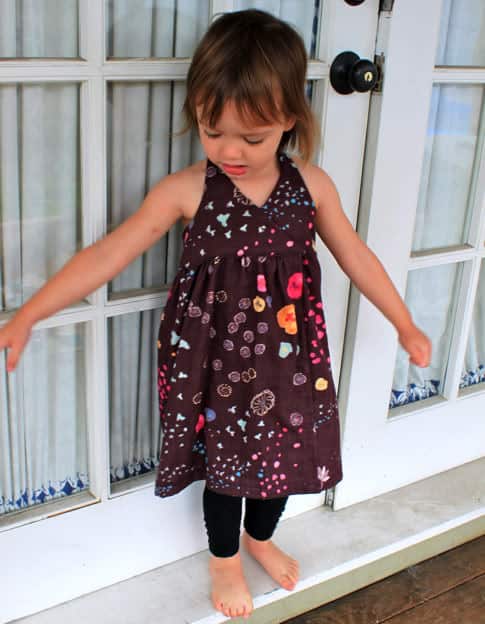
Look at that little monkey…
I think she likes it!
What do you think, did this tute live up to the hype? It’s a little different then the original but much easier to size and sew. I hope you like it.
Want to sew more dresses? Here are 25 Free Dress Tutorials from Pretty Prudent & Friends.
What a cute little dress, deffinately one to try.
Love this! so cute and great choice of fab. the pics in the tutorial are very nice. good job!
http://www.sewhomegrown.blogspot.com
I was wondering, about what size do you think the bodice fits? Just curious, because while I
am definitely going to make this, I'm just not sure if it will be for my 2yr old or my 4yr old….
Thanks,
Erica
This. Is. Gorgeous.
I have to get some of that fabric!! Looks like it is going fast.
This might be my most favorite Prudent Baby pattern yet!
thanks for the pattern, totally lived up the hype!! in it goes to the "to be made for future daughter" pile!
LOVE IT! Nuf said.
I opened up prudent baby today planning on scowering the archives for a 1 yard dress pattern for my 3 year old. We went to the store yesterday and I let her pick out any fabric she liked. I think I will be making this! Perfect timing, thanks for the Tuts 😉
Thanks so so much for sharing. I have a 1 yo grand niece, can you tell me how to resize? Thanks!
o for sizing… as is should be about a 3T (depending on your kid) BUT it is super flexible. Neck tie means you don't have to worry about strap measurement. you can wrap the dress around your model before adding the snaps to get a great fit. However, if you want to size up or down, shorten the bodice piece in the middle (so where the fold is, cut off or add a few inches). then cut the skirt the length you desire. make sense?
… a little jealous of Miss S's wardrobe!
So stinkin' cute! This will be hanging in D's closet soon I think.
Oh, I am so in love with this dress! I've had visions in my head of beautiful bottoms for dresses, I just was unsure of how to make a worthy bodice. Thank you for showing me how. Now my creations can come to life! (Ooo sounds a little Dr. Frankenstein-ish, the comment not the dress.) Can't wait to start!
I love this! I really want to try it. We'll see how it goes!
Girl, you have out done yourself! I have to agree with Jacinda, I think this is my favorite pattern yet! I can not wait to try it out! Do a mama version! Or a mama maxi version! Oh, wait, you aren't going to wear maxi's anymore. 🙂
Totally making this for a friends kid!! Now if only I didn't have 3 nephews!! I want to make more of these for everyone!
Very very very cute dress! And your daughter is too cute too, she has a great smile. My son is going through the, I don't want to have my picture taken stage. Now the question is… will I be brave enough to make this for my daughter?
WOW!!! Super cute, I have a bunch of fabric and lots of friends who also have little girls and I plan to make them all this dress! Yipee, thanks so much for your awesome talent and for sharing it with us!
That is adorable. I want one for myself, too!
Guiltless….this dress certainly is beautiful. I will have to make this one for all my little ladies. I don't have a daughter but I have a niece and 2 marine wife's baby girls too! They will love this with colored leggings!
I will definitely try this pattern I’m so excited already
Wow! Great pattern! I will be trying this out for sure! Thanks so much!
I'm making this ASAP to use as a jumper this winter over a onesie for my ALMOST one year old. Thanks a million for posting another faulous pattern and tutorial!
I'm a total Prudent Baby pimp- I spam your blog all over the net, especially for your cute cute cute little girl outfits!
Not that I am asking for a "cut" or anything, and I promise to never be an abusive pimp ; )
I love it! S looks so cute!
I gasp a little everytime you post a picture of Scarlett. That girl is absolutely gorgeous!
That's such an awesome dress! That style was my favorite to dress my daughter in when she was a little bitty thing.
I linked to your tutorial over at Craft Gossip Sewing:
http://sewing.craftgossip.com/free-pattern-snap-wrap-dress-for-toddlers/2010/09/14/
–Anne
Very Nice 🙂
I can't stop looking at this dress!
Love Love Love it!!!!
Thanks =)
So thrilled you posted this. I cant wait to get going on one of these for my little girl. Thank you so much. Its gorgeous
i havvvve to get new fabric for this…
although i have a barely 10 month old who is almost walking without my hand…
haha ohh well ill make it anyways!!
I let my 2 year old pick out fabric for the dress. She chose a fabric with the "cars" movie motif. (or as she puts it, the movie with the cars). I thought it was a little bit ridiculous but it ended up being pretty cute. I still have to put the snaps in tomorrow and then I will send over a pic!!
I used this pattern and tutorial today. The dress turned out fabulously cute even if my 19 month old seems to think the snaps are a toy and undoing it! Thanks for this post. I love the dress and will be making more for my daughter and my niece. Now to find the right fabric for the next one…
Love your blog! The dress is precious, your daughter is adorable, and your husband isn't bad to look at, either. 🙂 Thanks so much!!
Love your blog, love this dress!! Thanks for your feedback on facebook.
I linked to this tutorial over at Land of Little Princesses:
http://landoflittleprincesses.blogspot.com/
Thank you so much!
Your blog inspired me. Love this dress too.
Your instruction is very clear.
I will try to make one. Thanks.
I LOVE this dress and want to try making it for my daughter. But, I am very new to sewing, so I apologize if this is a dumb question, but I don't understand the last step about where to place the snaps. Can you help out? Thanks!
Shawna
This is so cute and sounds REALLY easy!!! Thanks for the tip on how to make from one yard, your the best!!
Taylor
http://www.maryjanesandgaloshes.com
Just made it and it is adorable!! I ALMOST want to wake my 3 yr old to try on… almost…
I can't download or print the pattern, any help?
alison, not sure. it appears to be working fine in google docs, you need to be able to view and print PDFs, so as long as you have acrobat it should work
Thanks for replying Jaime, I tried a different computer and it worked fine, SUPER excited to make this for my almost 2yo!
that is fantastic. Found you through Me Sew Crazy's remix of this dress today. LOVE IT! I think I'll make your version and hers. Fantastic tutorial, too. You rock.
How cute! I'm going to make this as a top for me!
Just made this. :). My seams where you sew together the skirt and bodice are a little wonky but that's fixable. All and all though, I liked the tut alot and have been waiting a whole YEAR for my daughter to be big enough for the dress.
I just made this for my 2 year old and she refuses to try it on. Her favorite word is, of course, no. When do they start liking to wear clothes?
sooo cool had a great barin at the trift shop for some great linnen. So… I think this will be the perfect dress for it!
I made this for my daughter this weekend. It turned out lovely. It was my first time following an online tutorial and you made it so easy- thank you!
My one question – is there a difference in the quality of snaps? I bought basic sew on snaps from Joann's and everytime she sits on the floors or moves a too quick, as all little ones do, the dress comes undone. Any thought on how I can improve it? I have not tried buttonholes yet but I suppose I could try. I would just hate to ruin a great dress….thoughts?
Made this dress today and it was a little big for my 19 month old but fit my friends 4 year old!!! when the season is over it is coming back to me for next year!!! also thinking of making one for myself!!
Just made this yesterday. This was my 2nd project after 15 years of not sewing! Found this on Pinterest. Your tutorials were easy to follow and it turned out wonderfully! Thank you so much!
Thanks Julie! That’s fantastic!
ooo, i want to see a picture!
Do you have any tips on where to get cute shirting fabric? I totally would have used quilting fabric had it not been for your warning. I love quilting fabric patterns for kids clothes, but never find any cute shirting fabric. Thanks in advance!
This was such an easy pattern! Thanks so much! I’ll be making more for my 3 year old grandgirl! Even had an adult look at it. . .and say she wants to make one for a swimsuit coverup! I would love to show you, but I don’t know how to upload a photo to you!
So cute! My husband will LOVE the easy off/on. I can barely get him to snap all three buttons on a onesie.
Oh, that fabric is to die for. Beautiful! I’m so excited for summer dress season–bring it on!
I just have to tell you how much I LOVE LOVE LOVE your site!!!!! This dress was such a snap to do, and you have so many amazing patterns!!! THANK YOU THANK YOU THANK YOU!
[…] a start for my little sewing business! In all honesty, I based my pattern off the prudentbaby.com Snap Wrap dress, but I changed the way the bottom of the bodice was and added ties. I feel that it makes it a […]
[…] on Pinterest, I saw this Snap Wrap Dress from PrudentBaby.com and I knew I had some awesome, light, flowy fabric that would be perfect for […]
When I click the link for the pattern, it takes me to a blank Google Drive page 🙁
Have you considered a way to make this reversable? Do you think that’s possible?
I made this reversible! It is much easier than you probably think. Just make the bodice as shown, put two rectangle pieces wrong sides together, baste across then continue with the rest of the instructions. I used a printed polka dot on one side and a solid color that matched on the other side. I sewed a ribbon from the same material and used it as the tie.
I love this dress. I am kind of short on fabric right now so do you think this would work in denim?
Thanks!
Thank you so very much for posting this pattern! It is the first sewing project I did with a pattern and I was able to make it for my baby girl (4 months old)! It came out so incredibly cute! This pattern was a great way to break into sewing and gave me the confidence to move on to another project and try another pattern! Thank you!!!
I’m in love with this dress! And I want one for myself, lol. Fantastic job!
Judy @ KAMsnaps.com
P.S. You have a beautiful family!
[…] Переходите на ее блог, чтобы прочитать подробную инструкцию. Чем меня привлекло это платьишко, так это сама идея […]
[…] Переходите на ее блог, чтобы прочитать подробную инструкцию. Чем меня привлекло это платьишко, так это сама идея […]
[…] And even if you don’t like or need buttons, you can always turn them into badges, magnets or even thumbtacks (!!) instead. My first attempt at covered buttons. Bag made using The Awesome Bag tutorial from http://www.elsiemarley.com/the-awesome-bag-luvinthemommyhood.html One simple button using the last bit of a favourite fabric. Tutorial for dress can be found at http://prudentbaby.com/2010/09/baby-kid/snap-wrap-dress-2/ […]
[…] just couldn’t figure out what to do with it…until I found this snap wrap dress. I printed the pattern and made it slightly larger so that it’s probably about a 3T/4T. I […]
[…] can find the tutorial and all the details here. Dress made in July 2011… …and still fits (just about!) in […]
My mom just taught me to sew this weekend. I’m 29. She’s super crafty and loves to sew, crochet, etc but I’ve always preferred paper crafts, but got a bug lately to make my now 2 yr old twins some cute stuff, so we made a skirt together this weekend and now I’m hooked. I am excited to say that I even with my extremely limited and beginner knowledge, I understood this tutorial and totally feel like I could make this. I am so excited to try. Unfortunately, I don’t even have a sewing machine yet, so I have to wait till she comes back out to visit and brings hers lol. I think this will be top of my list to do next though!
I really like reading a post that will make people think.
Also, many thanks for allowing me to comment!
[…] ik dit leuke kleedje zag op deze blog, wist ik dat ik dit ging maken. Ooit eens… tussen al de andere projecten […]
I recently used this pattern/tutorial to make a patriotic wrap dress for my daughter. It was so easy to follow. Thanks so much for sharing!
Navy Wifey Peters Patriotic Patchwork Wrap Dress/a>
I Have just made a white version of this dress for my two year old and added a pink linen fabric flower at the fasten, its super cute, tempted to wake her up now (11pm) for her to try it on, but think I should wait until morning. Thanks for the easy tute and lovely little dress, I will be making more.
Merci beaucoup pour ce joli partage. Ce tuto est très simple et le rendu est magnifique. J’ai fait ma version, moi aussi, tu peux la voir sur mon blog : http://www.aufeminin.com/blog/titine086
Encore mille MERCIS.
So great! Thanks for a fantastic tutorial! Now can you come over and hold my hand while I learn to sew?
[…] Go to Prudent Baby […]
[…] Snap Wrap Dress:: […]
This is so adorable, thank you. You make it look so easy! Love the blog xx
[…] time for more Pretty Prudent Projects by you! Emma shared her snap wrap dress. The polka dots with that wood button are too […]
[…] Snap Wrap Dress ~ via Prudent Baby medianet_width='600'; medianet_height= '120'; medianet_crid='532623418'; […]
[…] kumaş elbise dikilmiş. Dikiş işlemleride yapım aşamalarıyla tek tek gösterilmiş. Nerede mi burada. Fikir almak ve dikmek sanırım kolay olacak. VN:F [1.9.15_1155]please wait…Rating: 0.0/10 (0 […]
Thanks so much! My toddler loves this style of dress and I did NOT want to wait for my mil to make dd another one. Cheers!
Thank you for the great tutorial! I made my first dress thanks to it and I am very glad it looks good :). Here’s my dress:
http://toni-tochica.blogspot.com/2014/03/blog-post_4.html
I made this for my little M. for Easter. She is a size 5 so I increased the size accordingly. I made it reversible with a print on one side and a solid on the reverse. I also used a ribbon cut from the same material as the tie. Thank you for the inspiration!
What a cute little dress. And thank you so much for the pattern. I am a beginner and it is dead easy to follow. Thank you very much
This dress is so cute, I want to make it for my little girl. Unfortunately the link goes to a page that is, according to internet explorer, not available. Where can I get the pattern?
The same goes for the Snappy toddler top.
thank you for the great tutorial. I can’t find the pattern. The link doesn’t work. Can you please help me?
[…] vestido de flores fue para un regalo. El patrón lo saqué de aquí https://www.prettyprudent.com/2010/09/baby-kid/snap-wrap-dress-2/. Es muy sencillo de hacer y queda […]
Such a cute dress…but How could I modify these patterns to fit a five year old???
Well I guess maybe it is just me cuz here is another dress I tried to find the pattern for and I am either missing or just not getting it. I am trying to click on the “free pattern” link and it just directs me back to this page. LOL it is probably user error on my part. I am officially calling it a day and giving up. Your dress sure came out cute though the print is so perfect.
Love this dress! Approximately what size is the pattern? I’m looking to make a pair 18 mo. dresses for my twin nieces 🙂
Had trouble printing on my mac but I figured it out!! You need to have an NEWER version of acrobat reader DOWNLAODED (FOR FREE!) than version 9.
This is because version 9 or earlier DOES NOT SUPPORT TILING!! PROBLEM SOLVED!!
Just made this for my 2 year old (also freakishly tall!) I made the sewed the straps to the back of the bodice, criss crossed, I also only attached the skirt to the front of the bodice, then hand tacked the inside down. That way, if I need to I can always go back in an lengthen the straps a bit. But since I have a 7 month old girl as well, I’ll probably just save it for her when my first outgrows it! Thanks very much!
hi I cant find the kink to the free pattern.
can I get the link please?
Thanks for this darling pattern. I don’t have any grandchildren, but sew for my friends babies/kids at work. They will love this one. It look like thin spaghetti strap ties would be really cute to tie this closed instead of snaps. I’m going to make one up like that and see!