


Let’s kick off Prudent Baby’s Summer of Fanciful Treats: sponsored by Bake it Pretty with the lowdown on the little chocolate mold candies that we used to top the cupcakes for Clare’s Buggie Birthday. I’ve heard in the past that some of you have found molded chocolate treats difficult & annoying to make. Here is my process. Maybe you too will decide that that molded chocolate is the cake decorator’s secret weapon.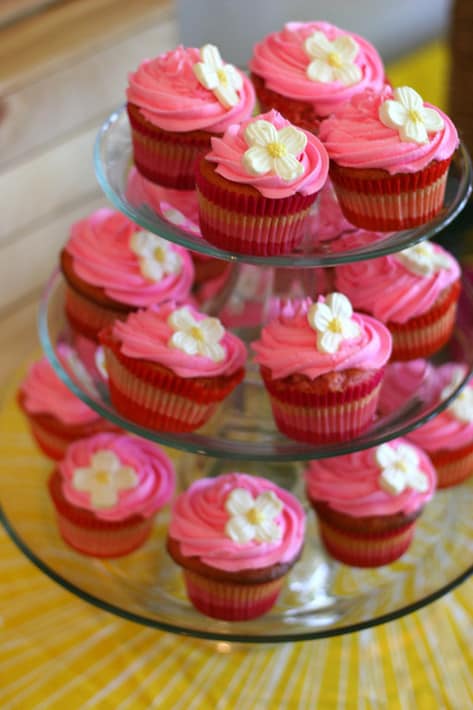
Click here to get the full scoop on making chocolate mold candy.
Supply List:
Americolor Gel Food Color Paste – Lemon Yellow
Dogwood Blossoms chocolate mold
White chocolate melts
Disposable pastry bags![]()
1. Pour a small amount of white chocolate melts (for the flower centers) into a microwave safe bowl.
2. Microwave for 30 seconds and stir. Most likely they will need to go back in for another 30 second interval. Remove and stir (even if they don’t look melted.) Repeat until your chocolate is smooth after stirring.
3. Add a few drops of Yellow Gel Food Color to desired color and stir thoroughly. Of course, you can use whatever color you like.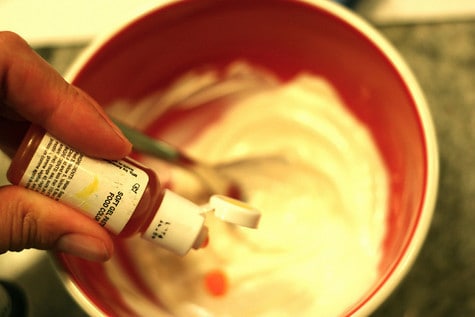
4. Working quickly, spoon the melted chocolate into a disposable pastry bag. I find it easiest to place the point of the bag into tall glass and fold the top over the sides of the glass to do so.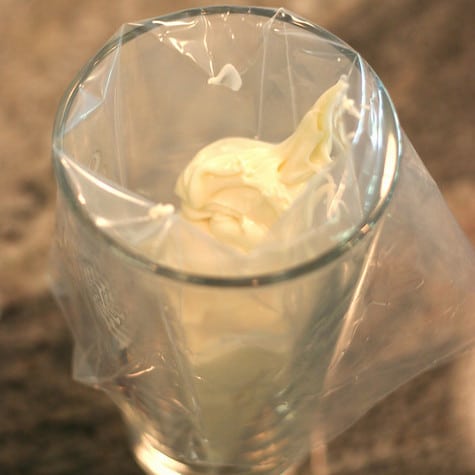
5. Pull the sides of the bag up and push the melted chocolate into the tip of the bag.
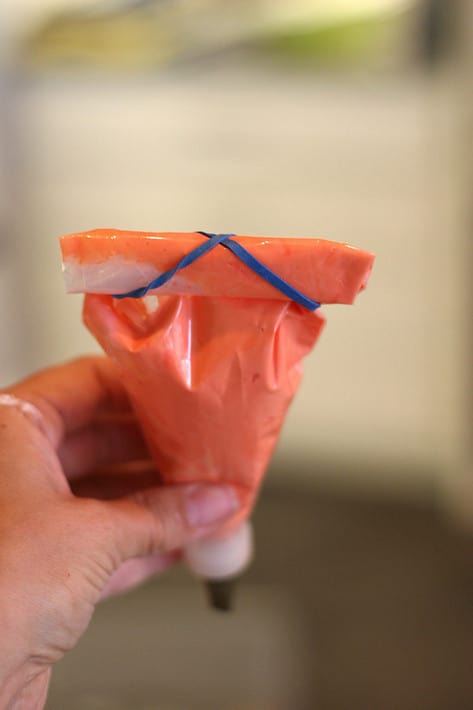
6. Fold the sides of the bag in and roll the top down. Secure with an elastic band in a figure eight as shown, if desired. * Don’t be confused by the orange… or the pastry tip. 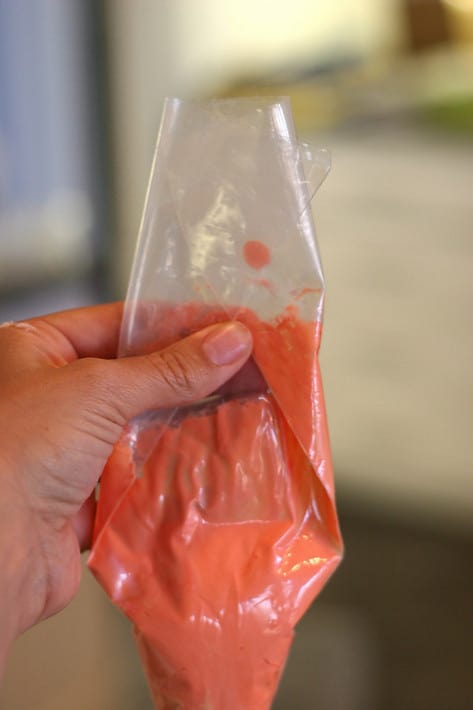
7.Snip the very tip of the bag off. Not too much, you can always cut more!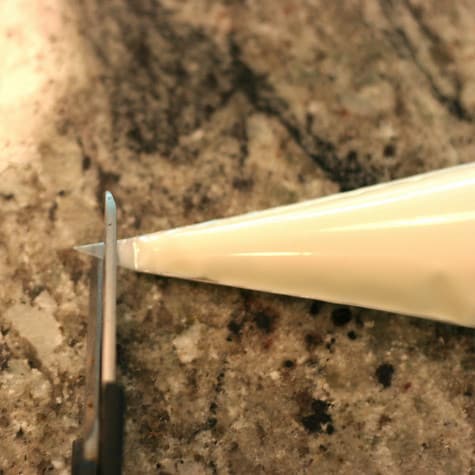
8. Squeezing from the top, fill the flower centers with a small amount of yellow. Not too much, you don’t want it to bleed into the petal area.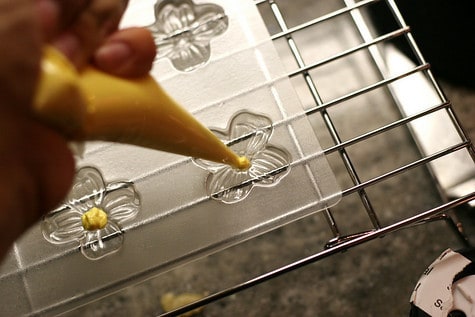
9. Tap the mold gently on the counter top to get rid of air bubbles.
10. Place your yellow pastry bag inside another pastry bag and submerge in a glass of hot tap water. This will slow the cooling of your chocolate. * If my chocolate gets too hard/cold at any point, I will microwave the entire bag for 10 seconds. It doesn’t say anywhere that the bags can be microwaved but it has always worked well for me. Proceed at your own risk. : )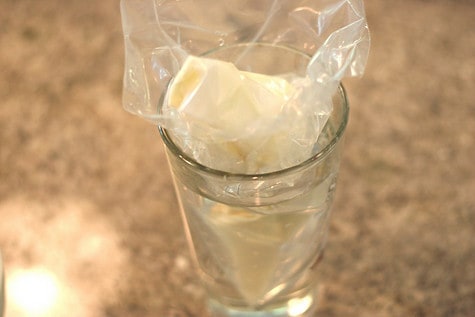
11. Repeat from step 1 with a greater amount of chocolate for your flower petals. I left this chocolate white.
12. Fill the rest of your flowers. I like to start with an outline, being careful not to overfill or go outside of the edge, and then fill in the center.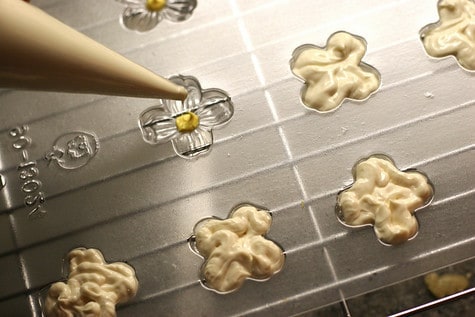
13. Tap gently again to smooth the surface and to release air bubbles.
14. Refresh your hot water glass for the bags.
15. Pop in the freezer for a few minutes (5-10) until the chocolate separates from the mold when you peek at the bottom. If you turn the mold over and the chocolates don’t fall out of the mold, pop it back in the freezer for a few.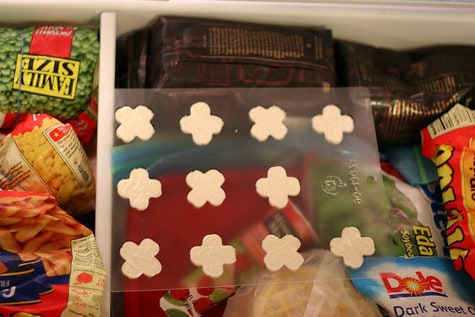
*Did you really need to see the inside of my over-stuffed freezer? Probably not.
16. Let them dry/thaw on the counter for a few minutes to avoid moisture issues.
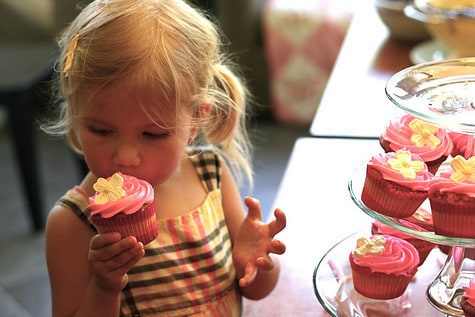
And you are done! Use your beautiful Dogwood Blossoms to decorate cakes and cupcakes or bag them up as a sweet favor on their own. For a cake these would look beautiful placed along a hand drawn branch! Gorgeous!
Thanks again Bake it Pretty for helping us create this awesome series of baking DIYs with your amazing supplies!