


Learn how to make salt dough ornaments and you will have a fun at-home activity for the family! This post may contain affiliate links which give us a small amount of income at no expense to the customer. Thank you for your support.
I’m sure some of you remember making these as a tot. When Jaime suggested we try some here on Pretty Prudent, I was totally on board! Fancy sugar cookies are one of my favorite crafty projects so the idea of making pretty “cookies” that could last forever was totally appealing. Have you tried these fun-for-all ornaments lately?
Here’s the scoop on how to make Salt Dough Ornaments.
As you can see, we skipped the dough sculpting and stuck to cookie cutters for our ornaments. Here’s what we did!
Make the Dough
- 1/2 cup table salt
- 1/2 cup water
- 1 cup all-purpose flour
And here’s How to Make Salt Dough Ornaments! So fun!
Blend ingredients together in a mixer until a sticky dough forms.

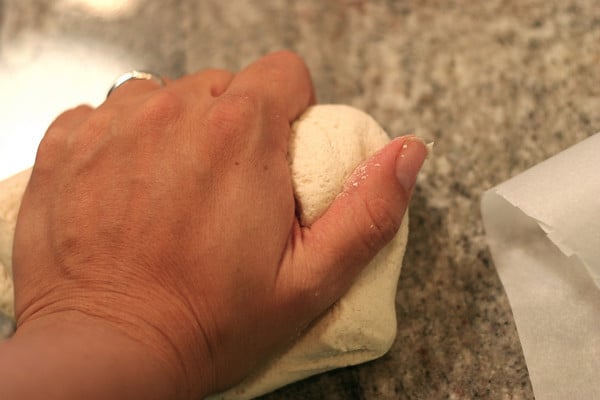
Take the dough out, and knead for 5 – 7, to a play-doh texture. If your dough is still really sticky, work in a little more flour. Once it feels smooth and elastic, you are ready to start making ornaments. This amount of dough was enough to make 15-20 ornaments of varying sizes. The recipe can easily be doubled, but be sure to keep any dough you are not using wrapped in plastic wrap, and work quickly, salt dough will dry out.
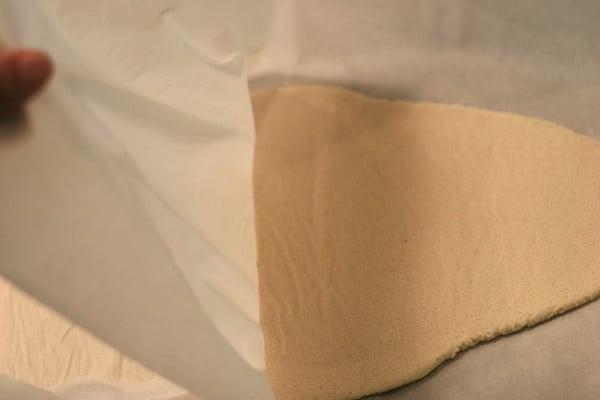
Roll the dough out to approx 1/4″ on a lightly floured surface.
If you want to try a cool trick, Roll your dough between two sheets of parchment paper, pop the whole thing in the freezer for 5-10 minutes, peel off the parchment and cut. No sticking! but you might get some little lines on the bottom of your shapes which was fine for me since it was the back. This works like magic for real cookies!
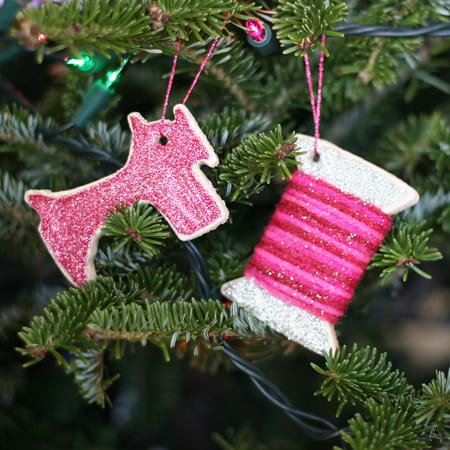
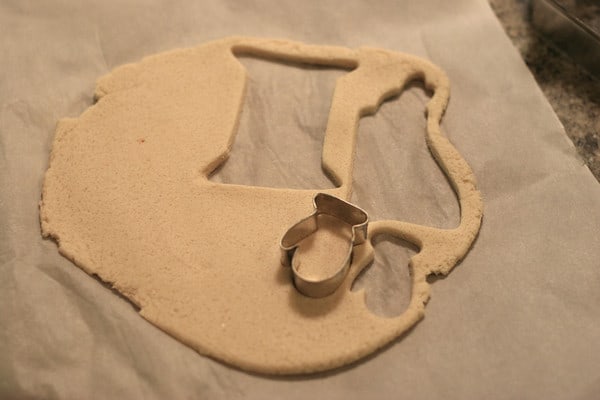
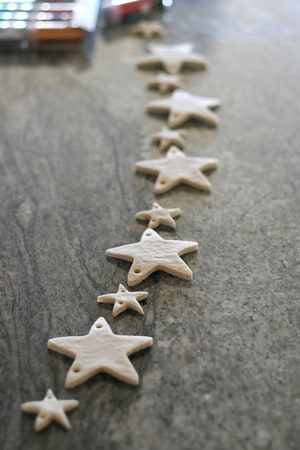
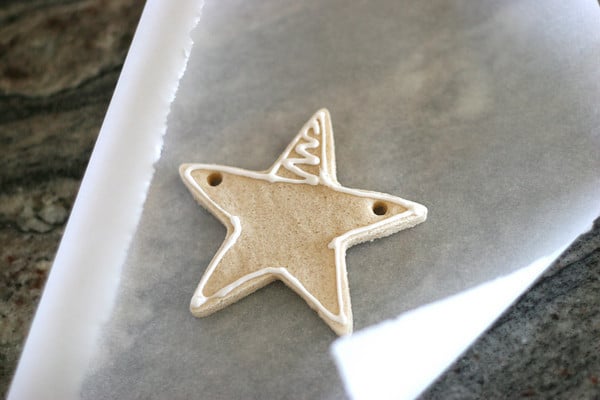
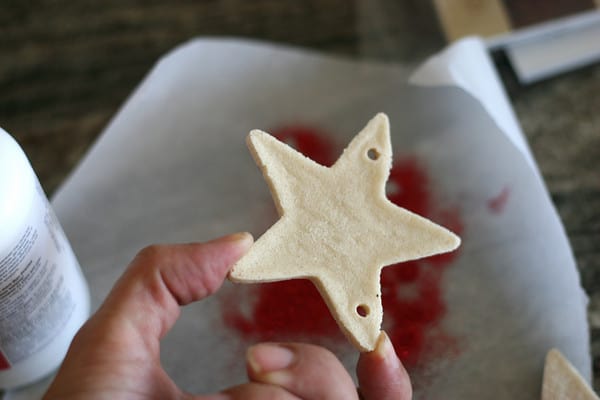
Pick out some cookie shapes you want to make. I love this sewing trio, tiny Christmas shapes, stars and gift tags cookie cutters. Cut out your shapes and drop them on your cookie sheet. No need to leave much space. You shapes will actually shrink a little rather than rise in the baking process.
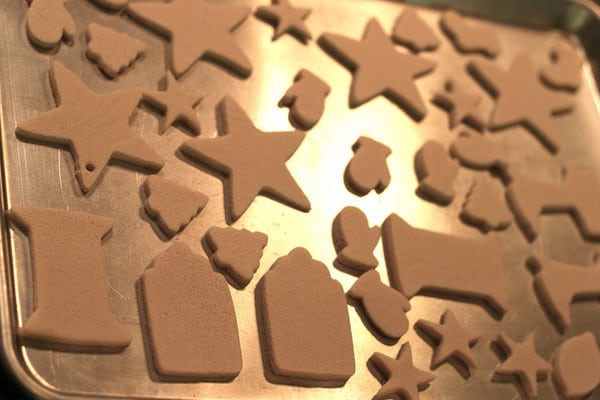
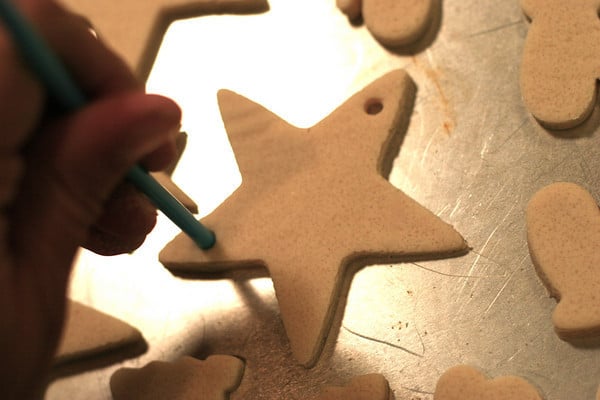
Use a straw to make larger holes and a the blunt end of a wooden skewer for smaller holes for hanging.
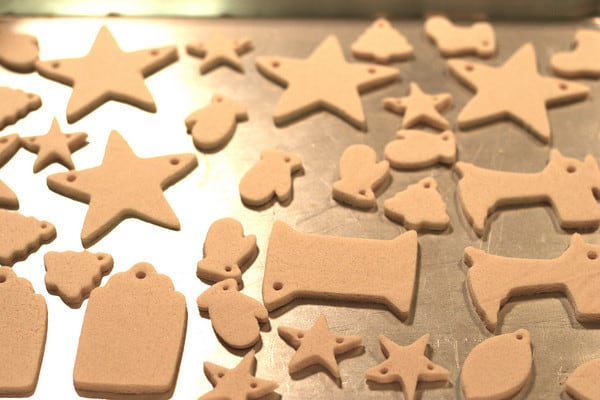
Dry your shapes in the oven at 200 degrees Fahrenheit for 5 or so hours. You don’t want them to brown at all, just dry. I flipped mine over at about 4 hours and let them go for a few more.
Now for the fun part! Decorating your Salt Dough Ornaments!
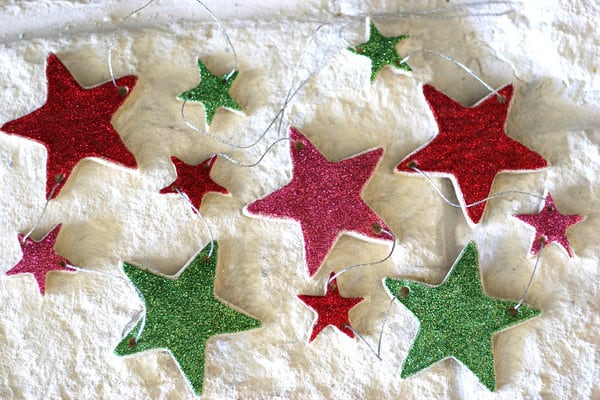
Sparkly Star Garland


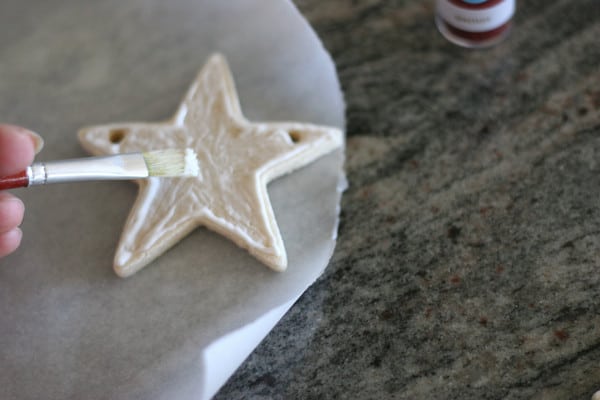
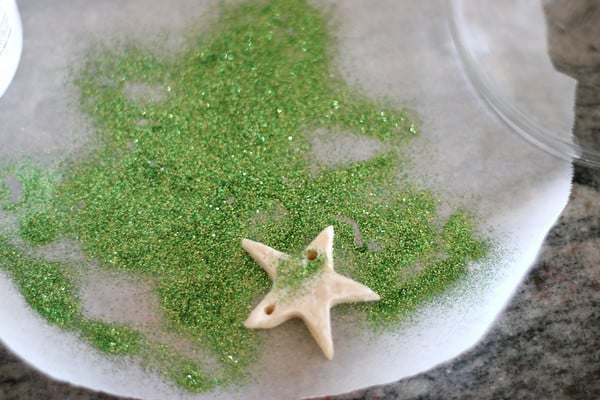
Glitter ended up being my favorite way to decorate the ornaments. So striking and easy!
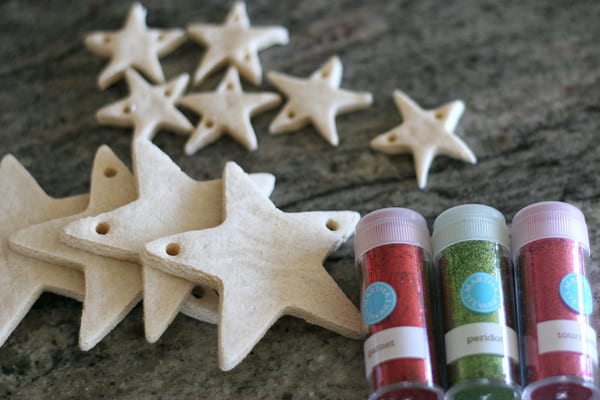
I wanted the edge of my shapes to show like sugar cookies so I did an outline in glitter glue 1/8″ from the edge, then filled my shape with glue and used a paint brush to be sure the surface was completely covered.
On a piece of parchment paper, I generously covered the entire surface with glitter and tapped off the excess.
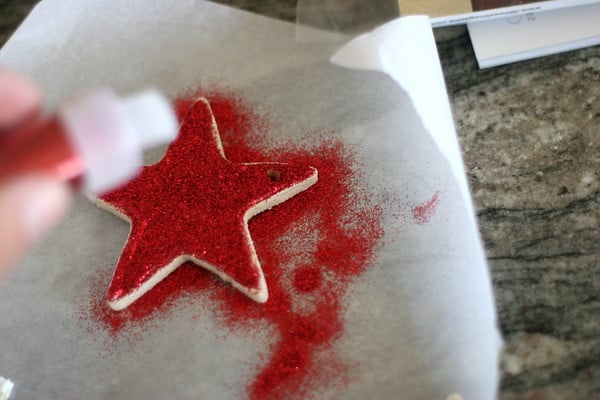
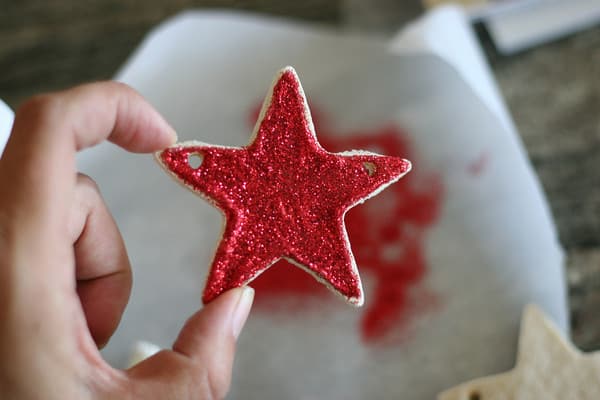
When I was done with each color, I returned the glitter to the container for no waste and started with a new sheet of parchment.

Once dry, spray all of the stars with a light but thorough coat of Polyurethane spray, repeat 2-3 times, front and back. Once dry string on bakers twine, or sparkly thread.

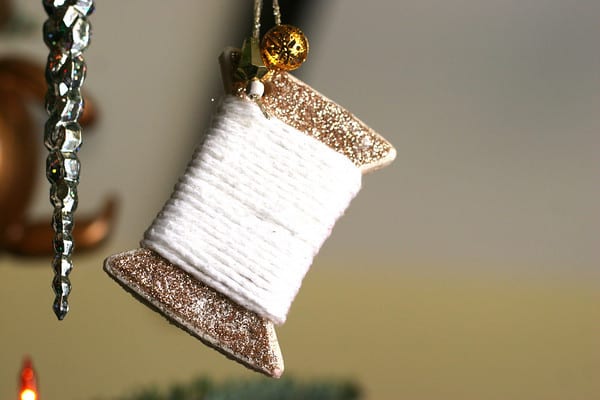
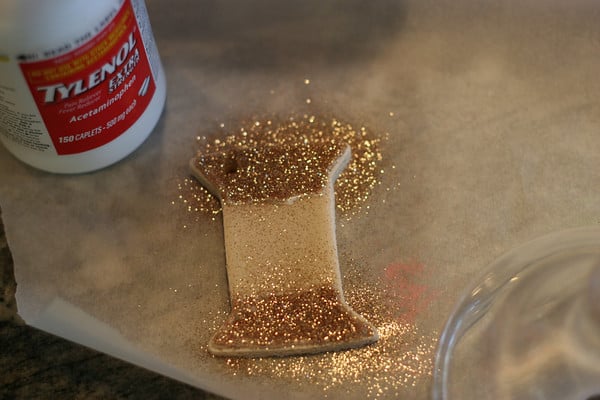
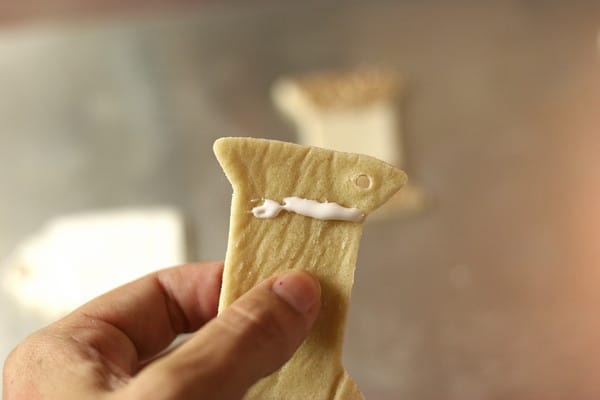
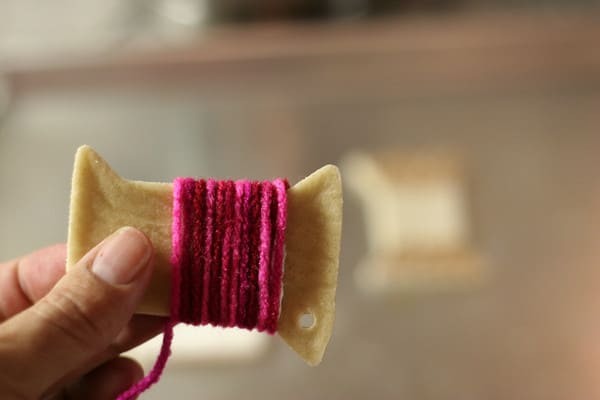
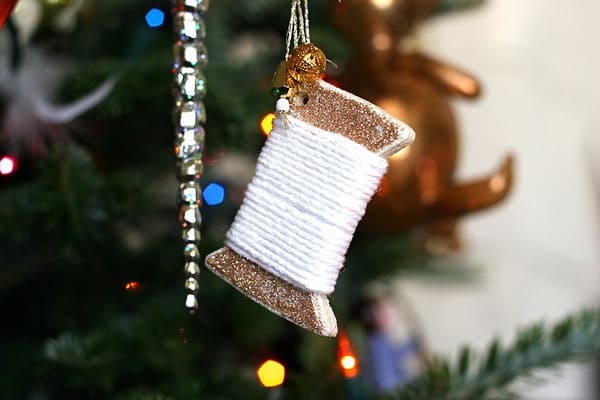
Sewing Machine and Spool of Thread

The sewing machine was made the same way as the stars. For the thread, coat just the ends of the spool with glitter, spray with polyurethane spray and wrap yarn around spool, securing with glue at beginning and end. (um, hi my pregnancy BFF Tylenol)

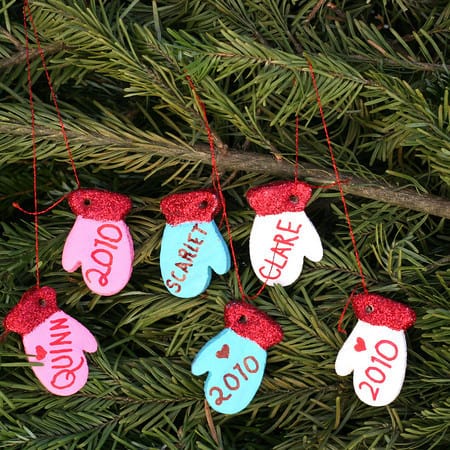
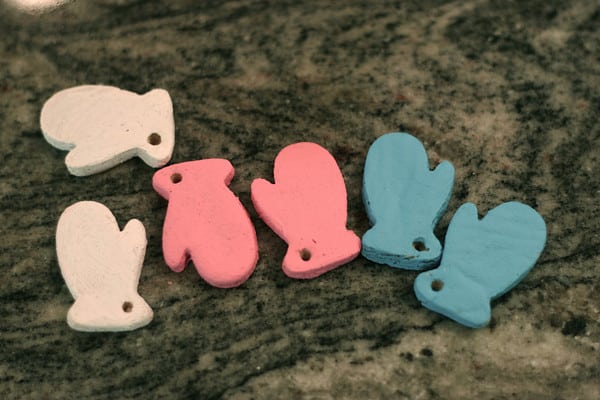
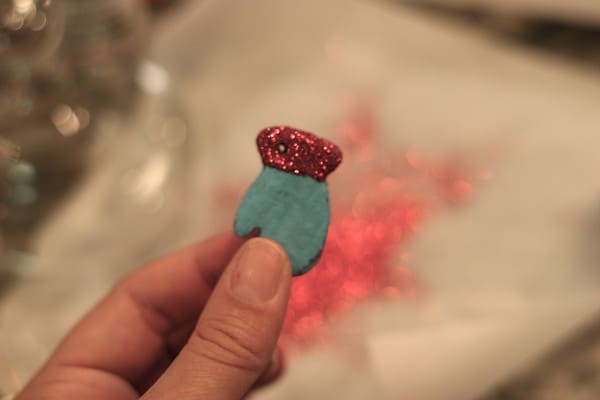
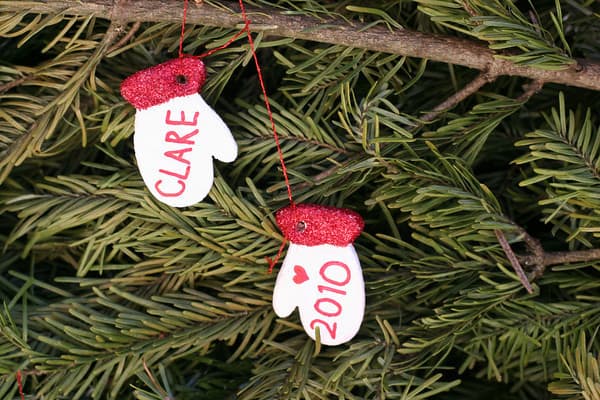
Mitten Strings
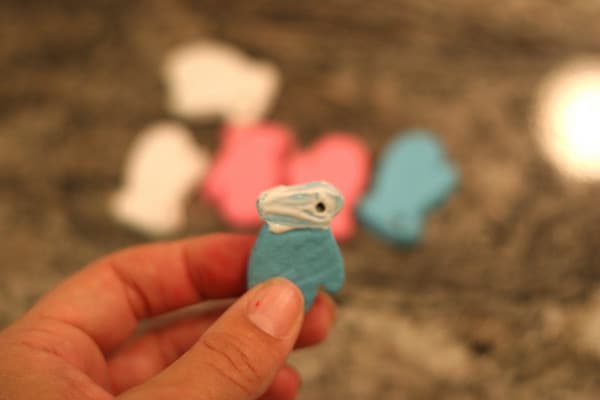
First I painted the entire surface of the mittens with acrylic craft paint. Once dry, I topped the cuffs with glitter.
Then poly-spray the mittens. Once dry, you can write names and dates with a sharpie. I did the Sharpie before the sealing coat the first time and they bleed horribly! No worries, I just repainted and started over.
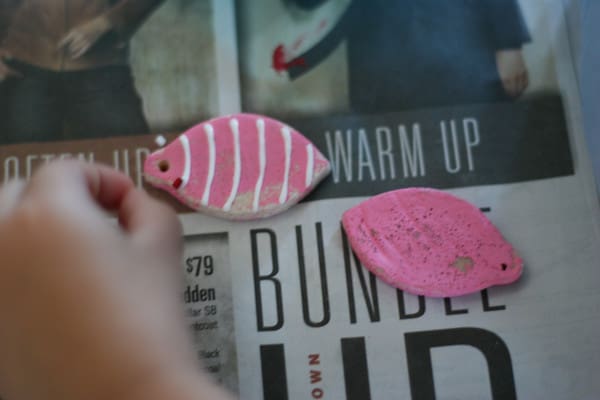
Clare’s Beaded Beauties (my favs, of course)

After painting, we added some generous glue and Clare beaded them up, then we sprayed. LOVE.
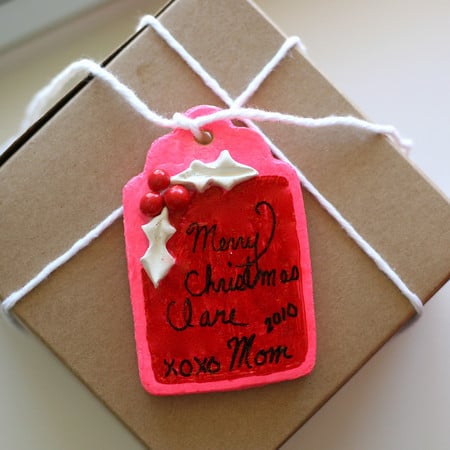
For this gift-tag (don’t look at that shameful handwriting and splotchy background) I added some holly and berries made with Sculpey. This was really fun and I want to try some more, hopefully with a bit more success.
Other things to try
– If you want to experiment with color, you can substitute 1/2 cup of dark tea or coffee for the water. I want to try some gingerbread houses!
– Add food coloring to dough
– Sculpt your dough into 3-D shapes attached together with a little water!
If you loved this project, try these Cookie Cutter Bird Feeders. They are so much fun to make with the kids!
Updated April 14, 2020. Originally posted Dec 13, 2012