


Man, I keep seeing these around and they are so gorgeous! But 50 bucks? Guess what, I made some and I’m going to show you how. You know what they cost? Zero dollars. I even feel like I earned money on these somehow.
I think it would be super fun to throw a party… a birthday party for a kid, a shower of some kind, or just a crafting party… and ask everyone to bring a couple old t-shirts. Then each person cuts his or t-shirt up, you hang all the strips on the wall or from a string, then everyone chooses from them to make themselves a T-Shirt scarf necklace! Super fun, super cheap, and with super stylish results. Would you throw a party like that?
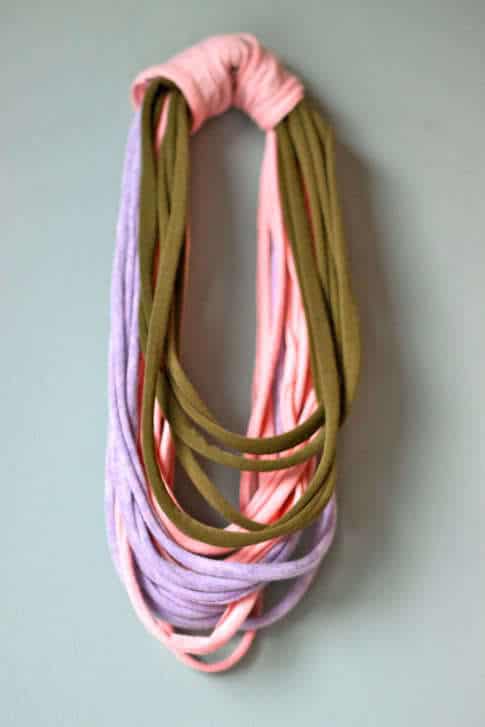
Scarlet picked out her own colors and made herself this cutie! She loved it! Adding this to the list of potential gifts for hot mess mommies and kiddos.
Get the full DIY Recycled T-Shirt Scarf Necklace Tutorial after the jump…
How to Make A Recycled T-Shirt Scarf Necklace
1. First, grab some old t-shirts. Any that don’t have side seams are the best, but those are more expensive and you probably don’t want to chop em up, so shirts with side seams are fine. Also choose shirts with a little bit of stretch. I tried some ribbed shirts and they don’t roll as well when cut into strips, but they do add their own flair. I used mommy-sizes shirts (actually, pre-mommy sized shirts that have not fit me since I got pregnant) and some kid sized shirts as well. The fabric stretches to about 50% longer then it originally is, so the kid sized shirts can fit over your head and definitely over a kids’ head.

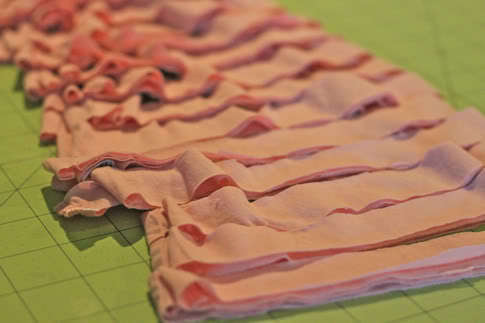
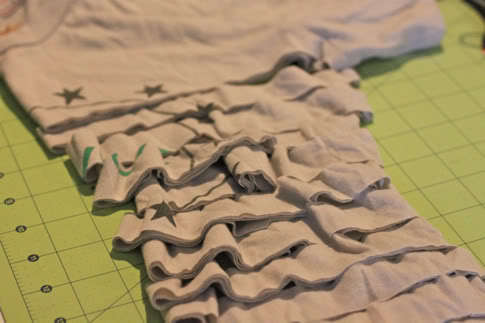
2. Cut of the bottom hem and from the armpit up, then slice the remaining jersey tube into 1″ thick sections. No need to be precise. Also cut off any tags that might be on the inside seams.
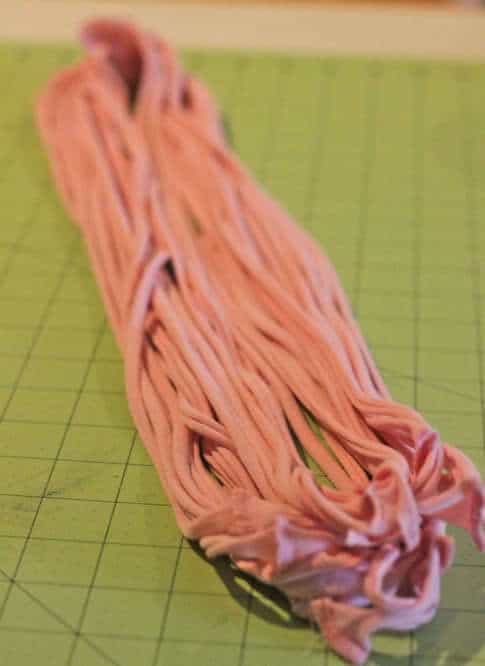
3. Grab one slice and pull it to stretch it out.
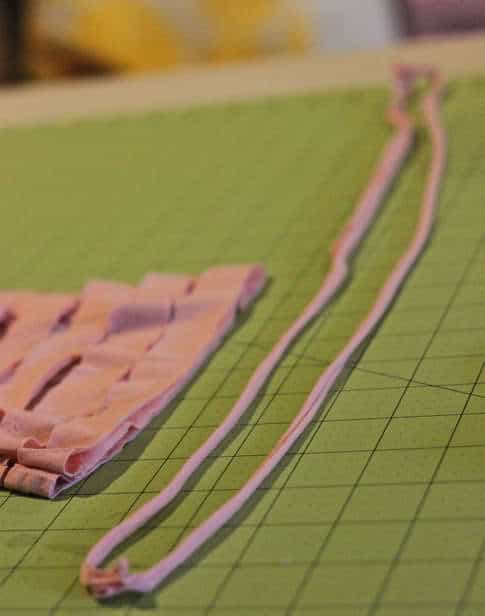
4. Continue until you’ve stretched all the loops.
Try to keep all the seams aligned on side of your pile for easier assembly later:
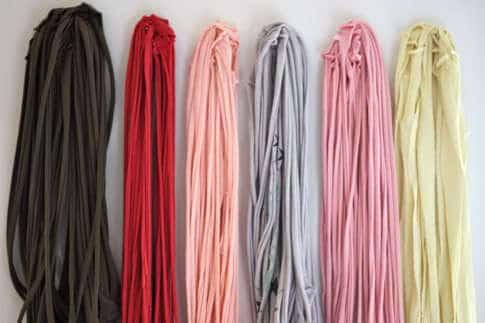
5. Repeat on other shirts. Shirts with designs turn out pretty cool looking.
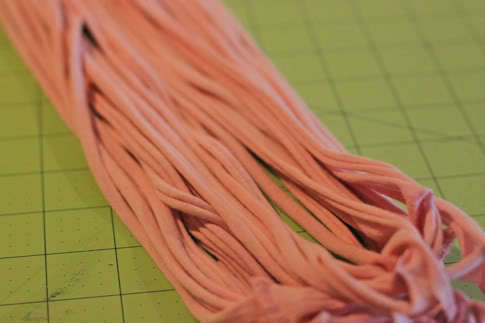
6. Now you’ve got a bunch of pretty colored jersey strips stretched into rolled “tubes.”
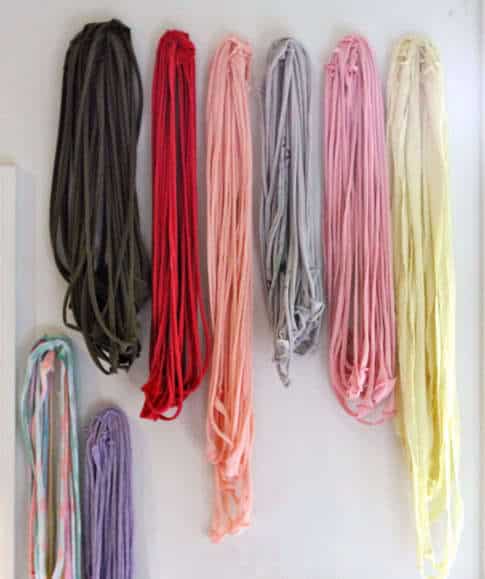
I hung them on the wall on nails because I loved the way they looked. Also hanging from a string or hanger would be pretty. Now I can just invite people over and have them make their own necklace scarves wheneves i please.
7. Select your jersey bits to make yourself a necklace. Go big or small, whatever your pleasure. This is the fun part, designing your look.
Try to arrange them so all the seams are in the same place or similar spots so you can cover them up later (or not if you like the exposed seam look). try it on a few times till you have it just the way you like it. you could braid a few sections or add some beads in random spots, or twist some pieces, have fun with it!
Tie a string around it to hold it in place.
8. Now grab a chunk of leftover tee and wrap it around the area with the seams, wrong side up, and sew the ends together.
Trim the edge.
Flip it over.
Done.