Paper Pinwheel Cupcake Toppers


These cupcake toppers were my first stab at using my new Brother printer-scanner (the fancy 11″X17″ one we are GIVING AWAY in this month’s contest) and they were so much fun! I used mine to decorate some cupakes (umm, well, to decorate A cupcake… somehow the others disappeared before the pinwheels were complete. Guess I will need to make more cupcakes, darn).

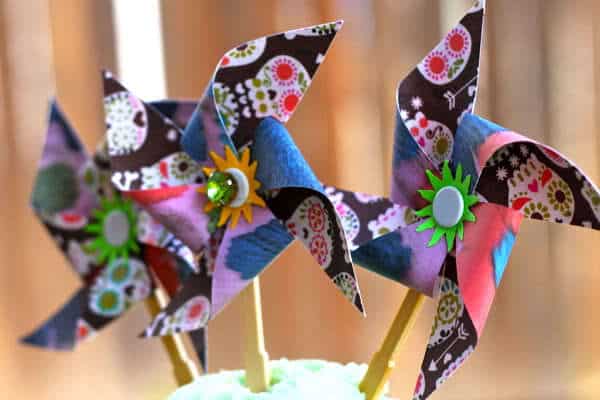
Anyhoo, you can use this tute to make simple paper pinwheels for any occasion at any size. It’s so much easier than you would think.

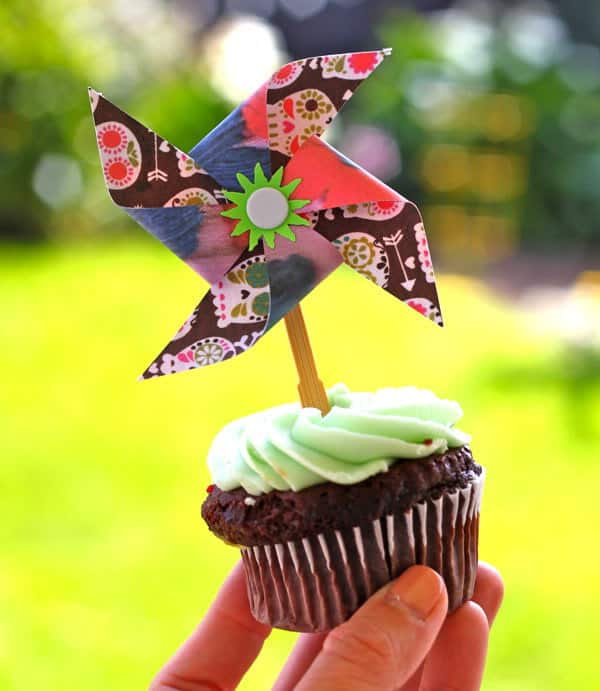
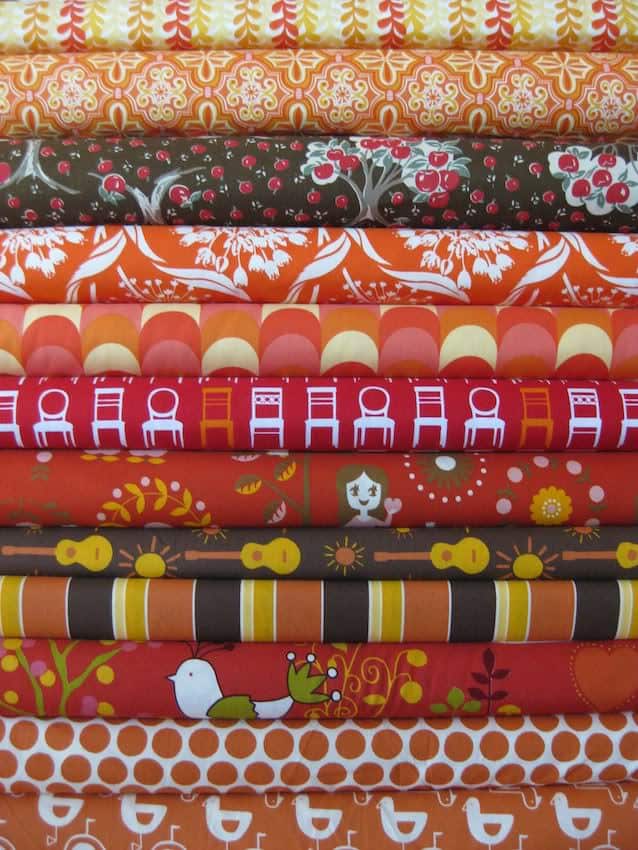
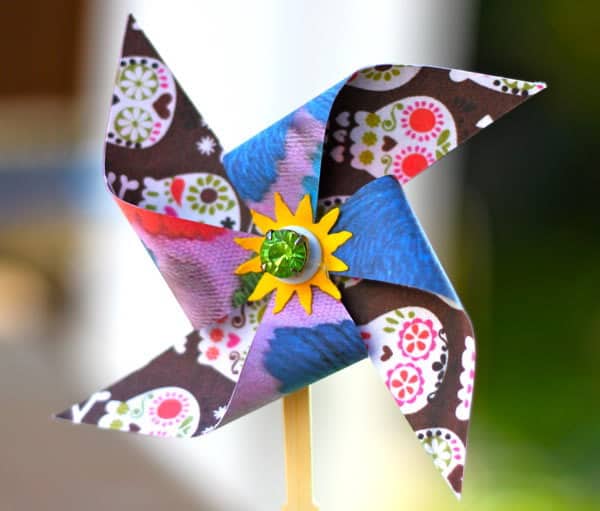
The first thing I did was ask Jacinda to scan some of that awesome bonehead fat quarter she’s giving away as our Friday Surprise Prize this week. She also scanned an embroidered dress of Clare’s from Mexico for me. I printed out the images on two sides of cardstock to make my pinwheels.

Get the full Paper Pinwheel Cupcake Topper Tutorial after the jump and leave a comment if you love skulls and want a bonehead fat quarter to call your own…
(more…)

by

DIY Recycled Sweater Pants


What a cute project to make an old winter sweater into cozy toddler pants. When gina from The Daily B sent it over, I begged her to share it with us, and she agreed. Make sure to check out her site The Daily B for more great projects and inspiration. Take it away Gina…

I’m sure you have a few sweaters in your closet that are destined for the donation pile. Did you know you can turn them into pants for your little one? This is one of my favorite projects. It’s free, and it only takes about 30 minutes to complete. I thought I’d provide a full-fledged tutorial so you can try it at home. Of course, I’m all about winging it, and don’t bother with sewing patterns and pinning, so not every pair of pants I make is perfect (in fact, none of them are). But if you’re willing to accept my tutorial and all its flaws, let’s get started!
Get the full Recycled Sweater Pants Tutorial after the jump…

Leave a comment for Ms. Gina, because she was kind enough to share, and also because this week’s favorite comment wins that skulleriffic fat quarter!
(more…)

by

GIVEAWAY: Slow Cooker Revolution


Since becoming moms both Jaime and I have become crock-pot enthusiasts. We’ve both found some amazing recipes, but you do have to sift through the tuna casseroles and cream of mushroom chickens (not that there’s anything wrong with that) to find the treasures. So imagine our jump-for-joy, sing-from-the-mountain-top, dance-in-the-rain euphoria when Slow Cooker Revolution from the Editors at America’s Test Kitchen arrived on our doorstep. CROCK-POT + ATK = YES PLEASE. And is that lasagna on the cover? Wait, what? Lasagna in the slow cooker? Tell us more. So you’re thinking… good for you, you have a new cookbook, but what’s in it for me? Well not only are the folks at ATK culinary geniuses but they also super nice and so we have a copy of Slow Cooker Revolution to give away to a lucky reader. Find out more…
(more…)

by

Last Minute St Patrick’s Day Treats w/ FREE PRINTABLES!

We loved the little Jelly Bean Pods from the 4th of July so here are more for St. Patrick’s Day! This time we have free printables to make us all look extra Mom-tastic. But really they take like 3.5 seconds to make. Shhhhh…

Get the FREE PRINTABLES and EASY INSTRUCTIONS…


What you need:

• Treats in shades of green. I used an assortment for green Jelly Bellys from my local Super Target and some M&M Mint Thrills (holy yum, I almost didn’t have any left for the bags!)

Vellum (which you can pick up from any office store in the drafting isle) or any paper and a printer

• Sewing machine and green thread. If you don’t want to sew, you can use tape. Happy Tape would be super cute.

Version 1.

1. Add names in white over the green square and print, or print and add names with a silver metallic pen. Here is the FREE DOWNLOAD.

2. Use the fold lines (about 1/3 way in top and bottom) and using a bone folder or a butter knife, create a folding line/crease by running your tool gently on the paper along the side of a ruler.

3. Starting at one of the creases you just made, sew in a curve along the top of the pennants. I used some beautiful sparkly Kreinik Thread but if you aren’t up for sewing, you can draw the line.

4. Curve the paper so the side edges touch at the back and sew them together with 1/4″ seam. Optional: Trim with pinking shears.

5. Press piece flat with sewn seam at back center & sew straight across bottom.

6. Add treats (don’t over-stuff)

7. Sew along top, & trim top and bottom with pinking shears.

Version 2.

1. Print art on vellum (or any paper) DOWNLOAD THE FREE TEMPLATE

2. Cut sheet into 4 quarters, using guidelines

3. Curve so sides touch and sew up back

4. Trim seam with pinking shears (I didn’t do this but it would have looked nicer.)

5. Pinch bottom so seam is centered and sew across bottom.

6. Add treats

7. Fold top the opposite direction of bottom and sew closed. Trim top and bottom with pinking shears.

8. Look like the craftiest mother of all and pour yourself a green beer to celebrate.

Save

by

How to Sew A Sham Pillow with Zipper Closure


I have such lust in my heart for Anna Maria Horner’s Innocent Crush velveteen fabrics, I just want to rub them on my cheeks all day long. So of course a pillow for my redesigned craft room had to be made. The velveteen lends itself perfectly to a sham with nice stiff edges, so I combined elements of Jacinda’s Sham Style Pillowcase tutorial and the How to Sew a Zipper Pillow tutorial to create a pillow with both a zipper closure AND a sham edge.

It is much easier than you would imagine, and it will allow you to take the zipper off of the very edge of the pillow so you can add decorative trim and other fun goodness without having to use an envelope closure (like we did for the pom pom pillow tutorial). Find out how to sew a Sham Pillow with a Zipper Closure after the jump…

I’m making about ten thousand pillows for my new office, so I’ll be sharing how to use zippers with trim and ruffles and whatnot soon. Is there a kind of pillow you want to know how to make? I’m on a pillow-roll so let me know in the comments. You could also win that skull-tastic fat quarter!
(more…)

by

Prudent Project Round Up from Flickr


All of today’s gorg reader projects were spotted in the Prudent Baby Project Pool on Flickr!

Top: DIY Nursing Cover | Top Knot Baby Hat | Pillowcase Dress

Middle: Reversible Bib & Burp Cloths | Bow Tie | One Shoulder Dressy Dress

Bottom: Layer Cake Skirt | Reversible Napkin Rings | Ruffle Heart Shirt

Join the Prudent Baby Project Pool on Flickr and maybe you’ll see your pretty prudent baby project here soon. You can also chat with other awesome Prudent Mamas and upload your pics to our super fun Prudent Baby Facebook Page or tweet them to us. And of course you can keep sending them to us through our Prudent Baby Contact Form. Your “As Seen On Prudent Baby” Button is down there on the left. Thank you!

by