The Oliver + S Lazy Days Skirt is the subject of this latest installment in our series where we give other folks’ DIYs a try. The verdict: Do it! I enjoyed making one for Scarlet so much, I had to sew one for Clare too! The free pattern from Oliver + S was so simple to follow; you can download it here. I can’t wait to try the more complicated Play Date Dress next time.
Materials included the last of the Joel Dewberry Tossed Flowers (Ginseng Collection) fabric in Raspberry and Camel leftover from the fabric alphabet project, some 3/4″ elastic, and some generic grosgrain ribbon. The whole skirt cost less then $3 to make!
Don’t forget to send us a picture if you give it a try, and let us know what you think of the pattern in the comments!
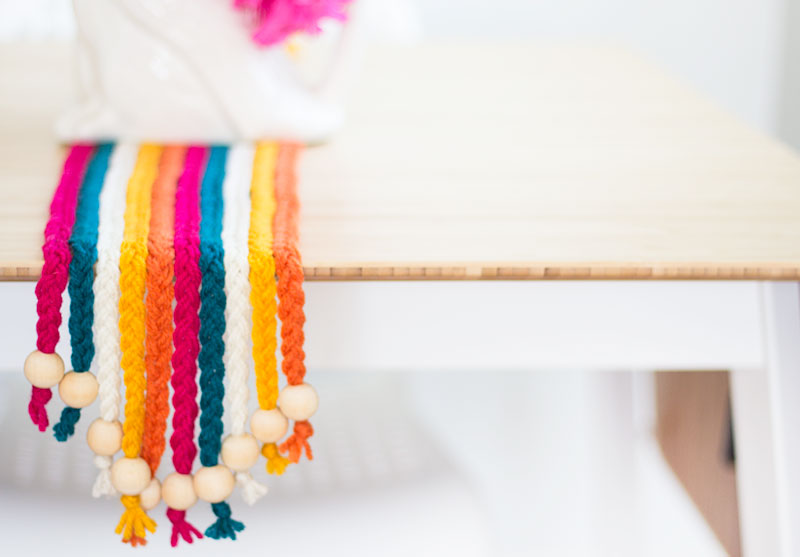
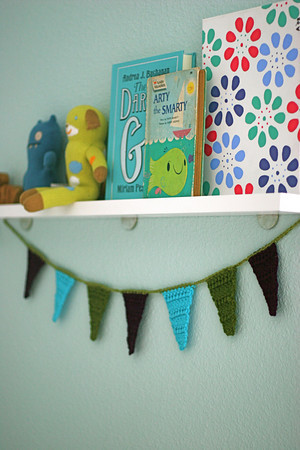
Pennant Garlands are everywhere and we still can’t get enough.This weekend, I tried one with yarn! It was really fun to make and pretty quick. Oh, and you can make this in bed, a total plus for crochet in general. I think these would be A-dorable on the mantle for Christmas strung from stocking to stocking.
I used an I/9 hook but anything from G-K would work.
Tips:
Unless otherwise noted, pick up both loops of each stitch
Keep gauge loose for ease of crochet and so that the piece will lay flat
Pennant:
Row 1: Ch 4, 3 DC in first Ch stitch (This should look like 4 DC in one loop – a tiny triangle)
Row 2: Ch 3, turn, 1 DC each in next 4 stitches (including the first stitch right at the bottom of your chain & the last stitch, which will be tighter. You can pick up just the top loop on the last DC)
Row 3: Ch 3, turn, 1 DC each in next 5 stitches
Row 4: Ch 3, turn, 1 DC each in next 6 stitches
Row 5: Ch 3, turn, 1 DC each in next 7 stitches
Row 6: Ch 3, turn, 1 DC each in next 8 stitches
Row 7: Ch 3, turn, 1 DC each in next 9 stitches (You can continue with more rows if you would prefer larger triangles)
Pull yarn through one last time to tie off and cut leaving a 1-2 inch tail
Crochet desired number of pennants (there are 7 here)
Connecting Garland:
1. With garland color, Ch 25 (or more stitches for added length at end)
2. Pick up top row of a pennant (with the pennant tail facing right)
3. 1 SC in each (10) stitch across top of pennant (make sure your first stitch is directly under the tail knot)
4. Ch 5 (or more, if you want more space between pennants)
5. Repeat step 2-4 for each pennant
6. After attaching last pennant, Ch 25 (or more for added length.)
Clean up:
Weave hook through top row of pennant (as shown below) and pick up tail on hook. Pull tail through piece.
Weave hook down side towards bottom point, pick up bottom tail and pull throw piece.
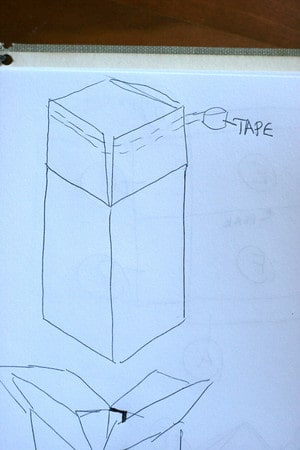
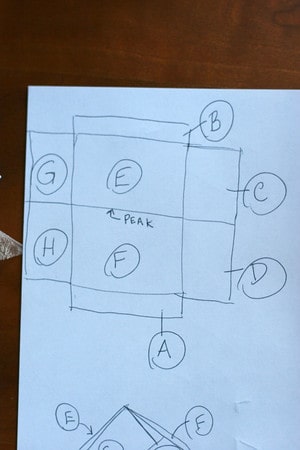
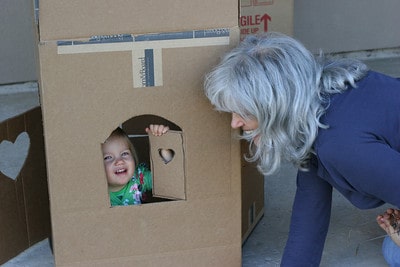
Prudent Grammie (my resourceful & crafty mama) made this awesome cardboard playhouse when she came to visit this Summer. With a roll of packing tape, a sharpie, an x-acto knife and two cardboard boxes she made the most entertaining thing in our home. Oh, and it takes about a half hour.
Instructions after the jump…
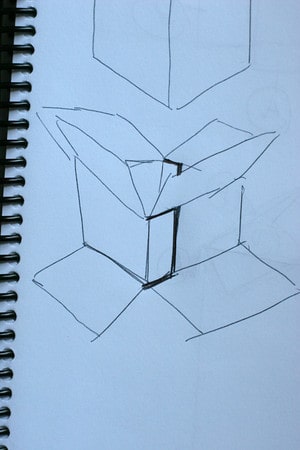
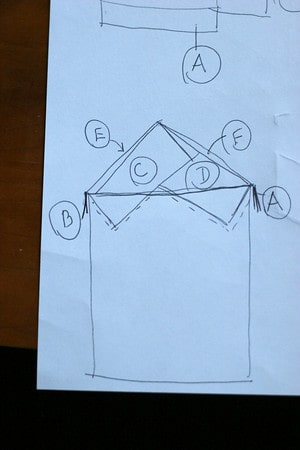
What to do: 1. Open your larger box so that the flaps stand up straight and tape around the outside to hold them up 2. Cut your smaller box down the side about 2 inches past the corners (as shown below) 3. When your smaller box is unfolded it will look like the diagram below 4. 2 of your side flaps (C&D;) will fold as shown below to make a solid eve for the house. 5. If your smaller box was as tall as the width of your larger box, flap G&H; can be folded just like C&D; (or) Flap G&H; may remain flat to become a continuation of the roof (as shown below.) They may need to be trimmed to fit. 6. Now fold your roof so that C&D; are inside the top of the larger box. Leave flap A&B; outside to keep the roof in place (as shown in diagram 4) 7. Now tape around the top of the larger box again to hold roof in place. 8. Draw windows and doors with a pencil (or sharpie if you like to live dangerously like my mom) and cut through with a box cutter or x-acto.
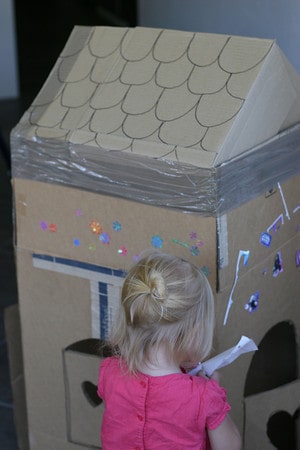
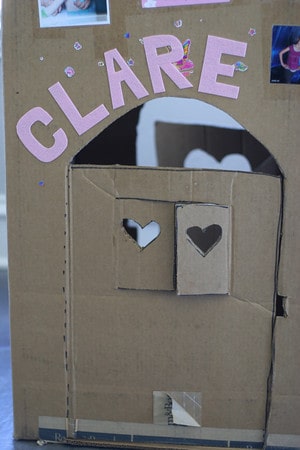
Clare (and little people who visit) play in this house every day. It has become the home of random photos, birth announcements, and many, many stickers. To jazz it up a little for it’s photoshoot, I added Clare’s name in Peel-n-Stick felt from Michael’s and drew on some shingles. It would be really fun to make some of these to decorate as a party activity.
If you’re feeling “Tom Sawyer-ish” this is a great project for Dad or older brother… or Grammie. thanks Grammie!
If you have any questions or problems, post a comment here and I’ll try to help. While Jaime is writing her book poolside, I’ll be chasing 2 babies and doing some new crafty projects for Prudent Baby so I’m around. I’m not bitter, really, I’m not.
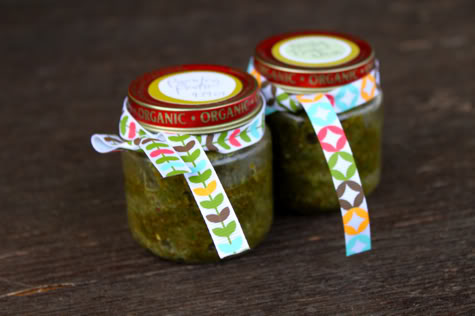
I’ve been wanting to come up with a way to use up all this parsley that’s growing like weeds around my yard. Pesto is the perfect solution, and packaged up in a recycled baby food jar, it’s cute to bring to a dinner party. Get the recipe after the jump… Pretty Parsley Pesto Recipe
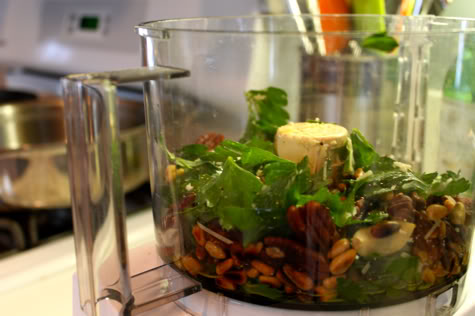
Parsley pesto is the perfect fall food, all toasty nutty goodness. In a clean baby food jar with a hand-written label and a bit of pretty ribbon it’s an adorable treat; it even says “organic” right there on the lid! -Toast 3 cloves of garlic by tossing them, peels still on, in a dry pan over medium heat for 5-10 minutes until they are spotty brown-Toast one cup of nuts – I like to use half pecans and half pine nuts, but all walnuts or pecans or really any combo of tree nuts tastes good. Toast them by keeping them moving in a hot dry pan until they are browned – don’t let ’em burn -Let all that cool, then peel the toasted garlic and throw the cloves and the nuts in a food processor with 7 tablespoons extra virgin olive oil and 1/2 cup fresh parsley leaves. I also throw in one raw clove of garlic for more bite:
-Mix in 1/2 cup grated parmesan, 1/2 teaspoon salt (or more or less to taste) and grind some black pepper in there -Serve with celentanni or penne and don’t forget to save some of the pasta cooking water to give the pesto a nice consistency (about 4-6 tablespoons for a pound of pasta). This is key when serving pesto!
Don’t forget to write the date on the lid. Since there is air in the jar it will oxidize after about 3-4 days, so it’s really for use pretty soon after jarring. Delivered with a tupperware of cooked pasta, it would be a good meal to bring a brand-new mom.
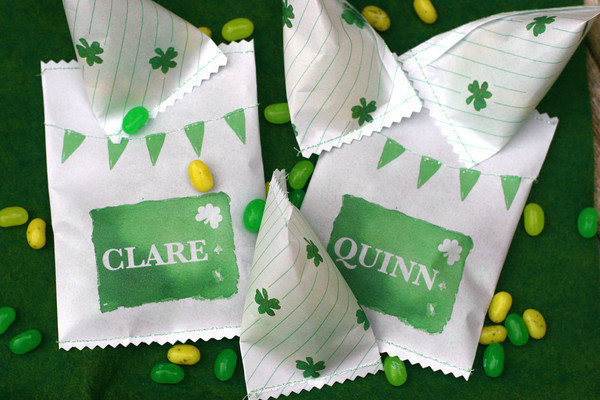
A custom fabric lunch bag takes 20 minutes, is adorable, and you can make one to match any outfit. These are fantastic thoughtful gifts (or gift wrapping) too. And they cost virtually nothing – you’ll even save money (and trees) on paper bags.
Get the DIY after the jump!
1. Cut your decor-weight or canvas fabric, a spare quarter yard works well. I used a bright Denyse Schmidt County Fair leftover that appears to be sold out, but some other fabrics from that collection are available at fabric.com while more amazing home decor weight prints can be found at Hart’s Fabric. You can cut two 13X9 pieces and with wrong sides facing sew three sides (leaving a short side open) with a straight stitch, or like me you can take one 26″X9″ piece, fold it in half with wrong sides facing and sew the two long sides together:
2. Finish the top edge by folding it over about 1/4″ and ironing:
Then hemming in place with a straight stitch:
3. Now you are going to create your gusset. Turn the bag inside out and bring the seams front and center and flatten the resulting fabric into a point:
Then fold one side down so it’s in a diamond shape and iron it flat:
4. On each side of your diamond shape measure 2 inches down from the point and draw a straight line with a washable marker. Make sure they are even otherwise your gusset will be wonky:
5. Sew a straight stitch along each line, then cut off the triangle of excess fabric:
so you are left with this:
6. Now turn your bag right side out, poke the corners out so they’re flat, and fold into a lunch bag shape and steam iron so it has crisp seams:
7. Stand that baby up and admire it, then fold the top over a few times and iron some creases into it so you can figure where to put your closing attachment
8. Now you can leave it like this or put some sort of closing mechanism. I’ve added buttons or velcro, but this time I decided to use an old bracelet clasp. Mark the spot in the center of the fold and corresponding spot on the actual bag with a washable marker (it’s important to get them centered or your bag will fold funny). Quickly hand-sew each side of your clasp in place:
You’re done! So easy and so cute. Scarlet’s daycare teachers and even my husband always enjoy these quickie lunch bags. I can’t wait until she’s old enough to request specific colors and patterns!
Here are some other cute DIY lunch bag projects I’ve seen:
A custom fabric lunch bag takes 20 minutes, is adorable, and you can make one to match any outfit. These are fantastic thoughtful gifts (or gift wrapping) too. And they cost virtually nothing – you’ll even save money (and trees) on paper bags.
Get the DIY after the jump!
1. Cut your decor-weight or canvas fabric, a spare quarter yard works well. I used a bright Denyse Schmidt County Fair leftover that appears to be sold out, but some other fabrics from that collection are available at fabric.com while more amazing home decor weight prints can be found at Hart’s Fabric. You can cut two 13X9 pieces and with wrong sides facing sew three sides (leaving a short side open) with a straight stitch, or like me you can take one 26″X9″ piece, fold it in half with wrong sides facing and sew the two long sides together:
2. Finish the top edge by folding it over about 1/4″ and ironing:
Then hemming in place with a straight stitch:
3. Now you are going to create your gusset. Turn the bag inside out and bring the seams front and center and flatten the resulting fabric into a point:
Then fold one side down so it’s in a diamond shape and iron it flat:
4. On each side of your diamond shape measure 2 inches down from the point and draw a straight line with a washable marker. Make sure they are even otherwise your gusset will be wonky:
5. Sew a straight stitch along each line, then cut off the triangle of excess fabric:
so you are left with this:
6. Now turn your bag right side out, poke the corners out so they’re flat, and fold into a lunch bag shape and steam iron so it has crisp seams:
7. Stand that baby up and admire it, then fold the top over a few times and iron some creases into it so you can figure where to put your closing attachment
8. Now you can leave it like this or put some sort of closing mechanism. I’ve added buttons or velcro, but this time I decided to use an old bracelet clasp. Mark the spot in the center of the fold and corresponding spot on the actual bag with a washable marker (it’s important to get them centered or your bag will fold funny). Quickly hand-sew each side of your clasp in place:
You’re done! So easy and so cute. Scarlet’s daycare teachers and even my husband always enjoy these quickie lunch bags. I can’t wait until she’s old enough to request specific colors and patterns!
Nerd Alert: I have had a love affair with origami for 22 years. I have boxes filled with random folded creatures, I had origami cranes on my wedding invitations and 1,000 folded cranes at my reception. I have at least 10 origami books and boxes (sigh) of origami paper which I would roll around in naked were it not for the wrinkling (that’s how much I love it) so I was happy to have come up with this little project as a way to display a few pieces in baby’s room. It seems so obvious, has anyone seen it done before?
Instructions after the jump
What you need:
• Display frame: $8.99 @ Michael’s. Rock that 40% off coupon and you’re in business.
• Instructions for origami butterfly. I used this book and highly recommend it if you have some folding experience. Otherwise here is a link to many butterfly instructions.
• Origami paper (the paper I used was 2 sided.) You could also use plain white for a more modern look.
• Clean recycled cardboard
• Background paper (this was from a recycled calendar. love it!)
• Spray Paint (optional)
• Double-stick tape
• Plastic ball stick pins
• Box cutter
• Straight edge
• Cutting mat
1. Disassemble frame and, in a well ventilated area, spray paint your frame (if desired.) Leave to dry.
2. Trace the back insert of your frame on to your background paper, tape to cardboard (or Xyron) and trim both together using your box cutter and straight edge.
3. Fold your butterflies as directed.
4. Double stick the butterflies in position on the background
5. Stick a pin through each abdomen
6. Reassemble frame
7. Add your creation to a tchotchke shelf filled with hipster baby loot. : )
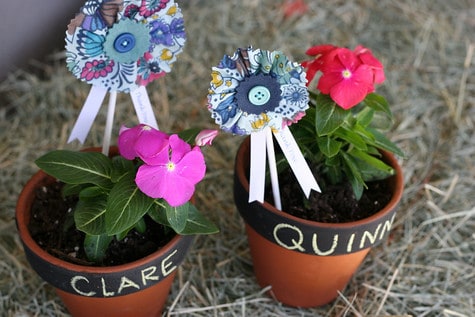
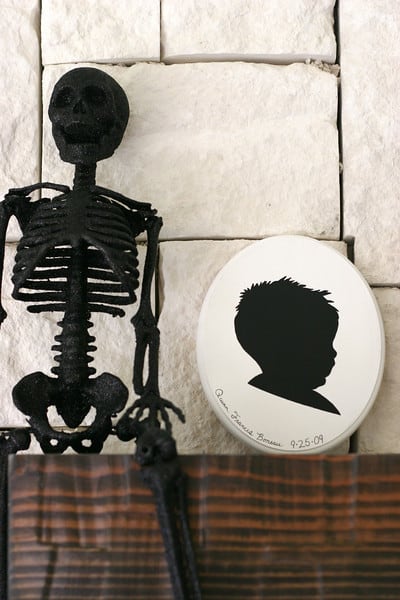
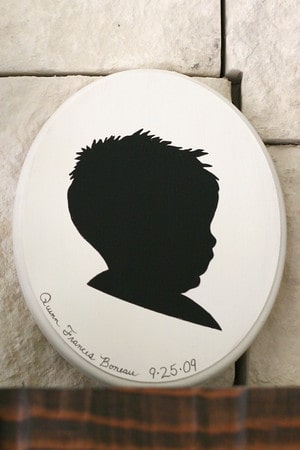
There’s something about cameos that I find a little bit spooky. It might have something to do with Disney’s Haunted Mansion. Regardless, I LOVE THEM and decided to try one out for Miss Quinn Frances. And then we decided to use a cameo in our new banner (see above) and then I decided to use my new cameo plaque as part of my Halloween decor for a bit before it takes up permanent residence on one of my bare walls (hence the weird photo with skeleton.) This was super easy and inexpensive! These would look really cute printed on mugs, totes, t-shirts too…
DIY after the jump
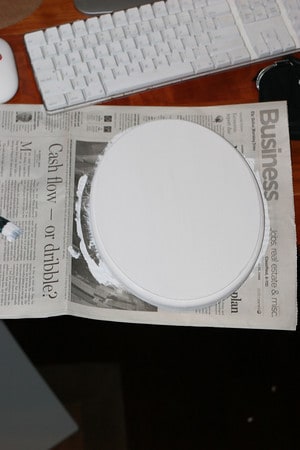
What you need: Wooden plaque (Walmart): $4.62 Acrylic paint (black & white): $2.50 Photo of child’s profile, on solid background if possible: $0 x-acto or small scissors Pen or pencil: I used a “Skilcraft Free Ink Roller Ball 0.7”: Stolen from husband’s desk (this is an amazing pen!!) Large paintbrush: $1-ish Tiny paintbrush: $1-ish Varnish (optional): $?
Total: Less than $10
Traditionally this type of silhouette art is actually cut from black paper and placed under glass or, in this case, under varnish/Mod Podge. For this version, I painted the art directly on the plaque but the paper cut would definitely work as well.
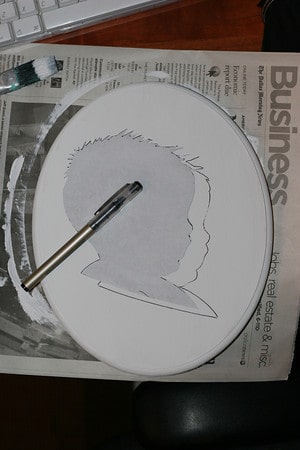
1. Paint the entire surface of your plaque white (I think it could also look cool and modern to leave the wood showing. I might try that next). Let dry while you move on to step 2. 2. Print out a profile photo of your baby and trim with an x-acto or small scissors. 3. Trace your cut-out directly onto your plaque with pencil, a fine black Sharpie or the heavenly “Skilcraft Free Ink Roller Ball 0.7” You don’t have to reverse your photo, feel free to trace either side. 4. Using your tiny brush, paint inside the detailed edge of your silhouette black and then fill in with your large brush. Make your black paint as smooth as possible. 5. Add the subject’s name and age (or the date) along the bottom (if you wish) using your pen or a fine brush. 6. When dry, apply a sealant (optional)
by Jacinda
Some links may be affiliate links. Through Amazon Associates and other partnerships, we receive money if you buy something or take an action after clicking one of the links on our site.