


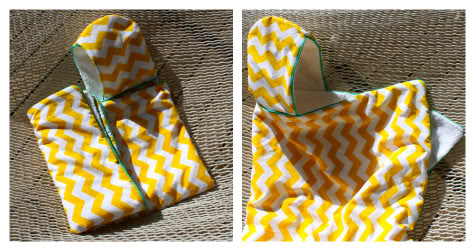
When our friends over at amazing trendy kid magazine Pint Size Social asked us to contribute to their DIYs with VIPs column, we were so excited to be in the company of such awesome ladies as Amy Atlas and Erica Domesek! So we went to work on this luxurious version of the kid’s summer staple, the hooded towel. 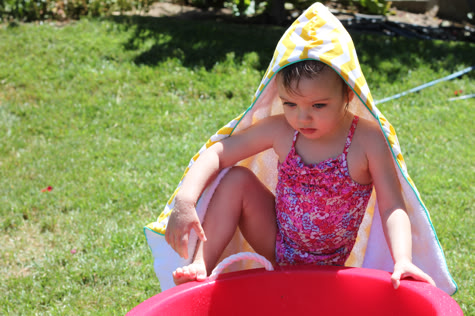
There’s just no reason to spend $45 on one of these if you have a sewing machine and thirty minutes! 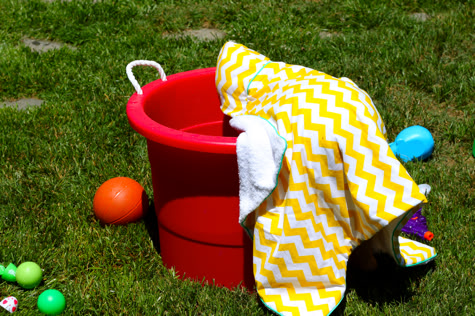
For more details and a little interview with yours truly, click over to the column on Pint Size Social. I also highly recommend checking out the Show & Tell section, where they highlight one hot item every day – it’s always something I’ve never seen anywhere else. Get the full Hamptons Hooded Beach Towel DIY after the jump…
(more…)
Prudent Project Round-Up
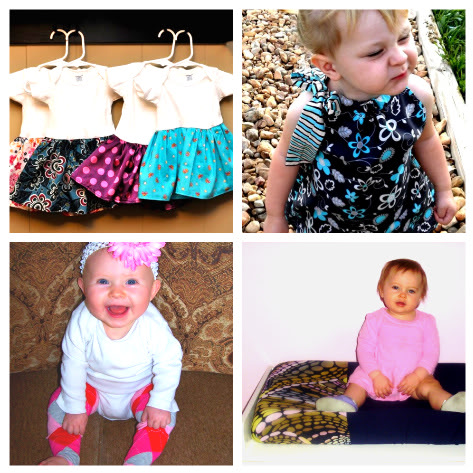
Nancy at Nancy and Christopher made a closetful of 10 Minute Onesie Dresses…
Mommmy2Madilyn made this gorgeous, colorful Pillowcase Dress…
Over at The Roses someone got a case of the crafties and made several sets of DIY Baby Legwarmers…
and Hayley made our DIY Changing Pad Cover for that cute baby’s room!
We give you patterns, you give us pictures via our Prudent Baby Contact Form or by adding them to the Prudent Baby Project Pool on Flickr! Prettier pics get shared first! Need tips on taking better photos? Get them here.
??? ?????:

Prudent Project Round-Up
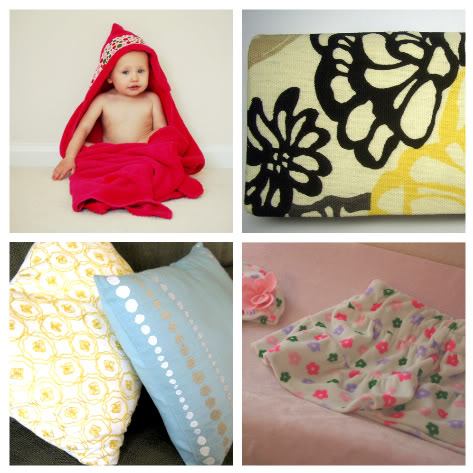
Krafty Katrina made the ever-popular DIY Hooded Baby Towel…
Nancy at Rabbit and Piggie made this gorg DIY Checkbook Cover…
Jaimie at Yes, Mom made two DIY Easiest Pillows Ever…
and Melissa turned a Winter Dress into a Summer Skirt!
Won’t you send us your pretty pics via our Prudent Baby Contact Form or add them to the Prudent Baby Project Pool on Flickr! We especially love pretty pics! Get better photo tips.
Uw knop:
Link Love
Stylish yet simple wrap dress pattern at Tiny Happy…
Ruffle Peasant Dress Tutorial at Ta Da Creations…
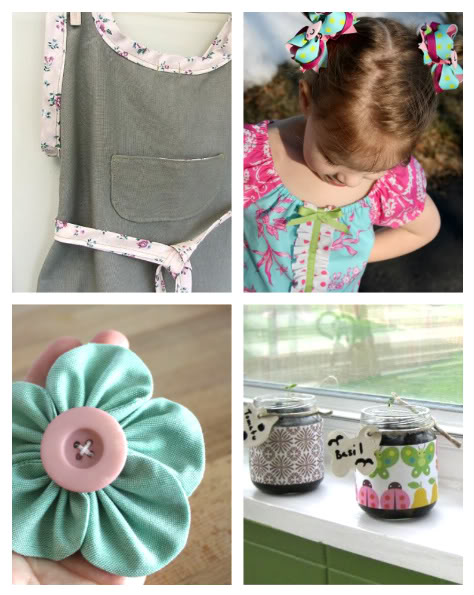
Poofy Fabric Flower How-to at The Adventures of Rory and Jess…
Grow seedlings in baby food jars with The Girl 30…
And more:
Have a picky eater? Here are some “picky busters”
Tips for moms on easy yet stylish hair at Parlor: Diary of a Hairdresser. I need!
I love ric rac…cute DIY ric rac flower pillows at Oh, Hello Friend
The existential sadness of lonely Jon always makes me laugh at Garfield Minus Garfield
A sweet tea screen print giveaway at The Design Pocket
Girl reversible pinafore dress pattern at The Stuff I Live For
DIY for a first communion or wedding veil at Tadaa Studio
And a sweet little bubble dress pattern at Made by Lex
Week in Review
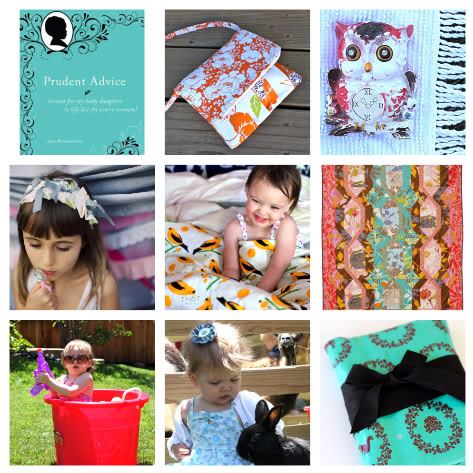
Giveaway: Handmade Beginnings by Anna Maria Horner
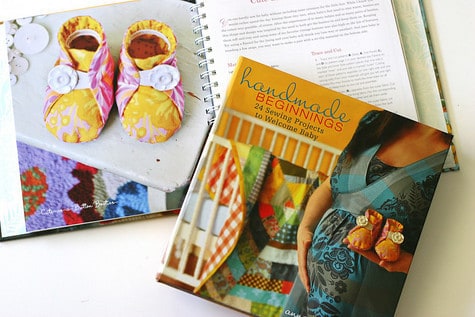
Jaime and I have been eagerly awaiting Handmade Beginnings![]() for a while.
for a while.
“… 24 Sewing Projects to Welcome Baby”… By Anna Maria Horner?!?!
Just about the best combo ever for the gals from Prudent Baby. This book was worth waiting for! We’ve been drooling over every gorgeous page and can’t wait to try out a project. The little dress below is on my to-do list.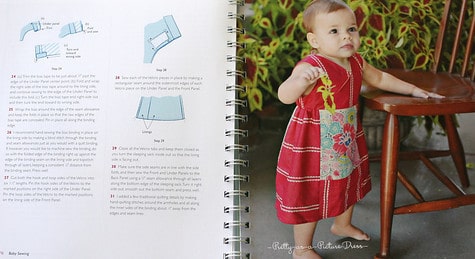
Thanks for entering! We will announce the winner next Sunday when we are part of Anna Maria’s Blog Book Tour! So here goes. Enter to win a copy of this beautiful (and useful!) book![]() by leaving a comment here with a question for Anna. You can learn a little more about Anna and all of the amazing things she does on her blog. Anna is going to stop by and hand-pick some questions to answer next week. The giveaway ends at midnight CT on May 14.
by leaving a comment here with a question for Anna. You can learn a little more about Anna and all of the amazing things she does on her blog. Anna is going to stop by and hand-pick some questions to answer next week. The giveaway ends at midnight CT on May 14.
We will announce the winner on May 23rd (my birthday!) when we are part of the book tour for Handmade Beginnings![]() . At that time we will also post YOUR interview with Anna.
. At that time we will also post YOUR interview with Anna.
If you would like to take a peek at the rest of the tour, here’s the schedule:
May 3 Craft
May 4 Indie Fixx
May 5 Sew Mama Sew
May 6 Pink Chalk Studio
May 10 Wise Craft
May 14 House on Hill Road
May 16 The Purl Bee
May 18 All Buttoned Up
May 19 Alabama Chanin Journal
May 20 Homemade by Jill
May 21 True Up
May 22 Oh, Fransson!
May 23 Prudent Baby
May 24 Sew Liberated
May 25 Handmade by Alissa
May 26 Hazelnuts
May 27 Petite Purls
And not to confuse y’all but we will announce the winner of The Handmade Marketplace by Kari Chapin![]() on Monday and share her answers to your questions. You are going to love her, she is so funny and smart!
on Monday and share her answers to your questions. You are going to love her, she is so funny and smart!
Last Minute Mother’s Day Gift: Oilcloth Book Cover
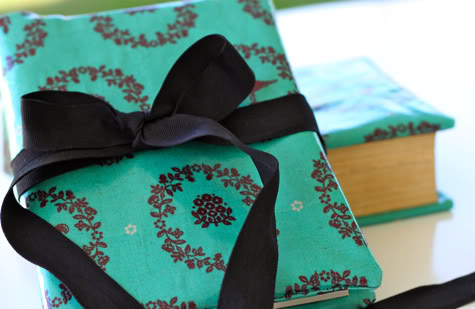
A lovely book with a custom book cover is a thoughtful (yet quick!) gift for mom. And a cookbook with an oil cloth cover is especially handy as it protects from spills and splatters. I made two versions, one that will take you all of five minutes, and one with a tad bit more polish. 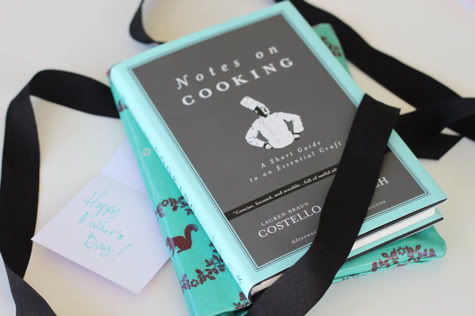
Either one will make you look like the thoughtful person who spends lots of time creating personalized gifts that you were before you had kids.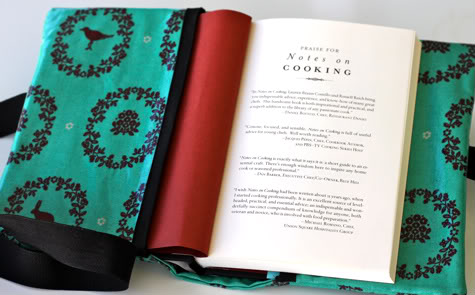
Get the Oilcloth Book Cover DIY after the jump…
(more…)
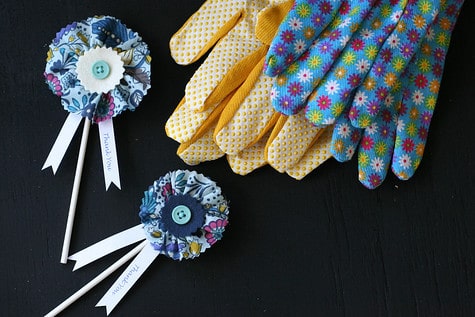
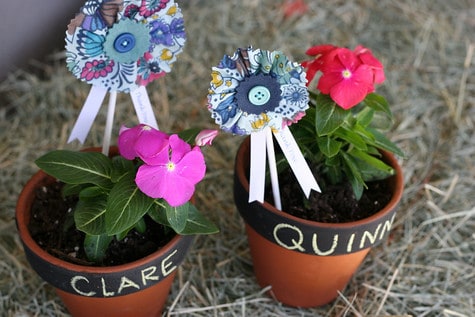
Quinn’s Farm-tastic First Birthday: The multi-use DIY hair clip!


I had every intention of making some of THESE hair clips for Quinn’s Birthday party a few weeks ago but just ran out of time. When I mentioned this to my mom, she had a great idea for an easier version that used less fabric. SO clever, those moms!

Get the DIY after the jump and start clipping you DIY Hair Clips everywhere… to plants and cakes and even to hair! (But not at the same time, that would be disgusting.)

What you need:
• pinking sheers
• ruler
• 1″x12″ fabric strip
• Approx 3″ of felt
• needle and thread
• button
• alligator hair clip
• 5/8″ ribbon
• hot glue gun
• fabric marker
• optional: Print out of “thank you” template and lollipop sticks for plant/cake picks.
What to do:
1. Cut a 1″x12″ strip of fabric with pinking sheers.

Tip: My mom folded the fabric in half and then in half again and cut her strips with one clip of the sheers.

Note: some of the clips we did were 1.5″x12″. They were a little too big (unless you live in Texas)

2. On one side of your length beging gathering your fabric on a needle and thread every 1/4″, about 1/8″ in from the side.


3. Pull snug and tie thread but do not cut.

4. If the end of your circle do not line up perfectly, now is the time to trim.

5. Using the same needle and thread stitch up the seam of your flower and then back down to the center. I would sew in and out rather than sewing as show below. This was faster but left ripples.


6. Use your spool of thread to trace 2 perfect circles on wool felt.


7. Cut out your two felt circles with your pinking sheers.

8. Use your spool to find the center of your felt circles and make a small dot.


9. Place one felt circle on the top of your flower and the other on the bottom.

10. Sew button securely into place through all layers.
Front:

Back:

11. Use hot glue gun to attach 5/8″ ribbon to alligator clip as described in detail here:


12: Apply hot glue to top of clip and immediately attach flower.

13. Trim loose threads. And you are done, unless you want to add the little “Thank You” ribbons.

14. Use this template or design your own “Thank You” strips and cut.

15. Fold in a “V” and snip the ends like ribbons.

16. Clip both together on the end of a paper lollipop stick.

