Ahh, what a gorgeous and fresh take on the fabric flower at Holidash via Not Martha… Everything matryoshka is awesome. Especially this DIY pin cushion from Maximum Rabbit… A vintage bee-themed birthday party would be amazing! Get this beehive free clip art here… These ceramics are not DIY but they are truly unique at Decor8.
And more… Wondering which is the best baby monitor? stroller? BPA-free sippy cup? The super cool moms at Mom OK’d will tell you. 9 great recipes for classic chocolate chip cookies at The Kitchn A non-cheesy, adorable take on a Mickey Mouse party 10 Best Handmade Gifts for mom at Craftzine And loving Jessica Grose‘s article on giving it a rest with all this saving-your-marriage business on Slate.
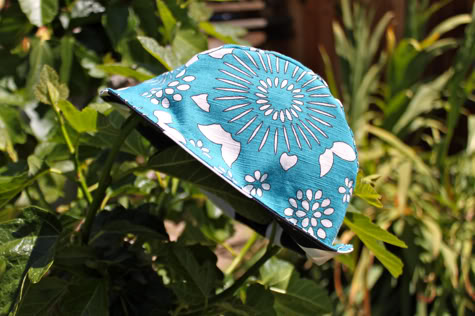
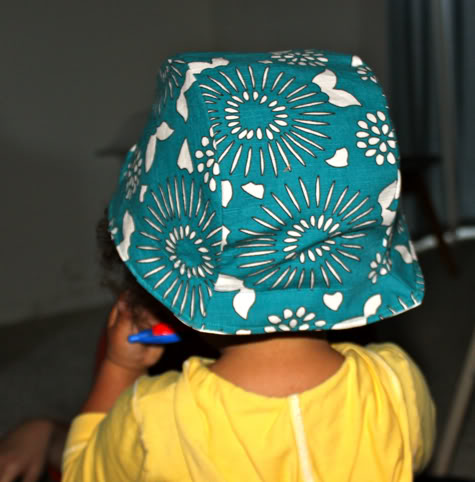
Sew a Reversible 40’s Inspired Sun Cap with Free Pattern to protect your loved one’s noggins this Summer.
I just got this gorgeous Kei Japanese import Bark Cloth and was inspired to make up a little forties-ish cap-type sunhat. I hope you like it as much as Miss Niko did! We have the free Forties Inspired Sun Cap Pattern and full tutorial after the jump!… (more…)
Just when you thought I might be finished… here’s more Farm-tastic First Birthday!
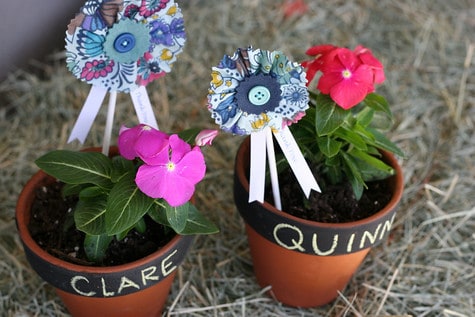
Our little planting station was a huge hit at the party, get the DIY scoop after the jump.
For the Pots:
This isn’t the neatest technique but it is fast! If you want your pots to look super professional, you should mask with tape but it will be significantly more time consuming. I was perfectly happy with the results of this quickie method.
Note: unless you want the fingernails of a coal miner wear some gloves.
1. Wrap a piece of paper around the base of the pot and spray the top portion.
2. Turn the pot and spray the other side. Let dry.
Funny story… Did you know that you can just write on clay pots with chalk… without chalkboard paint? Yup, my mom showed me that one after I spray painted 30 pots. Awesome. I still think they look good with the chalkboard paint though. I’m going to use the leftover pots for little herb gifts! PS. Jaime had chalkboard pots as favors at her wedding 4 years ago. She’s a trend-setter.
How to set up your table:
• Place a piece of plywood on 4 cinder blocks. The smoother the wood the better! This was pretty gnarly plywood from our garage and it still worked great for the party. As a permanent chalkboard it could have been smoother.
• Sand as needed (I didn’t)
• Spray entire top and edges with a primer. I used a can of Kilz Primer Spray
• Let dry.
• Fill any cracks/spaces with Spackling and Nail Hole Filler. I like this Dry Dex from Home Depot.
Use an old credit card (or the back of a butter knife in a pinch) to smooth the spackle.
• Let dry.
• Add another layer of Kilz Spray Primer and dry.
• Follow instructions on your spray can of chalkboard paint. I did 3 light all-over coats and had a great finish.
• Delegate writing instructions for plant potting to left-brained husband. He did a great job!
• Add large tubs of dirt, pots, stones for the bottom of each pot, gloves, shovels, a watering can, flowers and chalk. The little boys will spend the entire party shoveling dirt between the two dirt tubs. Boys are funny like that.
Are these prints to-die-for or what? Our new sponsor has THE MOST amazing etsy shop filled with whimsical prints that I want to hang in every room of my house! First let’s meet the artist:
Hello! My name is Stacie and I have a little shop called Gingiber. I find myself most happy when I am doodling. My shop is filled with cute & quirky doodles that would be charming additions to any child’s room! Feel free to drop by my personal blog, GingiberSnap, and say hello!
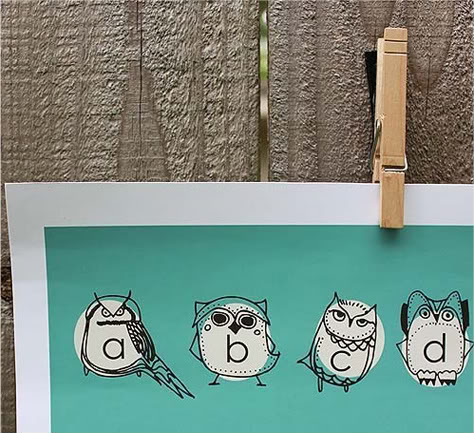
Sooo…since May is all about Mother’s Day, Gingiber and Prudent Baby are hosting a mother/child giveaway! The winning mom will get to call this “Those Darling Buds of May” print her own, and her kiddo will be learning ABCs with a “Turquoise Owl Alphabet” poster! And all of our readers are winners, because whenever you order anything from Gingiber and mention Prudent Baby you’ll get free shipping!
To enter this giveaway, head on over to Stacie’s Gingiber Shop, then come back and leave a comment telling us which print reminds you of your mom and why. For me it’s this one, and I think that’s self explanatory, HA! (love you mom!)
Come back every day for a new entry, and twitter or share the giveaway and leave comments letting us know for an additional entry each day. Entries will close at midnight on May 7th, a winner will be selected via random.org, and your print will arrive a few weeks later for a post-mother’s day treat! Isn’t this a great giveaway? SO excited to share it with you, our stylish friends! Now go enter, go, go, go!
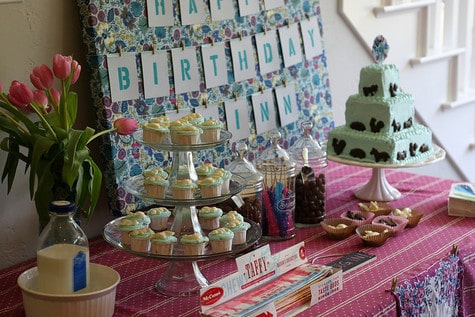
With all that time I spent making Hay Cones and Door Bows for Quinn’s Party, I had to cut corners somewhere and where is that you might ask? Oh, the only thing that people really care about when they come to a party… the FOOD! But hear me out because I’ve never had so many people tell me how great the food was at a party.
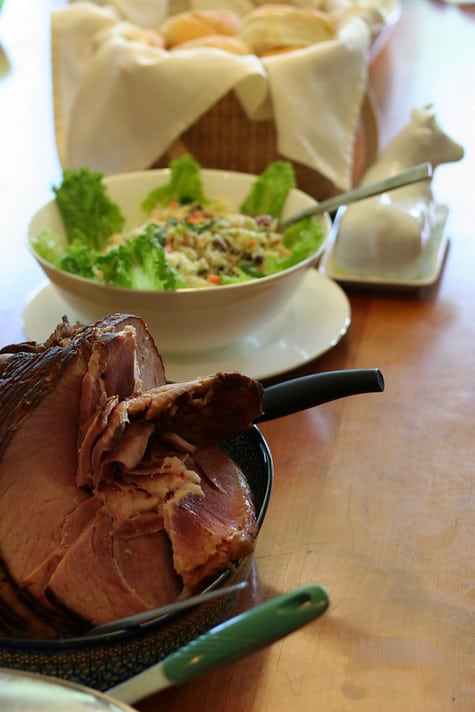
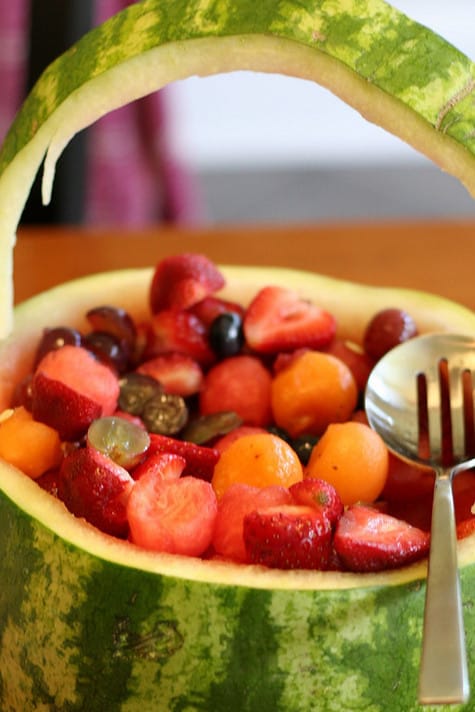
Here’s what I whipped up (and outsourced) FAST, EASY and CHEAP! A big spiral ham. We fed 45 people on $20! My mom’s delicious cole slaw. It’s no-lie the best. Let me know if you want the recipe, I’ll hook you up. Rick’s pinto beans. This is a great item to slow cook overnight. Jacinda’s store-bought potato salad. Kinda trashy but so delicious. and a big fruit salad in a watermelon basket, old school!
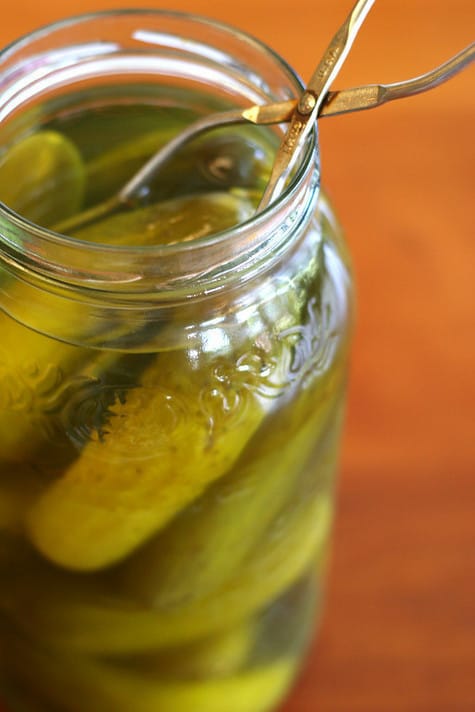
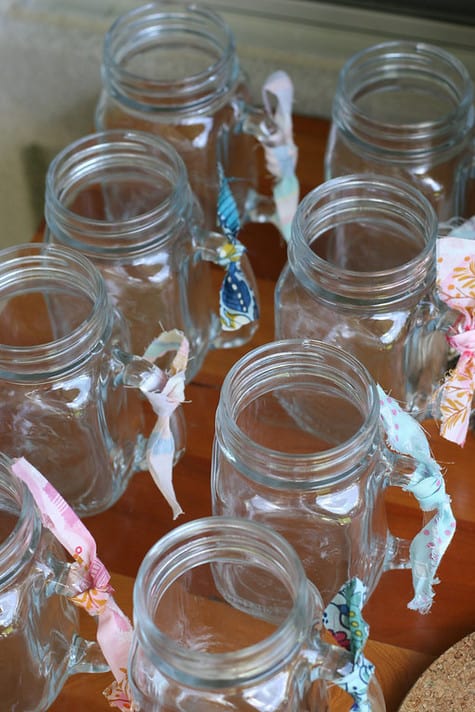
Plus lots of soft rolls and a giant jar of dill pickles. For drinks we did a 2 big vats of iced tea and lemonade and regularly replenished glass pitchers on a self-serve table. We added scraps of fabric to these mason jars so folks wouldn’t misplace their glass. And of course there was lots of beer, and juice and water for the kiddos. Everything could be cooked in advance and served room-temp/warm. It was so low maintenance that I actually had fun at my own party, I mean Quinn’s party, you know what I mean.
I have wanted to create wall art by stretching large-patterned fabrics on canvas frames for a while but just haven’t gotten around to it. Quinn’s birthday party seemed like the perfect opportunity to try out the technique and make a big impact. This Anna Maria Horner Little Folks Voile fabric pattern is too small to work with a frame this large for wall art but with the letters on top it somehow works. This fabric is an almost sheer voile but with a cotton or canvas you could easily use just stretcher bars, available in bins at any art supply store, rather than a stretched canvas and save some $$.
Get the easy DIY for the DIY Happy Birthday Sign after the jump. (more…)
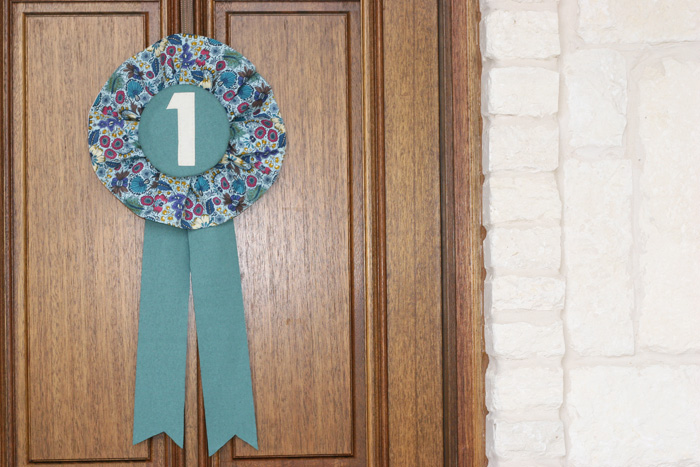
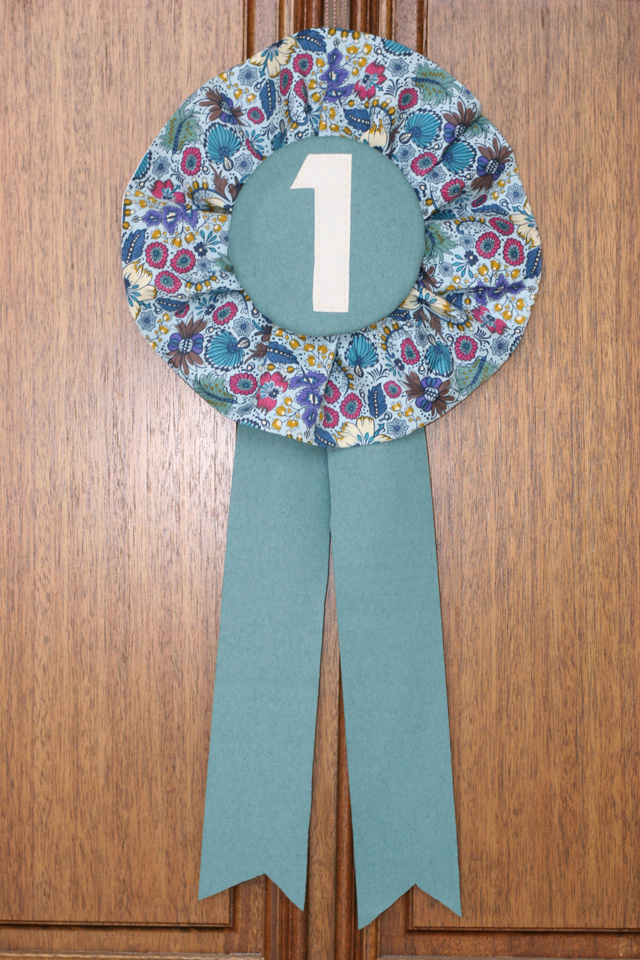
My color palette inspiration for Quinn’s party was a piece Anna Maria Horner fabric. In fact, I made everything that uses this print from a single yard of fabric, including this “First Place” Door Bow. You know you’re in Texas when you show your husband a 3 foot tall Door Bow and he exclaims… “HOW IS SHE GOING TO WEAR THAT??” Love it.
After the party, this will be used as a hair clip holder in Quinn’s room!
Get the DIY “First Place” Door Bow/Hair Clip Holder/GIANT CORSAGE after the jump.
What you Need:
• 6″x52″ piece of fabric for ruffle (can be stripped together)
• 6″x52″ piece of single sided, med weight interfacing
1. Iron your fabric, and iron your fabric to interfacing.
2. Trim both long sides with pinking shears (I didn’t do this but wish I had.)
3. Using a basting stitch (the longest stich on your machine, probably a 5) stitch along 1 long side, 1/4″ from the edge.) You could also do this by hand and gather as you go. It might be easier, in fact)
4. If you machine stitch, gather your fabric by pulling one of the threads and simultaneously bunching the fabric. It’s easiest if you start bunching from the center, doing one side and then the other.
5. Adjust the gather to make even all around.
6. You want to end up with a 5″ radius in the center.
7. Line up the ends and sew together approx 1/2″ from edge
8. If they dont’ line up perfectly, trim edge to match.
ps. Crafting in jammie pants. Shower woman!
9. This is what it should look like from the front.
10. Now we will make the center of your “Ribbon.”
11. Sew around the edge of your felt circle, 1/4″ from the edge with a basting stitch.
12. Gather as described in step 4.
13. Slip one paper plate into the center and make sure it fits snugly. Gather as needed and evenly distribute gathers. Tie thread ends together.
14. Remove plate from circle.
15. Cut our your number from a coordinating felt and center on circle.
16. Hand stitch number to circle. Set aside.
17. Center one of your plate, wrong side up, over fabric.
19. Cut a “v” into the bottom of your 2 felt rectangles.
19. Arrange felt strips on back and staple in place through paper plate.
20. Make a loop of ribbon for hanging and staple to back paper plate.
21. Place second paper plate directly over first.
22. Staple in place at center.
23. Slide felt “number” circle over outside plate and you’re done!
by Jacinda
Some links may be affiliate links. Through Amazon Associates and other partnerships, we receive money if you buy something or take an action after clicking one of the links on our site.