


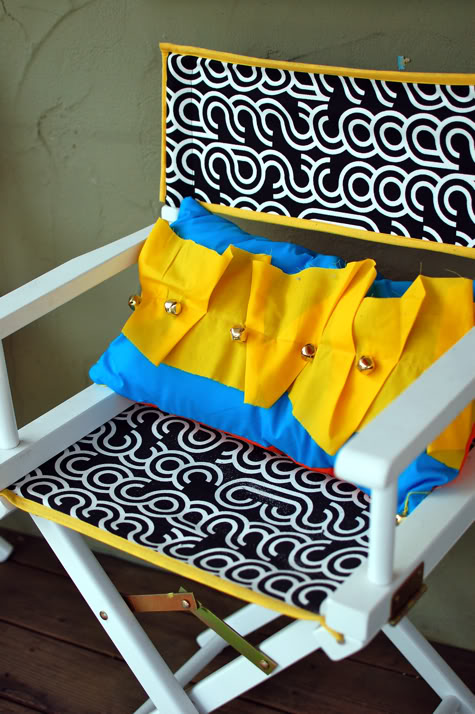
Here’s another pillow from Scarlet’s Indian Elephant Party. The colors are a bit much but they matched the DIY Pouf Pillow and the Deceptively Simple Ruffle Stripe Pillow. I guess it wouldn’t be so comfortable to snuggle up to a pillow with metal bells on it, but it looks cute and that’s what really matters. Or you could replace the bells with buttons or fabric flowers! 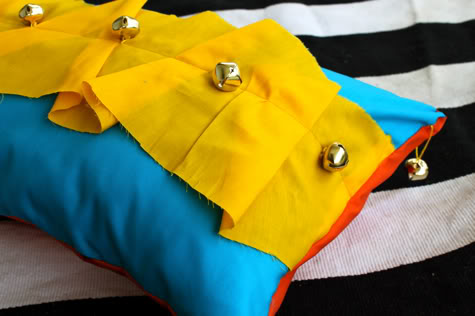
Get the full Jingle Pillow DIY after the jump…
(more…)
Prudent Baby on Martha!
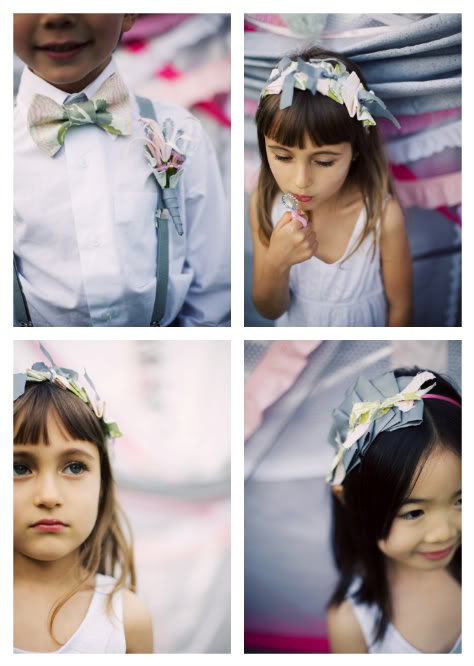
Pinch me, am I dreaming? We had the awesome pleasure of creating some special Prudent Baby DIYs for this Martha Stewart photoshoot! The girls’ headpieces and boys’ clip-on bowties were patterned and sewn by yours truly using Amy Butler cotton (fresh poppies in Linen).
The shoot was concepted and styled by our talented friends Paige of Bash Eco-events and Kelly of Yes, Please, and photographed by the uber-talented Bonnie Tsang. Check out the article here on Martha Stewart Weddings, and let me know if you want the tutorial on making your own little boys’ bow-ties and girlie headpieces in the comments!
UPDATE: The how-to-s are live. Go to the Bow Tie Tutorial and the Girl’s Headpiece Tutorial
Recycled Winter Dress into Summer Skirt
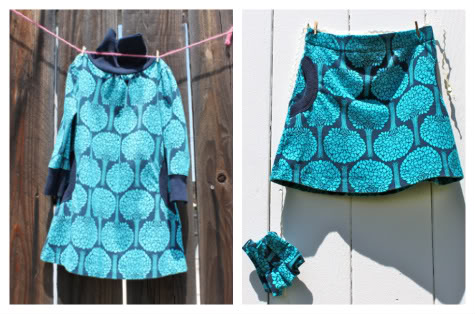
This turtleneck dress was the cutest on S last winter, but a little too small and way too warm for this summer. I’ve sort of reached the point of ridiculousness with my inability to part with her old clothes – how many boxes of “memory clothes” do I need? So I recycled it into a jersey skirt for summer and a matching hairclip. It took about 15 minutes. 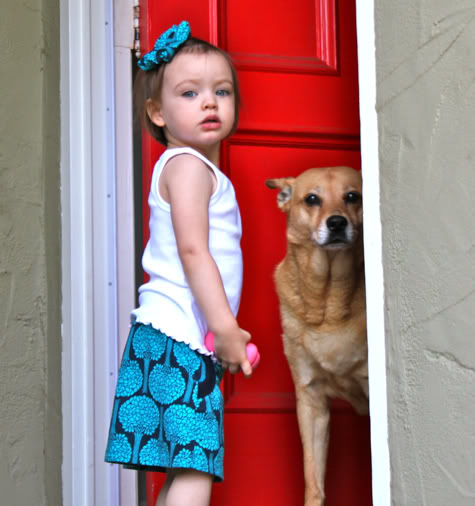
Get the full Recycled Summer Skirt tutorial after the jump…
(more…)
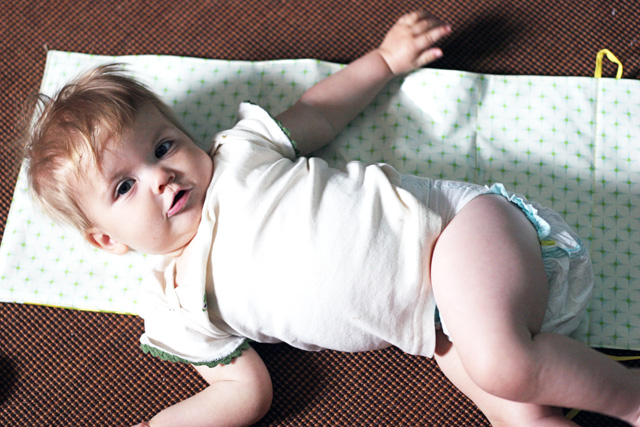
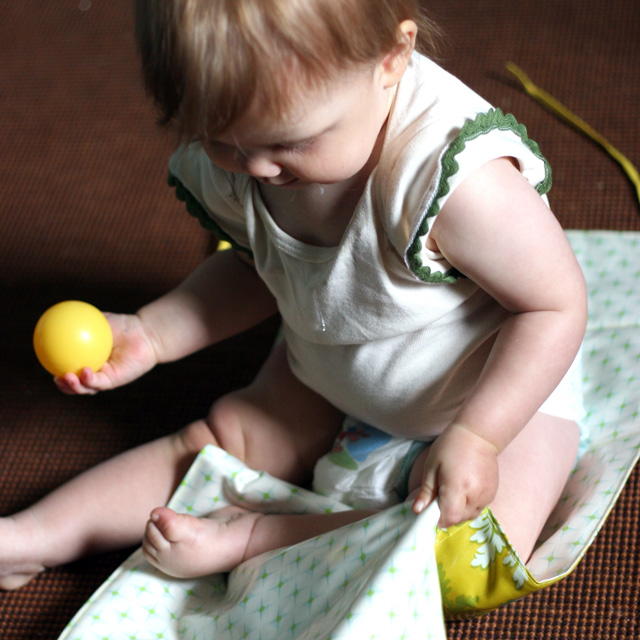
How to Sew a Travel Changing Pad in Oilcloth
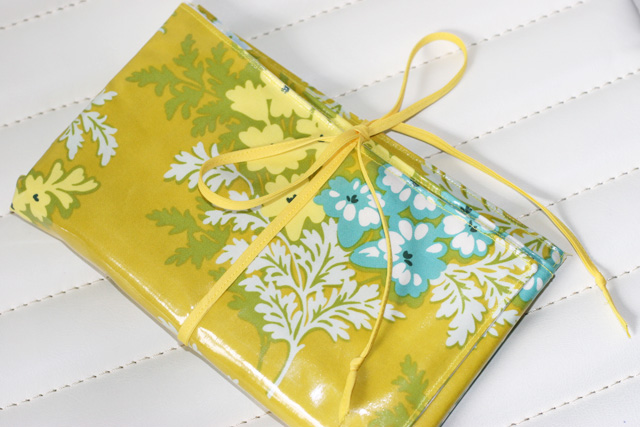
This is the simplest of sewing DIY’s and a perfect first project for oilcloth. Find the full {and crazy easy} DIY for a Travel Changing Pad after the jump.
What you need:
• 2 pieces oilcloth 12″x27″. I used two different prints but if you use one print, you can get what you need from 1/3 yard of this 55″ width oilcloth. I used Heather Bailey Nicey Jane Oilcloth in Hop Dot Cream and Picnic Bouquet Gold, both sold by our lovely sponsor, Fabricworm.com.
• Approx 2.5 feet coordinating single fold bias tape (or ribbon)
• 3 Pieces 8.5×11″ thin quilt batting.
• Basic sewing supplies.
What to do:
1. Cut the two 12×27″ rectangles. The size is not very important. You might want a shorter and wider pad, especially if this is for a newborn. This one is for a tall toddler.

2. Align your fabrics, right sides facing and pin in just a few places and along the very edge as pins leave marks in oilcloth.

3. Sew with a straight stitch 1/4″ from the edge all the way around the rectangle except for 1/2 of one of the short sides.

4. Snip all four of the corners.

5. Reverse your piece right side out.

6. The edges will be curling in (as seen above.) Use a knitting needle or chop stick to push the corners out clean and pointy.
7. Slide a small square of light card stock (a greeting card works well) inside the piece and use it to push the edges out while you iron them flat*. With oilcloth, use an additional piece of fabric (light batting in my case) between the oilcloth and the iron. I’ve heard that you can’t press oilcloth, but with the additional buffer, I’ve had great success. *Test your fabric and iron first.

8. Fold your piece in thirds and mark your folds. I thought I was being smart and used permanent marker thinking it would just wipe off but it stained my yellow thread. Use disappearing ink, or tape.

9. Measure your first third, the one furthest from the opening. Mine was just under 9″x11.5.

10. Cut a piece of batting slightly smaller than the first third. I cut mine 8.5″x11″

11. Slide the batting into the hole and position it in the third furthest from the opening.
12. Just below the end of the batting (where your original one-third marks are) give yourself some kind of a cheat line either with disappearing ink or tape.

13. Sew straight down that line. You may find the oilcloth sticking in the foot of your sewing machine and might have to help it along as it stitches.

14. Repeat from step 9 for the center section and again for the third section.

15. After you insert the batting for the third section, fold the seam of the opening in, iron as instructed above and topstitch across entire length, 1/8″ from edge, closing up the opening.
16. When you get 1/8″ from the end of the side, leave your needle down and turn piece 90 degrees. Continue topstitching along remaining 3 sides. Add a few back-stitches at the end.

17. I used single fold bias tape for my tie so I folded it in half and ironed it flat. You can skip this if using ribbon or another fastener.

18. Measure 1/2 way down the first third of your changing pad (approx 4.5″) and pin the tie in place, centered on the outside of the changing pad.

19. Starting at the end of the string, begin sewing the tie flat. (make sure your string is NOT twisted.)

20. When you get to the changing pad, continue sewing straight through all layers, attaching tie to changing pad. Then continue to the end of the tie, sewing the rest of the tie flat.

21. Tie the ends of the tie in knots or fold over twice and hem.

And you’re done! Fold the changing pad in thirds, then in half the other way, and tie the strings in a little bow!
Our DIY Bedroom Takes Shape…

A few weeks back Hubby and I threw (and by threw I mean carefully painted five torturous layers) a coat of bright paint on the wall (color chosen because of its name: Frankly Scarlet) and finally hung our DIY King Size Headboard! 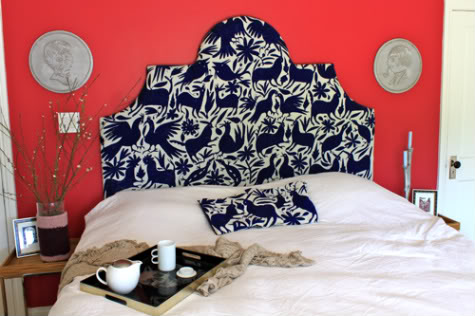
Get the full tutorial on how to make your own headboard, including free downloadable template, here. And because I know you’re going to ask, those awesome playful ceramic hangings were a Jonathan Adler splurge (he was there to sign them! how could i say no?).
So what do you think? Time to sew a new duvet, right?
Prudent Project Round-Up
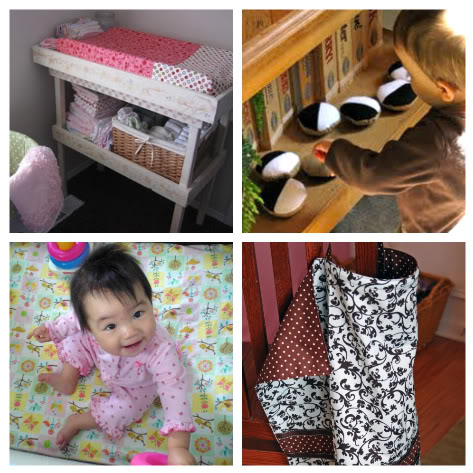
Over at The Big Trade-Off Karen made the gorgeous DIY Changing Pad Cover…
And I love it so much that at See Suzy Spin she made some of our Felt Black & White Cookies…
Emily at Stone Photo Journal sewed a DIY Playard Sheet and then plunked this adorable baby down on it!
and Meg at From Eight to Ten whipped up a DIY Nursing Cover and added some terry.
If you’d like us to share your project, send us your pretty pictures using this Prudent Baby Contact Form or add them to the Prudent Baby Project Pool on Flickr! Make ’em pretty pics girls! Get tips on taking better photos here.
Le bouton:

Prudent Project Round-Up
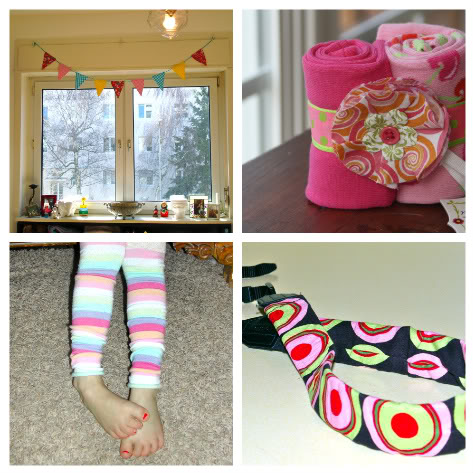
Jen at LA to Frankfurt was inspired by our Crochet Pennant Garland to create this cutie…
Amanda at This is Mimi Leigh made some DIY Baby Legwarmers...
while Julie Kirby whipped up some DIY Toddler Legwarmers…
and Mandy sent in this camera strap cover she made using our Strap Cover DIY…
Want to see your project in a round up? Send us your pretty pictures using this Prudent Baby Contact Form or add them to thePrudent Baby Project Pool on Flickr! The prettier they are, the better! Get tips on taking better photos here.
And your button of course:
Week In Review
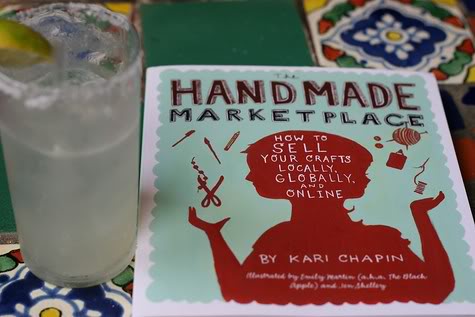
And of course our Handmade Marketplace Book Review, AND a Giveaway! Click here to ask the author any old question and enter!