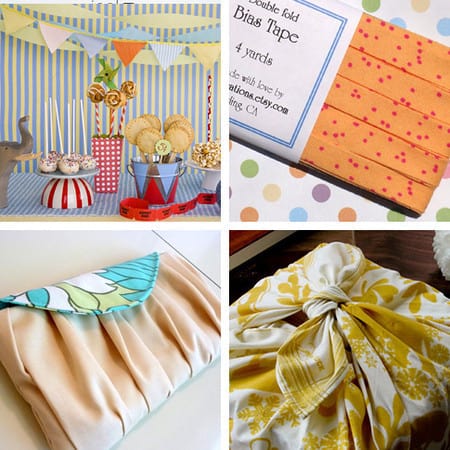
Brit left a funny comment on Prudent Baby this week, which led us to her adorable shop. Are you crushing on that clutch? Well, it’s $12.50!! Go buy it. She has lots of cute bags and hair bows.
And if you are in the Dallas area, City Craft is throwing a little book party and meet the author for Sew Serendipity by Kay Whitt on August 17th. You should go meet some cool crafty ladies! I wish I could go but unfortunately, I will be lounging on the beach in Rhode Island that day, eating lobsters while my mother watches my children.
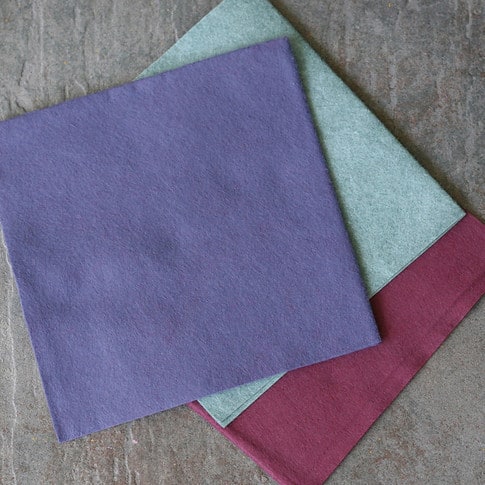
And don’t forget! Last chance to leave a comment and maybe win that nice Wool-Blend Felt lurking up there in the corner. And keep me in your thoughts as I fly alone with 2 children. I’m not scared.
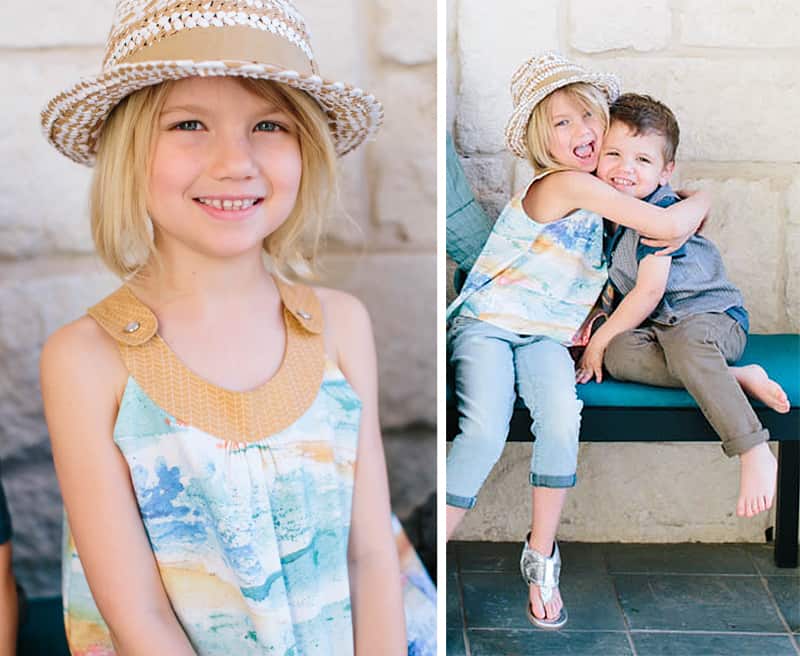
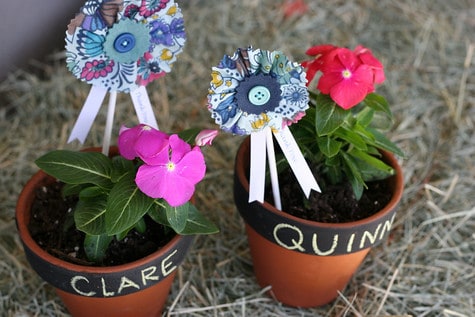
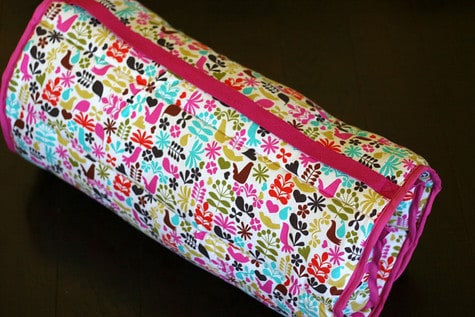
My little baby Clare is off to pre-school this Fall and now she will be all ready with a brand new mommy-made DIY nap mat. But will I be ready? I’m already making up excuses for why she should maybe stay home. I’m out of my mind, right? Anyway, DIY nap mat, so cozy, want one for me, for napping, while daughter is at school. Ok, I’m back on board. (more…)
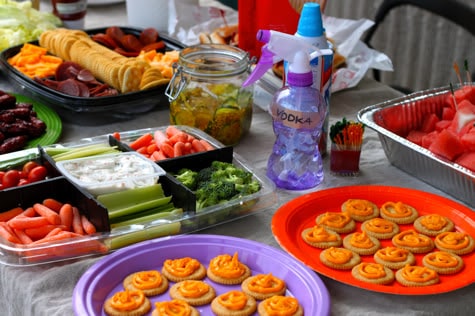
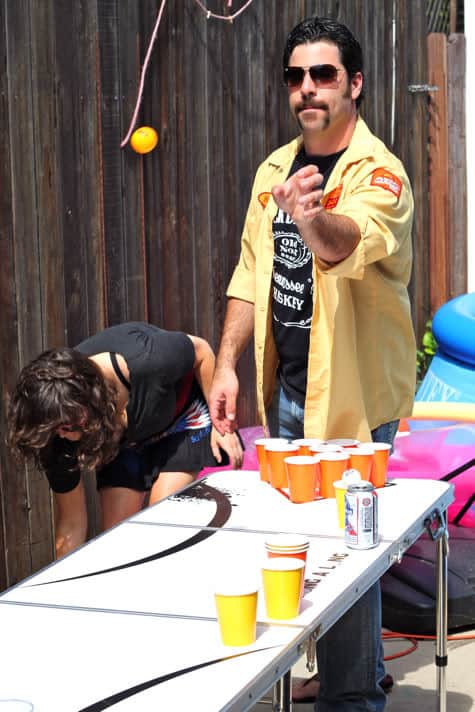
So you read all the magazines and websites and, ahem, blogs, with their “easy entertaining” tips and it’s always like, decorating sugar cookies until four in the morning or making marshmallows from scratch. And you’re all “groan, thanks ladies, sounds like a breeze, I’ll get right on that…” Yes, even this Prudent Mama likes to sometimes have a work-free party. So let me just let you in on a little secret: the redneck theme. It’s potluck, it’s hilarious, everyone obeys rule #4, and if you’re lucky someone brings over a beer pong table, hello, thank you Erin. The best part is, the less you do and the cheaper it is, the more on theme you are! I supplied a giant bag of hot dogs, buns, a giant bag of mini hot dogs sauteed in bbq sauce, some cans of Pabst Blue Ribbon and Miller High Life, and a box of chablis. The rest was up to the guests (though if you can possibly put an indoor couch outside, that would be a nice touch). Some of the amazing things brought to the BBQ: fried pork skins, pink andre champagne, bartles & james wine coolers, mcdonald’s cheeseburgers cut into quarters and served as hors d’oeuvres, several bottles of white zinfandel, a spray bottle of vodka to accompany watermelon, spray cheese, one of everything on the Popeye’s menu, vodka jello shots, sandwiches made with peanut butter and bacon. Other highlights from past WT BBQs include spam casserole, strawberry-twinkie surprise, and Jacinda once brought a molded jello coleslaw with actual coleslaw in the center. My favorite costume touch was Sherri’s scrunchies and make-up hickeys, though Malice always delivers in the costume department. But nothing will ever beat the costume Jacinda rocked at the April 3rd, 2005 White Trash BBQ… ohmygod, she’s going to KILL ME for posting that!! I apologize Jacinda (no i don’t). And on that note, I also apologize if this party theme offends anyone, and promise it’s all in good fun and that I enjoy like 95% of these things every day and am quite possibly the trashiest person you know. I would totally share embarrassing pictures of me but you know how it is, mom is always the one taking the pictures and never actually in any of them. And also it’s way more fun to share embarrassing pictures of Jacinda.
Rebecca from Cooking With My Kid is here to share a fantastic field guide for an activity that your lil’ one is sure to love. Take it away Rebecca!… This morning I surprised my kid with an indoor bird watching expedition complete with make-your-own binoculars and breakfast trail mix. He’s been talking about it all day long. The bird watching expedition starts with our special breakfast trail mix which we take along while we search for birds throughout the house using our home made binoculars. My kid uses the Bird Watching Guide I created to find each of the birds hidden throughout the house. Once he’s identified and found a bird, he circles it on the guide and heads off to look for the next.
And don’t forget! Leave a comment on this or any post this week and you might win the Wool-Blend Felt pictured up there on the left. The Season of Cozy is upon us! (more…)
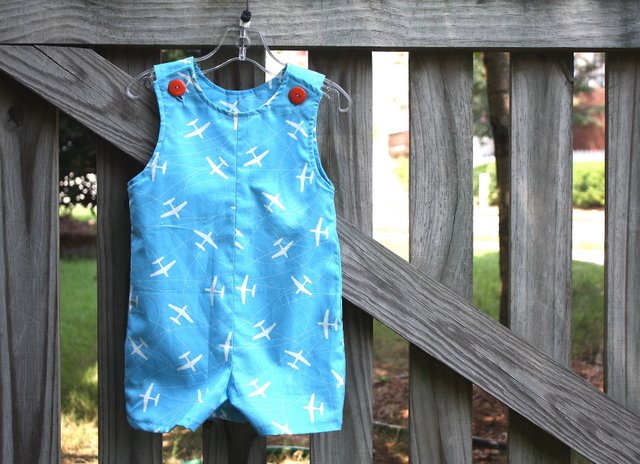
Elisabeth from Growing Home is here to share her A-DORABLE John John DIY with us. See, BOY STUFF! Isn’t it the cutest? I’m starting to think I can get excited about boy clothes! Take it away, Elisabeth…
If you are a boys’ mom, you know that the options for little boys clothes are a bit limited. You can buy inexpensive clothes with words and graphics printed on them (not my always my fave) or you can pay an arm and a leg for one among the handful of traditional offerings that look masculine enough for a boy. I usually settle for shopping consignment sales and haunting the racks at TJ Maxx. [If any of you out there are looking to start a business, please note that there is a gaping hole in this market!!] Because my life isn’t exactly aligned for an entrepreneurial venture at the moment, I’m trying out a different tactic: do-it-yourself boys clothes. And right now, this style is my favorite accomplishment…the John John.
This style goes by lots of names (confusingly many): romper, coverall, jumpsuit… The most common name, however, comes from John F. Kennedy, Jr., who wore these outfits during his father’s presidency. Here in the South, little boys wear smocked or appliqued versions of the John John for dress up. You can add those things to it (I’ll discuss appliqueing below; Jim does not allow smocking unless it depicts football, trucks, or other equally masculine things, so it hasn’t seemed worthwhile to learn:)). The greatest thing about the John John it is that it is relatively easy to make and will only cost you about $15, if you have sewing supplies and another John John (to use for your pattern) on hand. That’s right, about $15…not $60 (or more). This is reason enough to learn to sew, my friends!
There are two parts to the process: making the pattern (which you can use over and over) and constructing the John John. My guess is that, if you worked without stopping (not even close to a reality in my life), it would take you about four hours…IF you’re a beginner. If you’re a macho-sewista, it will likely take you far less.
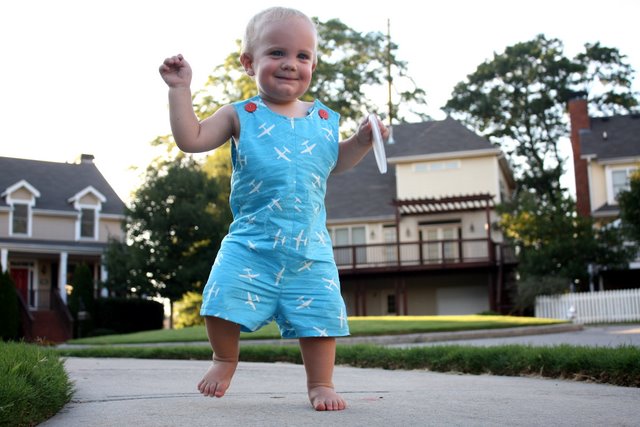
Little Brother was so thrilled with his new airplane suit that he decided to take a romp in the yard on Sunday afternoon…and then a test flight down the block. He worked so hard that he thoroughly wrinkled himself and sweated through his clothes. So…hurray! Our creation passed the boy test. And now I’m going to go wash it:).
See the full instructions (including a bajillion pics of the process) after the jump.
And don’t forget! Leave a comment on this or any post this week and you might win the Wool-Blend Felt pictured up there on the left.
Materials
a Jon Jon that fits your son/nephew/very lucky little friend
Tracing or freezer paper
Sharp pencil
Scissors
Fabric – I needed a yard for a size 2T John John
Coordinating thread
Fusible interfacing
Fabric scissors
Pins
Sewing machine and basic supplies
Seam ripper (because you will mess up, and you can undo it!)
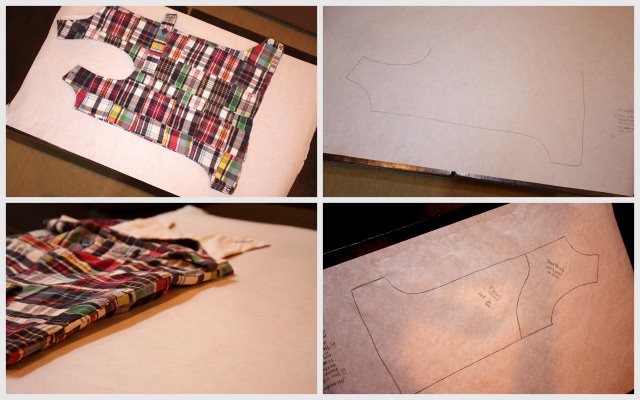
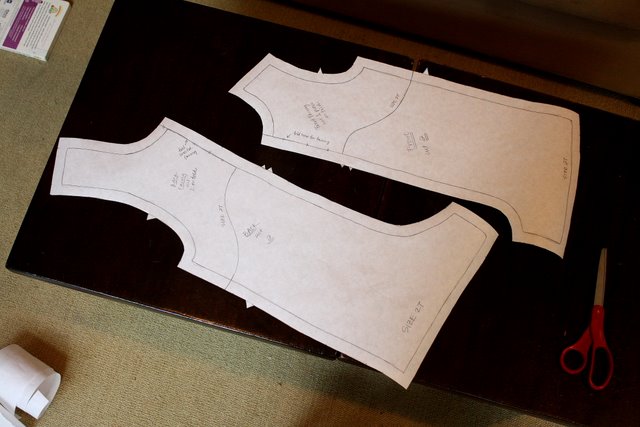
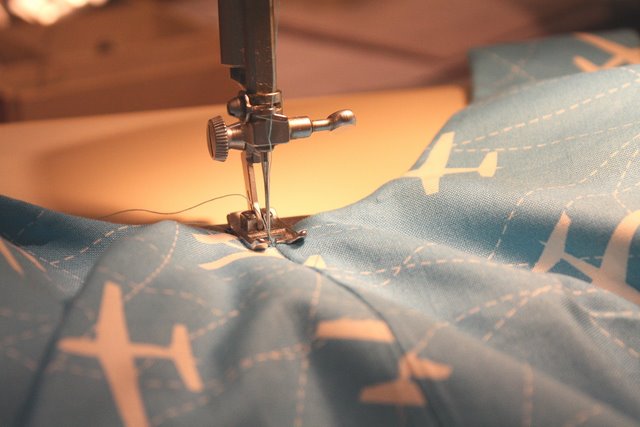
1. Fold your pre-existing John John along its center seam and trace the front from the top to the bottom of the side seam, as shown.
2. Refold the John John along the side seams (as you would normally), and place it face down on your paper, lining it up with the lines you’ve traced. Now, trace the side seam from under the arm to the bottom of the garment. Retrace all lines and work out the little bumps.
3. Add 5/8 inch for seam allowance all around your tracing, except the bottom—there add about an inch, so that you can have a nice thick hem. Add seam allowance by placing your ruler perpendicular to the traced line and marking a dot every inch or so. Then connect the dots. Mark this piece “FRONT – cut 2.”
4. Repeat this entire procedure with the back of the garment. Mark it “BACK – cut 2.” Now, mark both pieces with the size of your traced John John so that you can use the pattern over and over. (Disregard the little triangular notches on my pattern and fabric–I was trying something that wasn’t worth the time).
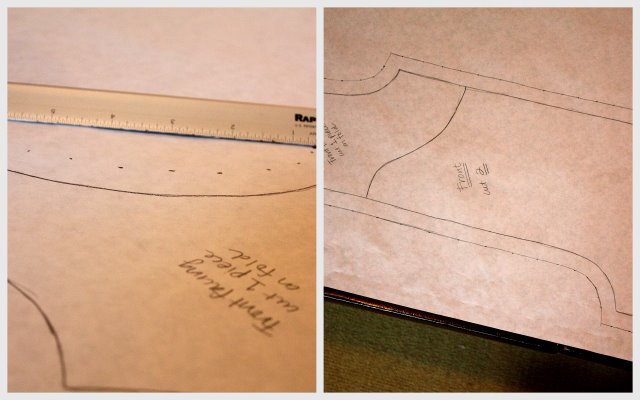
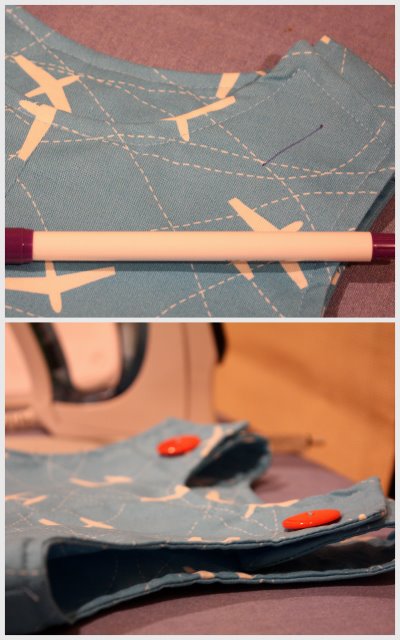
5. Make facing pieces by drawing a sloped line from the center seam to a point about 3 inches under the arm on the front and back sections (see pic). Trace these sections onto separate pieces of paper with ONE CHANGE: exclude the 5/8 inch seam allowance on the center seam side, as shown. Your original line on this side will become the fold line for cutting facing pieces.
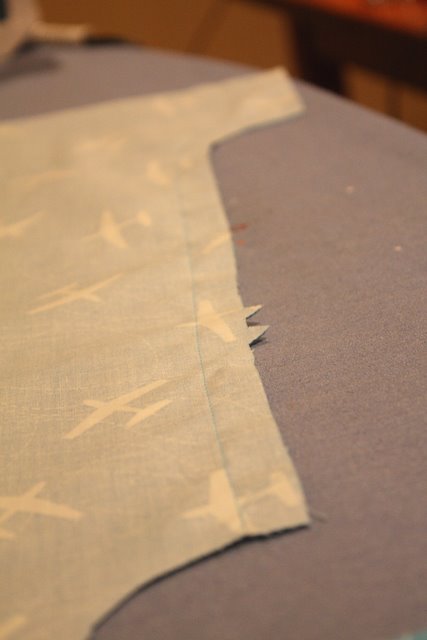
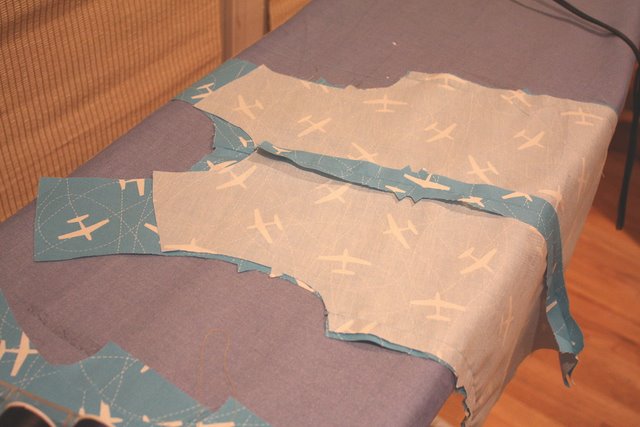
7. Cut out all pattern pieces and pin them to fabric. Fold your fabric as shown, so that selvages (edges of the fabric) run right down the middle like the crack between a set of double doors (you should iron the fabric first, even though I didn’t). Make sure that the facing pieces are aligned with the folds.
Now cut it all out. Before you put up the scissors, go ahead and pin the two fabric facing pieces to your fusible interfacing (wrong side of fabric should face the bumpy side of the interfacing). Cut interfacing to match the fabric. Now it’s time to sew.
8. Pin the two front sections together, right (printed) sides facing, and stitch the center front seam, leaving a 5/8″ seam allowance. Pin the two back sections together, right sides facing, and stitch the center back seam. Press the seams open.
9. Pin the front and back together by aligning the pieces at the underarm.
Stitch them together at the side seams, and press the seams open.
Here’s what we’ve got at this point. Look how far we’ve come!
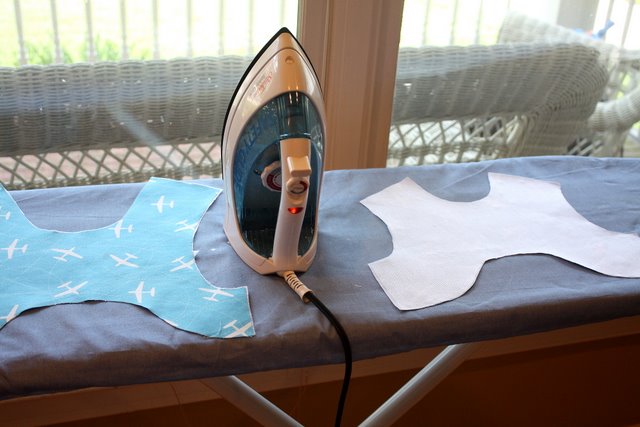
10. Now, following the instructions on your interfacing, fuse the interfacing to your facing pieces.
(Ahhh…finally a photo with some natural light. I wish it had lasted longer…someone woke up from his nap.)
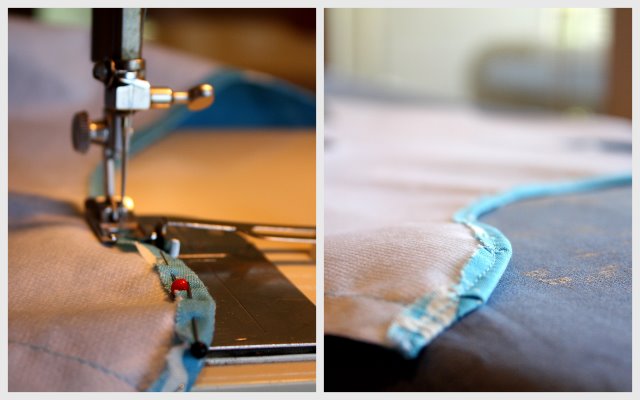
11. Stitch the side edge of facing sections that is directly under the arms. Continue to use a 5/8 seam allowance.
12. Finish the bottom edge of facing. Previously, I’ve used a zig zag stitch over the edge, but it always ended up messy, or led to sewing machine seizures. This time, I stitched ¼ inch from the edge, then turned fabric under along the seam and re-stitched. Much nicer result.
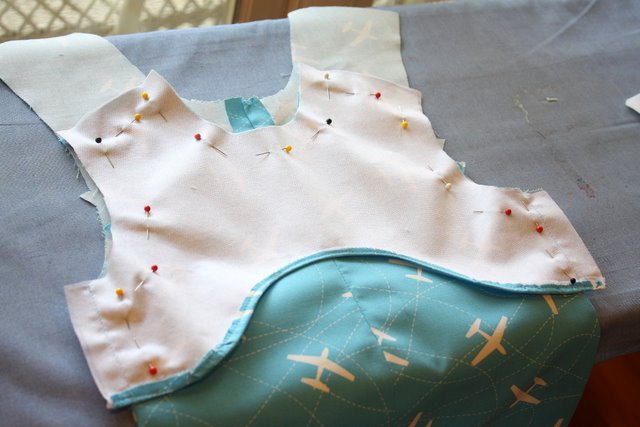
13. Pin RIGHT side of facing sections to RIGHT side of neck edges, matching the side seams and centers.
Stitch the neck, shoulder, and armhole edges. Before you do, MAKE SURE that the side seams are pressed open inside your John John.
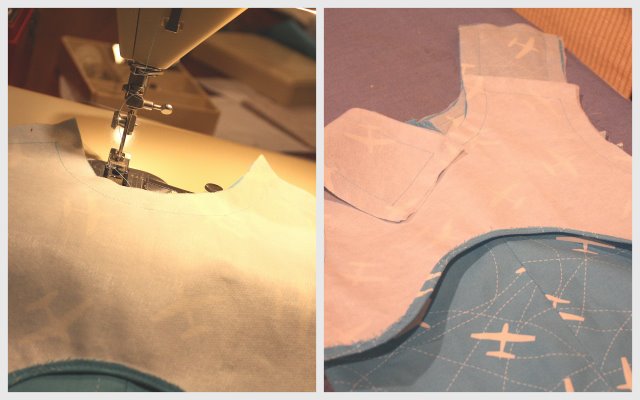
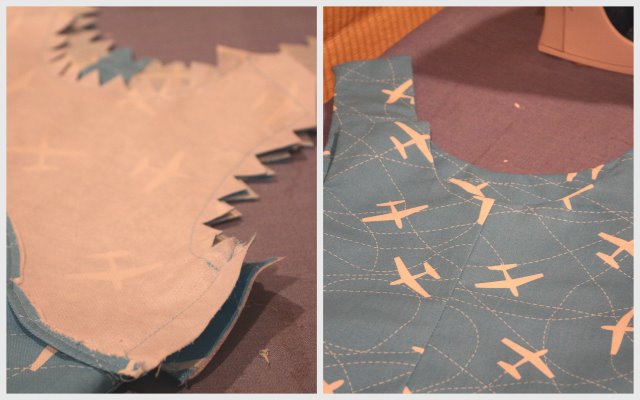
14. Now, clip the curves. Clip a triangle off of the squared edges at the shoulders, and clip little triangles into the seam allowance around all curves. Turn facing to the inside of garment, using point turner to form corners. If it’s puckering on the curves, clip out more. Press.
15. To keep the facing from rolling out of place, stitch facing to garment in the seam under the arm. This is called “stitching in the ditch.” Who knew?
16. On the outside of the John John, sew ¼ inch from the edge around the neck, shoulder, and armhole edges. This is optional—it’s reinforcement for the garment, and a tad decorative, but you could skip it if you’re in a hurry.
17. Make the button holes and attach buttons. For this, you’ve got to use your sewing machine manual because I’m guessing your machine is a ton newer than mine and will do the whole thing for you. (Mine is actually my mom’s from 1970 and is awesome, minus some of the shortcuts.) So, just use your disappearing fabric ink pen to mark the buttonhole location and proceed according to your manual’s instructions. Then use your pen to mark two dots through the button holes onto the shoulder straps where buttons should be, and sew on buttons by hand.
18. Press up the hem as high as you want; then press the raw edge under ¼ inch. Stitch hem as close as possible to the turned under top section. (I forgot to allow extra fabric for this, so my hem is too short.)
You’re SO close now. Can’t you smell the completion?? One more step…we’re going to apply the snap tape.
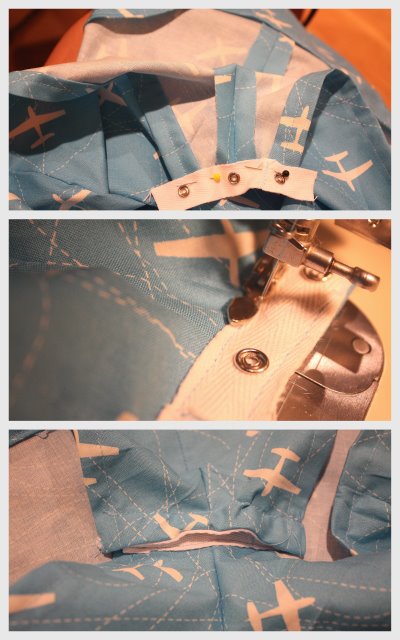
19. First separate the knob and socket halves of the snap tape. Now, with the KNOBS face up on the OUTSIDE front of your garment, pin the knob half of tape 5/8 inch over the raw edge at the crotch. Leave 1/4 inch of the tape on either side. Then turn under tape ends and stitch the inner edge of tape. Now, turn the tape to the INSIDE of garment and stitch the remaining edge and ends in place, as shown below.
20. With SOCKETS face up on the INSIDE of the back of your garment, pin the socket half of tape about 5/8 inch over the raw edge at the crotch. Check to make sure that sockets line up with knobs, and leave 1/4 inch of tape for turning under. Stitch close to the tape’s inner edge. Now, turn the tape to the OUTSIDE of garment and stitch remaining edge and ends of tape in place.
AND YOU’VE DONE IT!! You made a precious outfit for your little guy. I don’t know about you, but I’d like a margarita now. I might have to chase Little Brother instead.
Enjoy your creation!
A late breaking addition: if you want to add an applique, do so after stitching the center seam in the front section of your John John (just after step 8, above). You can use the same method that I did to make the boys’ Super Shirts (except that you won’t need two layers of applique–so it will be easier!).
Thanks everyone!! Your “As Seen On Prudent Baby” button is on the bottom left. Send pics in by form or share them with everyone in the Prudent Baby Project Pool on Flickr!
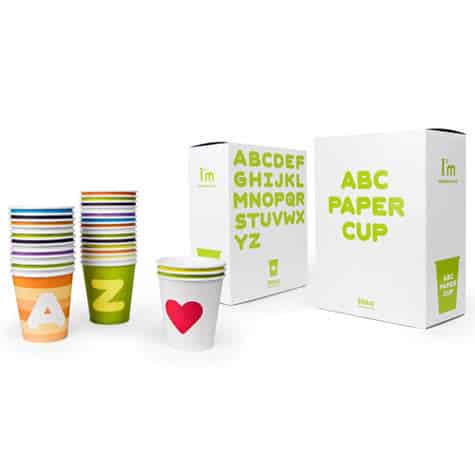
This week we are giving away these AH-DOR-ABLE ABC paper cups from our friends at Pint Size Social to our favorite commenter. And the winner is…
Danielle who said… I make a similar recipe every year. By the end of the growing season, we are using it to pickle just about anything left in the garden. It helps that we have an extra fridge. These pickles also go great in a glass of beer (nothing too dark). It is a tradition from my husband’s home town in the upper peninsula of Michigan that he introduced to all of his friends called “smelting.” Leave the pickle until the end of your drink- if you eat it before you finish it’s “poaching.” Believe it or not, it makes a great beer and an even better pickle!
Danielle, I would totally be guilty of poaching. Maybe you can use these for Smelting!!
So, If that’s you, use this Contact Form to send us your address and your cups will be on their way! Winners have 5 days to contact us with their address before forfeiting their prize to another lucky reader. If that’s NOT you, don’t fret, you can buy a set for only $10 at the Pint Size Social Pop Up Shop!
And hey, look what we have for you next week!
3 – 9″x18″ pieces of wool-blend felt that I picked up from the Stitch Lab booth at Renegade Craft Fair Austin. This will be perfect for your felty Fall projects. Maybe some hair clips or a clock! So remember to leave a (funny or useful or ego-boosting) comment on any post between now and next Friday and you might win! But remember that we still love it when you just say hi! Happy Weekend, do some “smelting” for me!
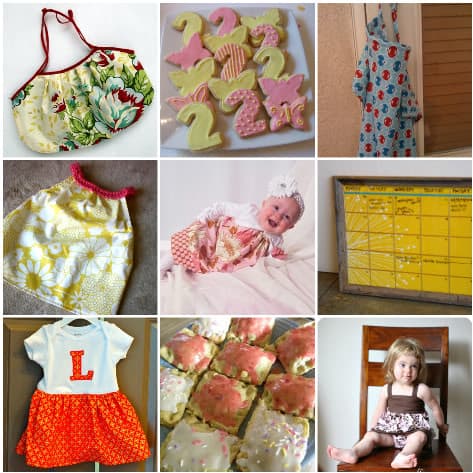
If you are looking to get inspired for some fun activities with the kiddos, we love Made By Joel. Clare will dig this Match Game Printable.
Sweet Preservation, The Washington State Fruit Commission’s new website devoted to canning and preserving Summer, is inspiring! Get some behind-the-scenes details from Blair of Wise Craft, who created many of the concepts and styled the photos. And don’t miss the Preservation Party Playlist which includes “Pump Up the Jam” by Technotronic. I totally want to have a Preservation Party.
And you’ve probably seen this magical creativity floating around the web. Is it wrong that this makes me feel like a failure as a memory keeper of my child’s early years? I mean that as a compliment.
And if you are into things like people devoting their lives to saving precious orphaned elephants, you might want to grab your tissues and take a peek here. gulp.
And if you’re into things like justifying eating chocolate while pregnant you might want to take a peek here. {she types while balancing a half-gallon of Rocky Road on her knee.}
Oh, and don’t forget! Last chance to leave a comment which could win you those adorable Alphabet cups up there to the left. What link do you love this week?
by Jacinda
Some links may be affiliate links. Through Amazon Associates and other partnerships, we receive money if you buy something or take an action after clicking one of the links on our site.