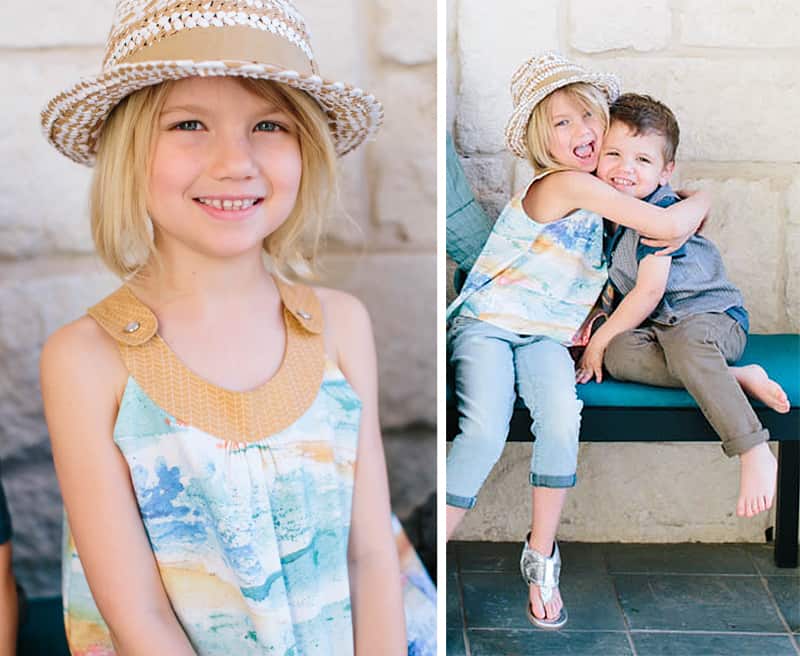
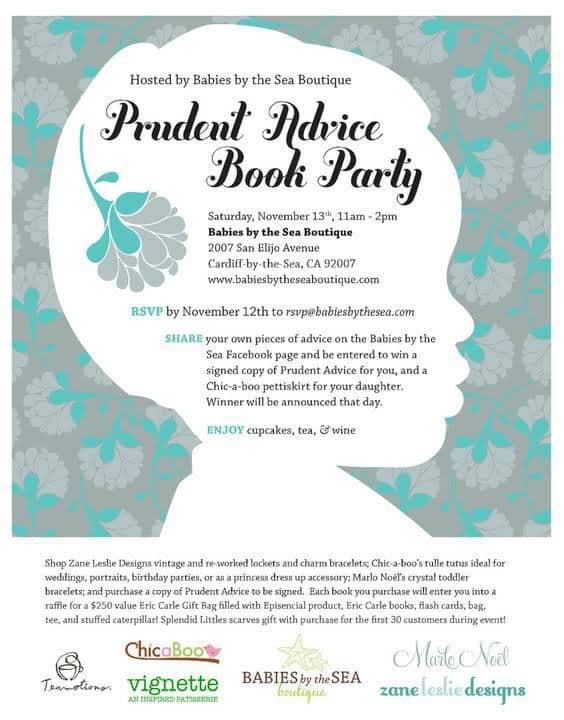
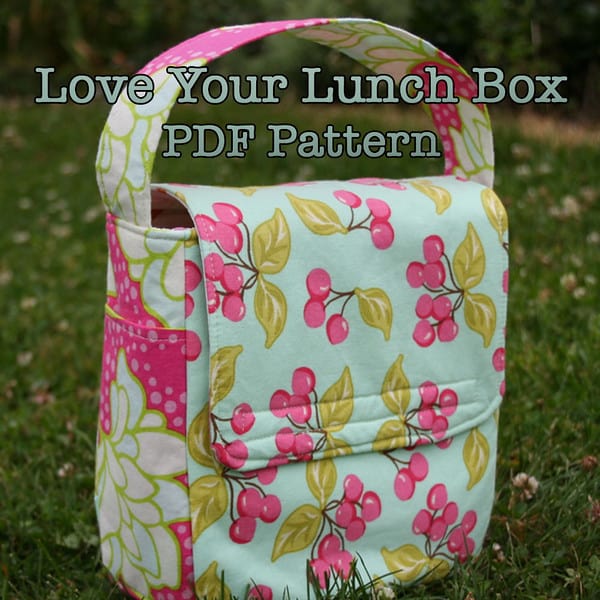
We had so much fun at the Dallas Prudent Advice Book Party at Little Bean Shop, hosted by Small Magazine and Dallas Child Magazine. We got to see each other which is always a treat, and bonus: We met a bunch of Prudent Mamas! Here’s some pics of the lovely ladies and the GORG shop. I hope I get to meet more of you at the next book party this Saturday in North County San Diego! Here’s the details: Where: Babies by the Sea, 2007 San Elijo Avenue, Cardiff-by-the-sea, @ Birmingham Ave. (760-230-4272). When: Saturday, November 13th Hosted by:Babies by the Sea
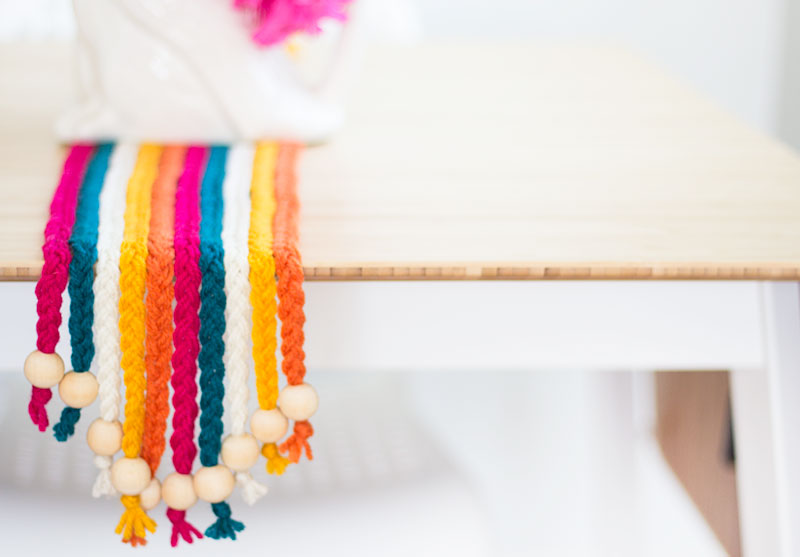
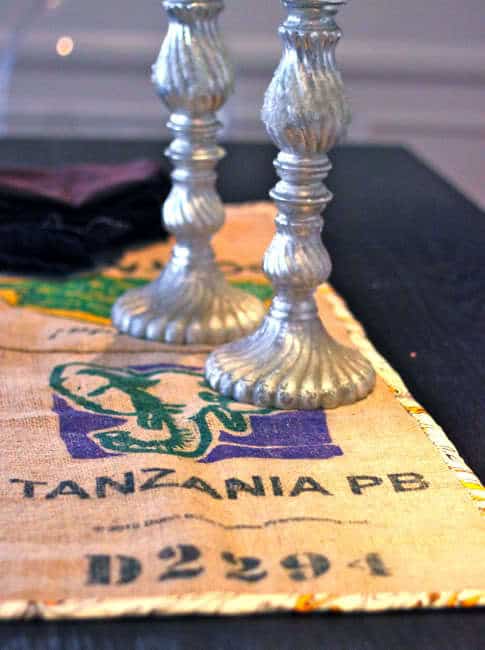
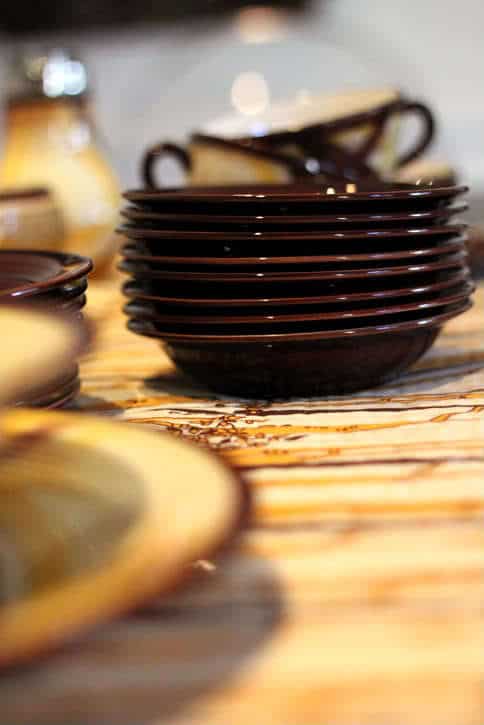
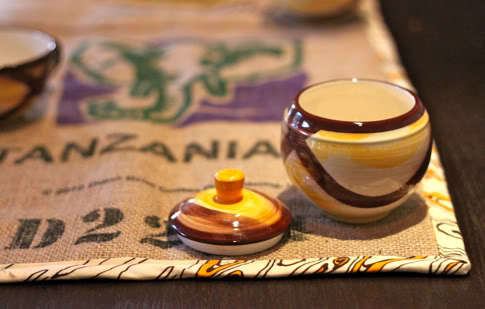
Thanksgiving is right around the corner so it’s time to start planning your pretty table, yay! Here’s a tute for a simple reversible table runner using bias tape. You can change it up and make it your own with different fabrics and bias tapes. I did a little quilting and used some old burlap coffee sacks for mine, and added some homemade bias tape. I made a small one, perfect for piling up the pretty dishes and having a buffet on holiday mornings. How gorg are those vintage dishes? They were Carleton’s Grandma Jane’s wedding dishes, I’m so excited to save them to give to little Scarlet Jane one day. This is a fun project to customize, much like our Fat Quarter Apron. Get the Bias Tape Table Runner tutorial after the jump… (more…)
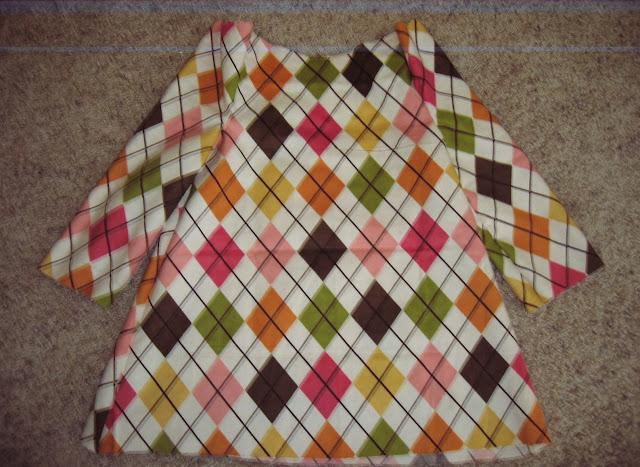
When we saw that Amy from Little Bean Workshop had created a long sleeve dress variation of our peasant blouse tutorial, we begged her to let us share it here on Prudent Baby. She said yes, yay! I can’t wait to try this, I think my girls would love one, maybe in adorable Ann Kelle or some new Anna Maria?
With Winter fast approaching here in the Pacific Northwest, long sleeves and cozy fabrics are a must! So, I played around with the pattern until I came up with this:
Here is what you will need for one toddler dress (size 2T):
• 1 yard of fabric
• 1/4 inch elastic (approximately 26″)
• corresponding thread
• safety pin
• pins (optional)
Step 1: Cut out fabric
Here is the pattern:
(Side note: If you would like 3/4 length sleeves, cut your sleeve pieces to 10″ x 14″)
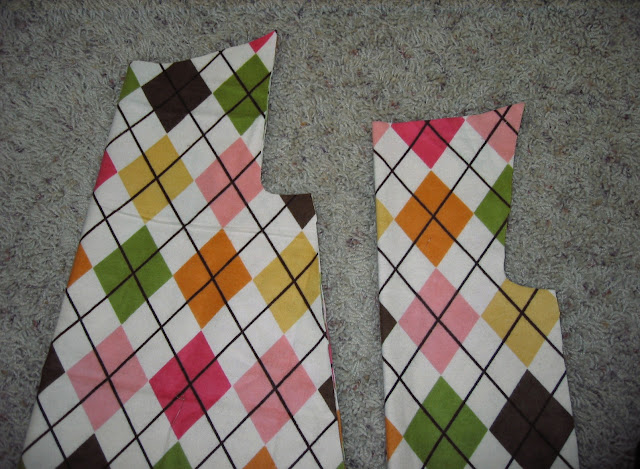
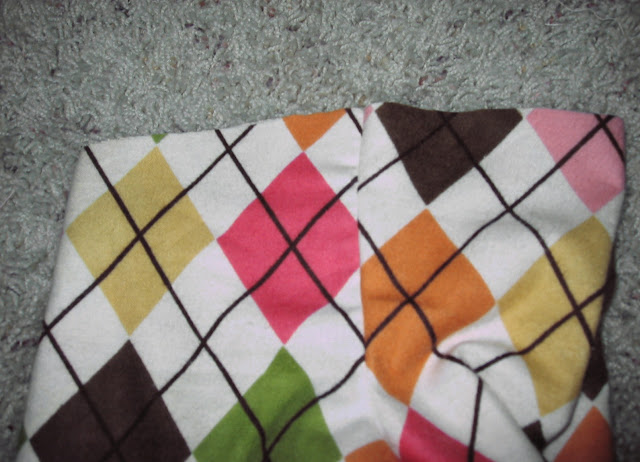
Once cut, your pieces should look like this:
Note that these are still folded
Step 2: Cut out neckline and armhole
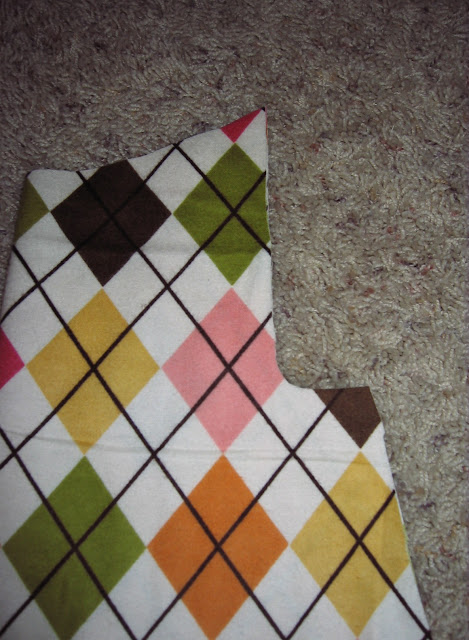
On your dress pieces (leaving them folded in half and stacked on top of each other), cut out an armhole 6″ long. I cut a basic J shape.
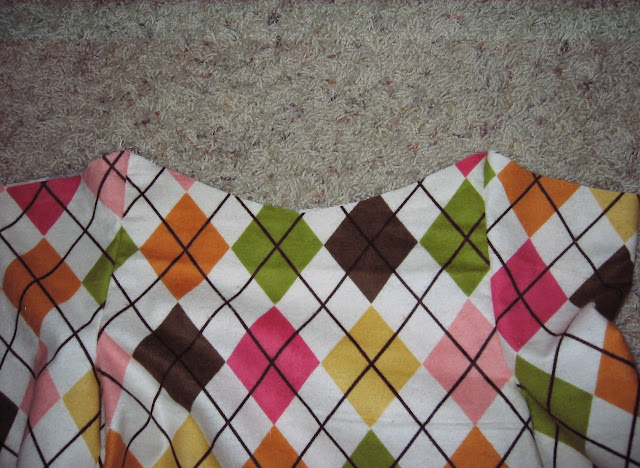
Cut the neckline as deep as you would like it. You may prefer to cut the front more than the back.
Fold the two rectangles for the sleeves on the long side, so you will have two 5″ x 16″ pieces. Stack them up and place them behind the dress piece with the fold on the inside, like this:
Now cut out the armole and neckline where they overlap the fabric.
Piece together your dress
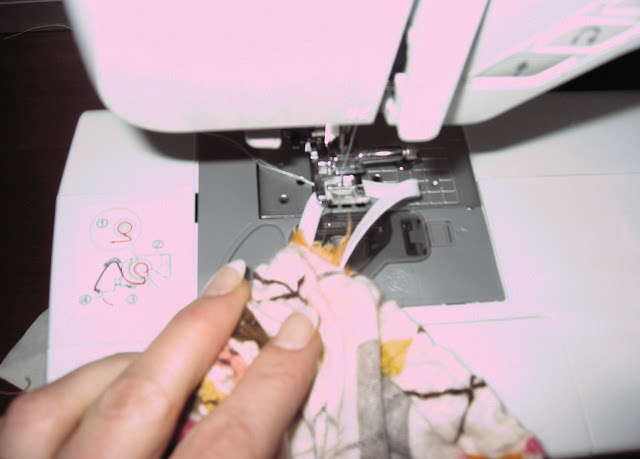
Unfold all of your pieces. With right sides facing each other, line up the armhole on one side of the dress with the matching cut on the sleeve piece. (You can pin this if you like, but I don’t bother…I only pin things if I absolutely need to.) Like this:
Now sew around 1/4″ in around the edge of the armhole. Go back and do a zig-zag stitch at the edge of the fabric to keep the seam intact.
Repeat this on the other side of the dress piece.
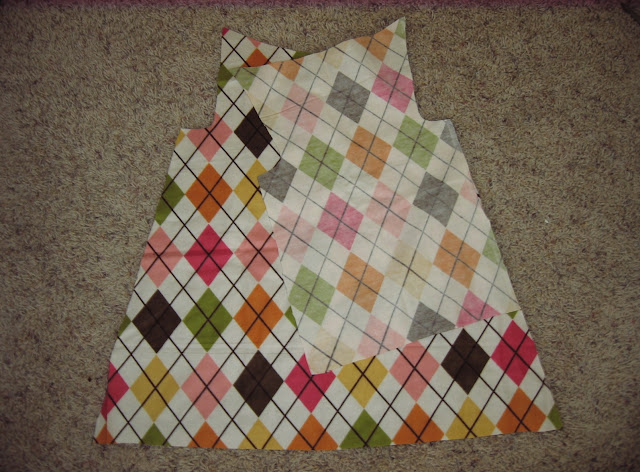
It should look something like this:
Now attach the other side of the dress piece in the same way.
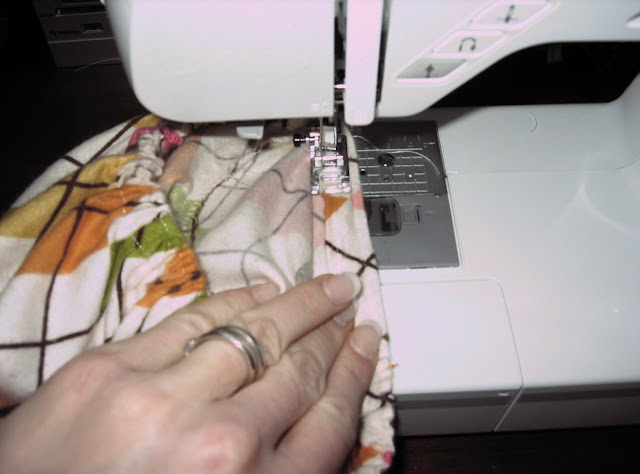
The dress is starting to come together! Next, the side seams need to be sewn. Line up the seams at the armpit and then sew along the arm and the side of the dress all at the same time. Again, secure your seams with a zig zag stitch.
Line up the armpit before you start sewing!
It should look like this:
Step 4: Finishing touches
Lay your dress out so the top is flat. It is likely not perfectly straight.
We want it to be straight…so, fold your dress in half vertically…
And cut until you have a straight line across the top…
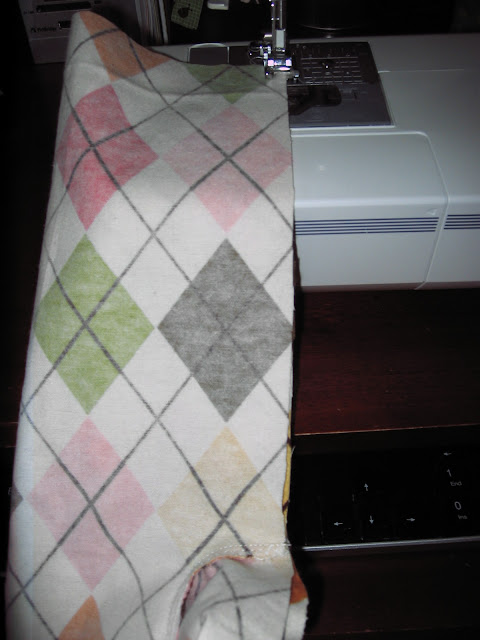
Time to heat up that iron. Fold the top edge over 1/8″ and iron, then fold over again about 3/8″ giving you a nice clean edge. Iron down.
Repeat with the sleeves and the bottom hem (although for the bottom hem, you can fold over to 1/4″ on the second fold since we are not inserting any elastic here).
Now sew one line straight across the top of your nicely prepared fold just below the very edge of the neckline. Go all the way around the edge.
Now sew a second line around the bottom of your hem (leaving a minumum of 1/4″ in between your two rows of stitches). Don’t sew all the way around – be sure to leave about 1/2″ gap at the end so that you can feed your elastic through there. Repeat on both sleeves.
You can hem the dress now as well.
It’s time to insert the elastic. Here are the measurements that worked best for Little Bean:
Neckline: 14.5″
Wrists: 5.5″
Forearm (should you want 3/4 length sleeves): 6.5″
Mark the length of your elastic. Do not cut it yet (otherwise it will be much more difficult to stitch up when you are done). Attach a safety pin to one end of your elastic. Insert it through the hole at the neckline and start to feed it all the way through to the other end. Once you are satisfied with the length, then stitch it up with a few zig zags to secure it. Clip off excess.
Sew the 1/2″ hole closed.
Repeat with both sleeves.
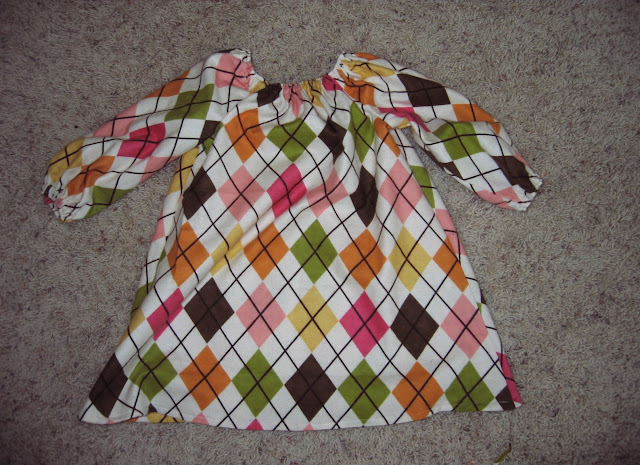
You’re done!
Here is your final product:
Little Bean running away again.
Here’s proof she does have a face!
Enjoy! Leave a comment and you could win a set of bow-tie hardward, just like we used in our Martha Stewart Weddings feature. Let Amy know what you think of her project in the comments!
To enter this giveaway we asked you what you would “go deluxe” on, and your answers were HYSTERICAL! Everyone wants a deluxe vacation, a deluxe laundry management system, a deluxe craft room, and a deluxe husband. Some of my favorite deluxe fantasies included a deluxe cup of coffee that never empties or spills; a deluxe pregnancy with no morning sickness, no stretch marks, pre-natal pills that don’t smell like rotten feet, perfect skin and an easy labor and birth; a new set of deluxe tatas; a baby who sleeps a deluxe amount of hours in a row at night; and one reader said “I would love to ‘deluxe’ this post baby a$$ into a smaller pair of jeans”, HA! For a good laugh, read through all the charming deluxe requests here.
So, the randomly selected winner is #210, Birdie of These Moments of Mine who said: Okay time for a deluxe massage! One hour minimum, strong hands and relaxing music. Ready, set, go… Sounds heavenly Birdie! Use the Prudent Baby Contact Form to send us your address and we’ll send off your prize.
Virginia from Gingercake, is here to share her adorable pattern shop with us and to announce an AWESOME giveaway just in time for holiday gift making. You may remember her from the lovely Scrappy Pumpkin Tutorial. Take it away Virginia… Hi! I am Virginia Lindsay, creator of Gingercake Patterns. I started sewing again (like many of you!) when my kids were new and I was spending more time at home while they were napping and playing. I loved all the bright and beautiful fabrics available and I became addicted to searching for new projects all the time! I eventually found myself with many ideas of my own and I loved the process of taking that idea and turning it into a perfected pattern. I wanted to create items that were useful and thoughtful for our busy lives. Since most of us already have an almost full schedule, a day spent sewing is such a treat and I wanted to create a line of patterns would be a treat for the sewer and the person she is sewing for. For sewers, searching for that perfect pattern is like shopping at the mall for other women (we shop at the mall too!)~ we get to think about who we are sewing for, what fabric combinations we are going to use, and always ask ourselves, are they really going to use this? You don’t want to waste your precious sewing time on something that isn’t going to be cute and useful! My favorite feedback from people who bought a Gingercake pattern is not only “we use this all the time!” but also, “i had so much fun making this!” We all know that we can buy something cute at the big box store, but creating a handmade gift is not only about who is getting the gift but about how much you enjoyed your time spent sewing! This giveaway is for the entire collection of Gingercake Patterns. This will keep you busy well past the holidays! In this collection you will find cute and stylish patterns for moms, kids, and everyone else on your list. Enjoy your sewing! Read on for the details on how to enter! (more…)
Let these ladies know what you think of their projects in the comments and give them a facebook “like.” Join us on Flickr, hang with us on the Prudent Baby Facebook Page, or send them to us via the Prudent Baby Contact Form. Your “As Seen On Prudent Baby” Button is down there on the left. XO
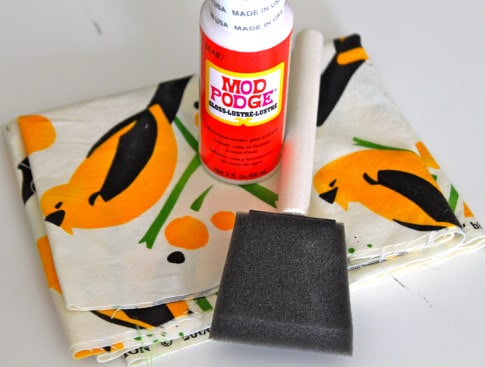
So this week’s winner is getting a little decoupage kit, which includes a trial size mod podge, foam brush, and 1/4 yard of Alexander Henry Birdsong fabric, all of which were used in the making of the DIY Decoupage Key Holder. And the winner is a commenter on an older tutorial who solved a great mystery for us, answering a question we get so many emails about and have never had a satisfactory answer for. I’m so thankful to her! So the comment is from Handmade Mama on our How to Sew A Bow Tie post:
Okay ladies, so I found the bowtie hardware today at my local Hancock Fabrics. The price was $1.50 for the set. The manufacturer is Blumenthal Lansing Co. and the website is www.blumenthallansing.com. The style number is 1070 and the item is found in the button section of the store. Hope that this helps someone!
Thank you so much Handmade Mama! Please use the contact form to send us your address and we will send out your decoupage kit. Winners have five days to contact us before forfeiting their prize to another lucky reader. So, in the spirit of this bow tie info awesomeness, next week’s favorite comment will receive a bow tie hardware kit including slider, clasp, and bow tie clip. Then you’ll be able to use our How to Make a Bow Tie Tutorial to make your little man a clip-on bow tie like this: Just in time for the holiday dress up season!
To enter, just leave a comment on any post between now and next Friday. We’ll pick our favorite and announce it Friday afternoon. Happy commenting!
Some links may be affiliate links. Through Amazon Associates and other partnerships, we receive money if you buy something or take an action after clicking one of the links on our site.